Getting started · Handy Theme
A getting started guide for Handy Theme
If you have any difficulties or stumbled upon a bug please contact us at Our Support Page we offer one on one personal support
Get Handy WordPress ThemeA getting started guide for Handy Theme
If you have any difficulties or stumbled upon a bug please contact us at Our Support Page we offer one on one personal support
Get Handy WordPress ThemeThe package of the Handy Theme contains everything that you need to customise the look and functionality of the theme
THEME folder contains the HandyStore theme, PLUGINS folder contains the plugins that you may use with the theme, DOCUMENTATION folder contains this particular document, SAMPLEDATA contains the data that was used for the live demo of the theme located at http://handy.themes.zone
Below is the package structure:
handy_theme/
├── THEME/
│   └── handy.zip
├── PLUGINS/
│   ├── ajax-thumbnail-rebuild.zip
│   ├── contact-form-7.zip
│   ├── contentbuilder.zip
│   ├── revslider.zip
│   ├── sample-data-installer.zip
│   ├── suppamenu.zip
│   ├── twiget.zip
│   ├── unattach-and-re-attach-attachments.zip
│   ├── woocommerce.zip
│   ├── wysija-newsletters.zip
│   ├── yith-woocommerce-compare.zip
│   └── yith-woocommerce-wishlist.zip
├── DOCUMENTATION/
│   ├── docs.html
│   └── assets
└── SAMPLEDATA/
    ├── handy.sql.zip
    ├── sampledata-installer.zip
    └── handy-slider.zip
THEME folder contains Handy theme, these two folders have to be uploaded to wp-content/themes/ folder of your WordPress. The main CSS file of the theme is located in the Handy theme.
The PLUGINS folder contains WordPress plugins that you may want to use with the Handy theme, there usage is optional, but recommended.
The DOCUMENTATION folder contains this document that you are reading now.
The SAMPLEDATA contains everything you need to get the same looks of the Handy theme that is on the live demo of the theme at http://handy.themes.zone
Handy Theme is a WordPress theme, therefore it is important to get to know WordPress CMS before you continue. If you are not familiar with WordPress please visit WordPress getting started guide
You may find a detailed documentation of WordPress functionality at WordPress Codex
Once downloaded, unzip the compressed folder to see the structure of package.
Go to THEME folder, there you will find a packaged handy.zip, upload the package to wp-content/themes/ folder of your WordPress and uncompress it. Once uncompressed the theme can be activated.
Go to backend section of your WordPress site (http://link_to_your_site/wp-admin/), then go to Appearance -> Themes and activate the HandyStore theme).
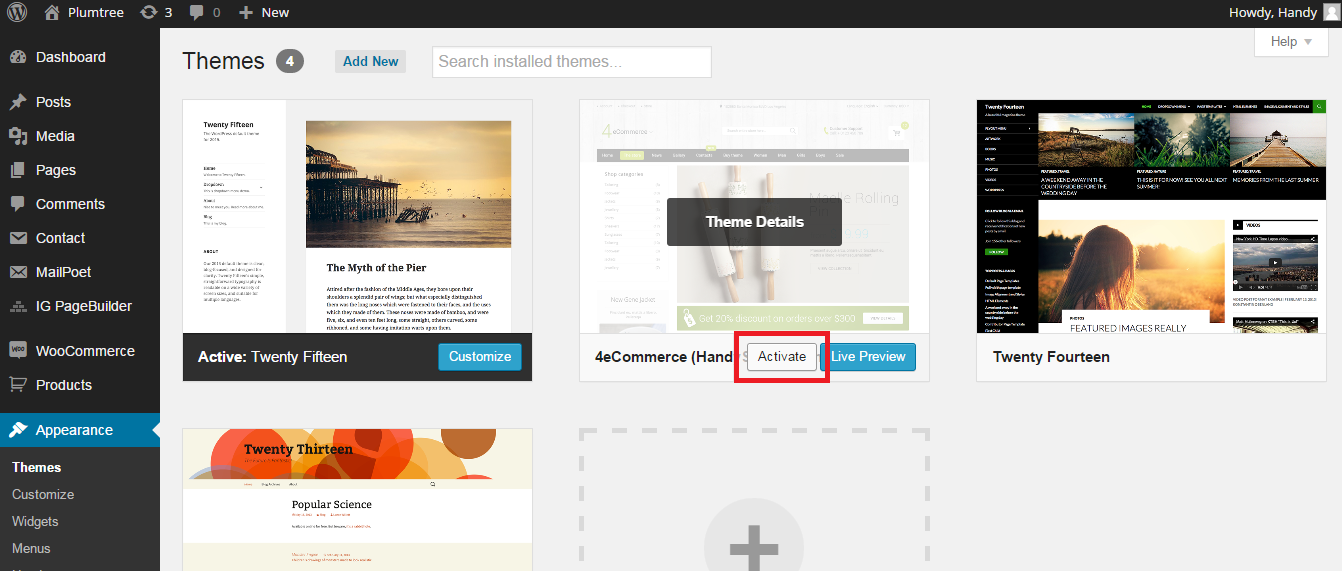
Due to high piracy level we have removed premium plugins (WP Bakery Page Builder and Revolution Slider in this case) from theme’s package. To get your copy of the bundled plugins please create a ticket here with the subject line: “bundled plugins” and your purchase code and you will receive a link to the plugins.
When you click on "Activate" button to activate Handy Theme, you will see the a notice offering you to install required and recommended plugins. Click "Begin installing plugins", on the screen that appears, next select the plugins you want to be installed, pick "Install" in Bulk Actions select box and click "Apply" button. For optimal user experience install and activate all recommended plugins.
You should not install sample data on an existing website - it's database will be deleted and replaced with sample one. You also should not run sample data installer on a WordPress MultiSite - the database for all you overwritted as well. As long as you are using one database for several sites all of these sites may be lost.
Please note that images used on our live demo cannot be used on your live sites build with the help of our theme. You should only use properly licensed images on your live projects. Images you see on our live demo are not sold with the theme and therefore are not included in the theme package.
After you activate your theme and install required plugins you may want to install sample data to make your site look like Live Demo of our theme, which can be found here: http://handy.themes.zone/. To install sample data go to Appearance -> Import Demo Data and press the Import Demo Data button. Make sure your hosting meets the php requirements needed for demo installation process to be succressful.
You may also want to import the demo slider, demo map, and demo vendors to make your site look exactly like our live demo. You can find demo slider and map files in the \required-plugins\dummy-data folder of your theme. We can provide you with demo vendors upon request at https://themeszone.freshdesk.com
To achieve the best site speed you need to choose good hosting. WP Engine servers are configured to run WordPress and WooCommerce sites as smoothly as possible, they are always up to date, simplest to configure and their support is just outstanding.
For all our clients here is a special offer from us, 20% discounts for:
We strongly recommend you to create a child theme and use it for customizing Handy Theme. This way you can update Handy Theme and it's plugins without fear of loosing implemented changes.
Video tutorial on how to create a child theme for Handy theme:
function child_theme_enqueue_styles() {
wp_enqueue_style('parent-style', get_template_directory_uri().'/style.css');
wp_enqueue_style('parent-style-woo', get_template_directory_uri().'/woo-styles.css');
wp_enqueue_style('child-style', get_stylesheet_directory_uri().'/style.css');
}

add_action( 'wp_enqueue_scripts', 'child_theme_enqueue_styles' );
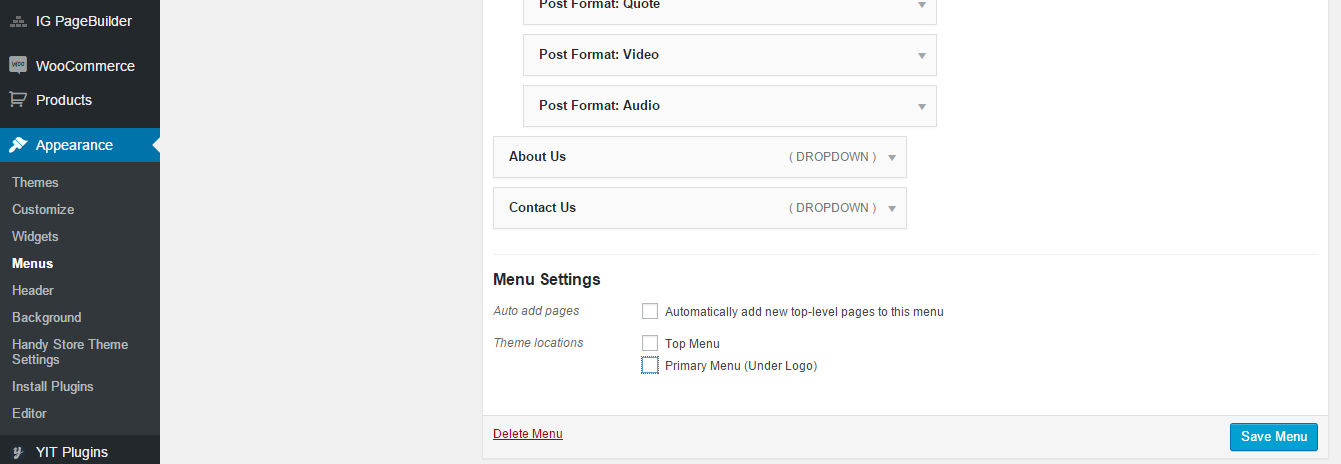
Please, not that you might "loose" your menu after activating your child theme. Please, go to Appearance->Menus, check "Primary Menu (Under Logo)" option and hit "Save menu" to reassign the menu:
Handy theme supports default WordPress functionality, such as post types and page templates. This allows you build any kind of page, plus theme contains a lot of useful shortcodes and pre-built elements.
It is strongly recommended to setup a separate copy of the WordPress instance with the demo content, this way you will be able to look up how to create this or that layout or add different el
Handy Theme is a WordPress theme, therefore it is important to get to know WordPress CMS before you continue. If you are not familiar with WordPress please visit WordPress getting started guide
You may find a detailed documentation of WordPress functionality at WordPress Codex
Once downloaded, unzip the compressed folder to see the structure of package.
Go to THEME folder, there you will find a packaged handy.zip, upload the package to wp-content/themes/ folder of your WordPress and uncompress it. Once uncompressed the theme can be activated.
Go to backend section of your WordPress site (http://link_to_your_site/wp-admin/), then go to Appearance -> Themes and activate the HandyStore theme).
When you click on "Activate" button to activate Handy Theme, you will see the a notice offering you to install required and recommended plugins. Click "Begin installing plugins", on the screen that appears, next select the plugins you want to be installed, pick "Install" in Bulk Actions select box and click "Apply" button. For optimal user experience install and activate all recommended plugins.
You should not install sample data on an existing website - it's database will be deleted and replaced with sample one. You also should not run sample data installer on a WordPress MultiSite - the database for all you overwritted as well. As long as you are using one database for several sites all of these sites may be lost.
Please note that images used on our live demo cannot be used on your live sites build with the help of our theme. You should only use properly licensed images on your live projects. Images you see on our live demo are not sold with the theme and therefore are not included in the theme package.
After you activate your theme and install required plugins you may want to install sample data to make your site look like Live Demo of our theme, which can be found here: http://handy.themes.zone/. You also need to donwload the "uploads" folder (click this link to download the uploads folder), unzip it and upload it to your wp-content folder. After that install and activate sample data installer plugin. It can be found in "Sample data" folder of you theme package.
Please, make sure to use original WordPress copy from wordpress.org website. Do not use the pre-installed copy provided by your hosting company.
After installing sample data installer plugin, but before activating it, please, set the installed plugins folder permissions (sample data installer folder in plugins directory of your WordPress install) to 777. You can uninstall the plugin after successful sample data installation.
We strongly recommend you to create a child theme and use it for customizing Handy Theme. This way you can update Handy Theme and it's plugins without fear of loosing implemented changes.
Video tutorial on how to create a child theme for Handy theme:
function child_theme_enqueue_styles() {
wp_enqueue_style('parent-style', get_template_directory_uri().'/style.css');
wp_enqueue_style('parent-style-woo', get_template_directory_uri().'/woo-styles.css');
wp_enqueue_style('child-style', get_stylesheet_directory_uri().'/style.css');
}

add_action( 'wp_enqueue_scripts', 'child_theme_enqueue_styles' );
Please, not that you might "loose" your menu after activating your child theme. Please, go to Appearance->Menus, check "Primary Menu (Under Logo)" option and hit "Save menu" to reassign the menu:
Before reading further it is strongly recommended to read WordPress Codex on How to Create a Static Home Page, General Information on Creating Static Pages and about WordPress Page Templates
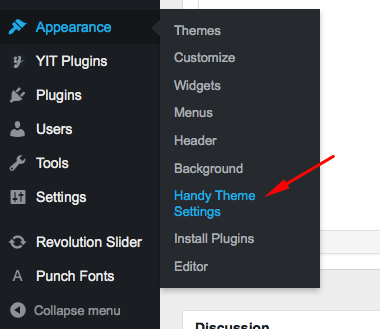
Theme menu, which is located in Appearance menu of your dashboard, is a powerful and easy to use tool which gives you control over various theme aspects.
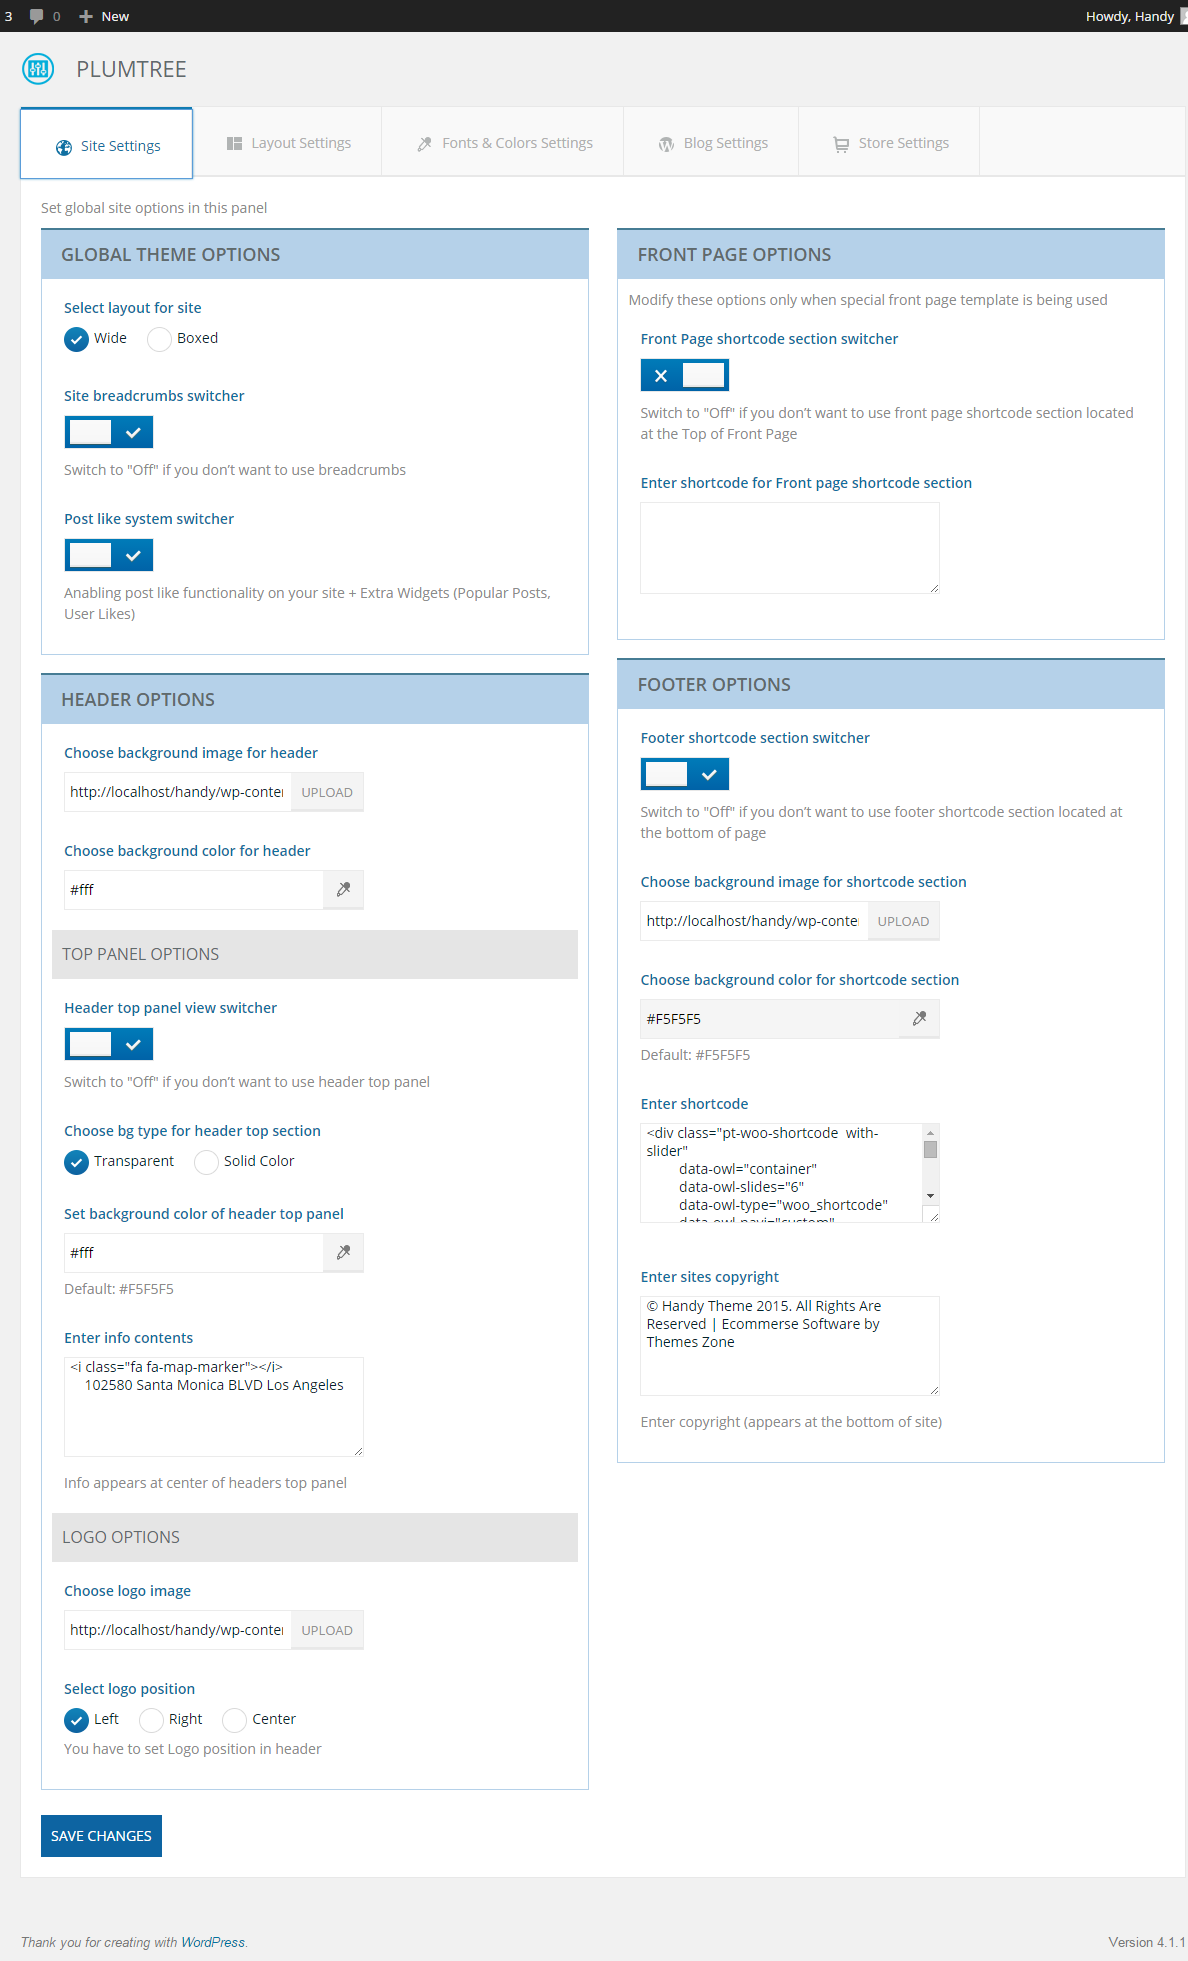
Site settings is the first tab of our theme's menu.
Handy Theme offers you a dynamic way of sidebar positioning. You can set both global and per page sidebar positions. To set Global Sidebar Positions go to Backend of your WordPress site (http://link_to_your_site.com/wp-admin/), then go to "Plumtree" panel, open "Layout Settings" tab.
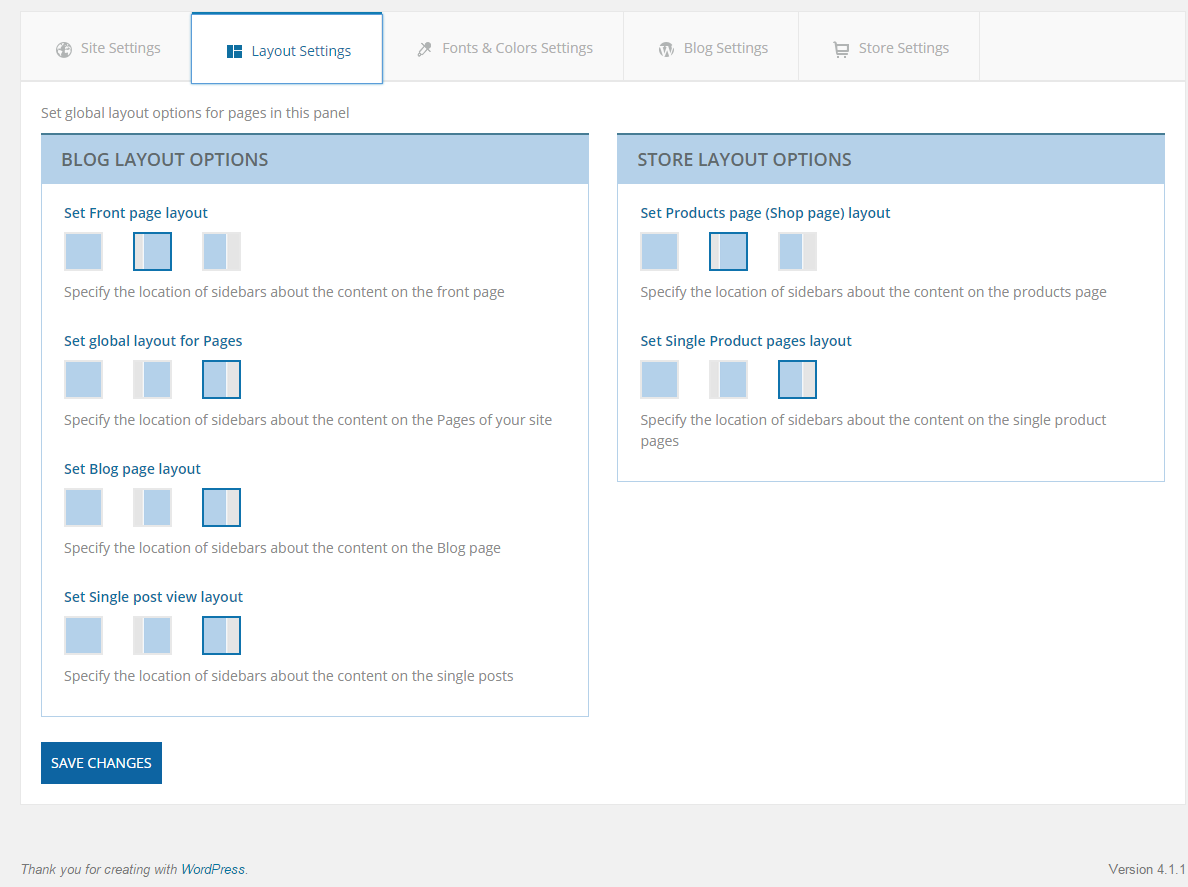
The "Layout Settings" panel lets you set global layout settings for each type of page. You can set sidebar position to left, right or with out the sidebar. Front Page Layout lets you set the sidebar position for the Home Page, "Global layout for Pages" setting will set global value for all static pages present on the site. The "Blog Page Layout" settings will set sidebar position for "Blog" pages (Page that has blog posts listed). "Single Post View" controls the position of a sidebar on single post page (the Single Post page). Store Layout options lets you set sidebar position on Store Pages (Product Listing Page, Single Product Page).
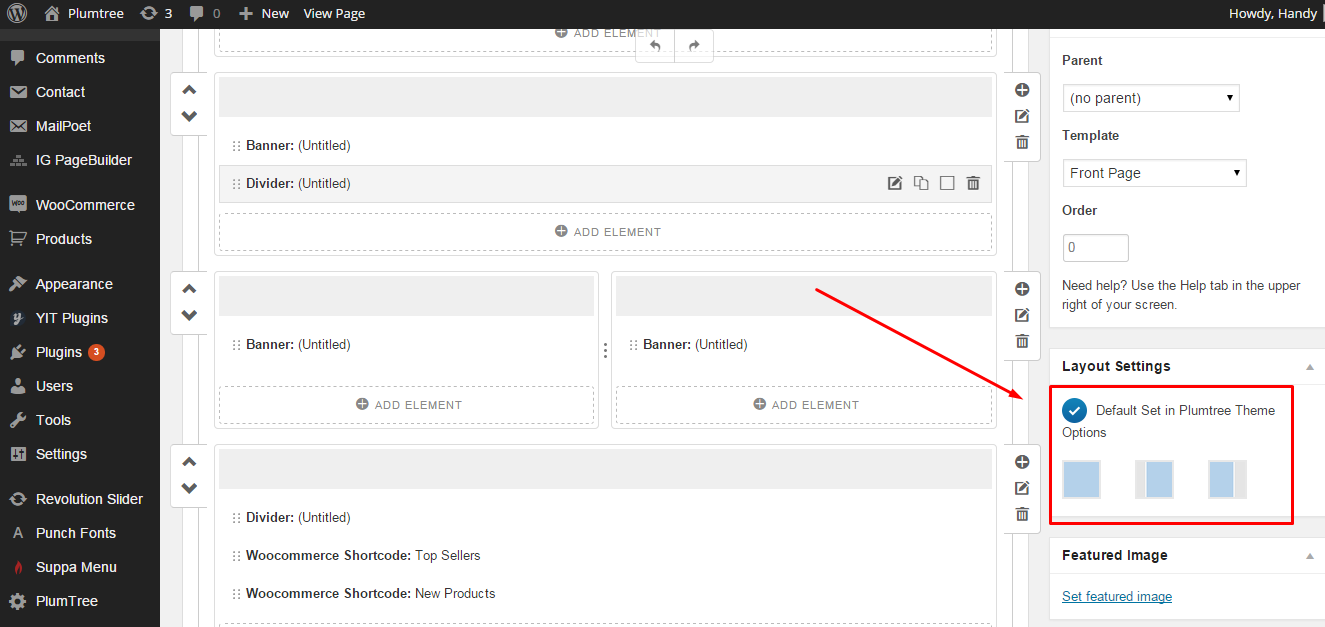
You also can set Sidebar Position for each created Page. Open a static page for editing in the backend of your site, there you will find a "Layout Settings Widget", set the sidebar position in that widget and the global value for the sidebar position will be overridden.
Handy Theme allows you to change main theme color, text color, menu color and headings color.
 Use Custom Color Scheme Switcher to enable color changes.
Handy Theme comes with a set of the best fitting font set. You can also add your own fonts to the theme.
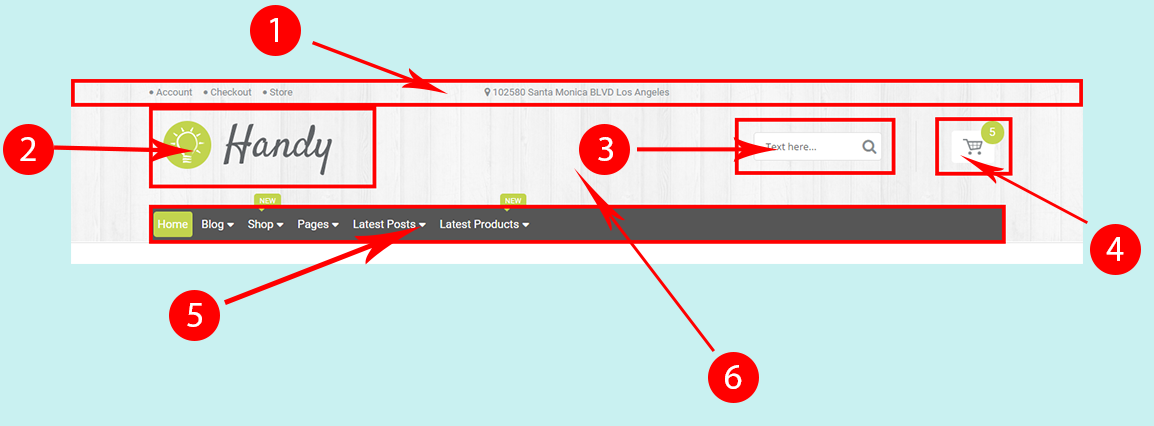
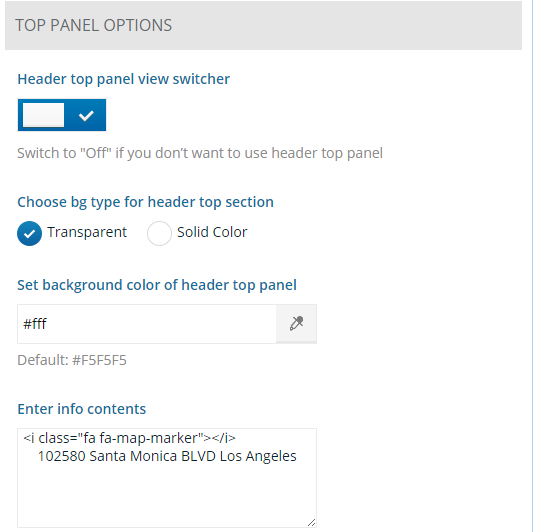
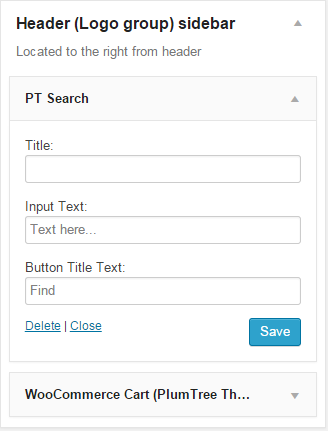
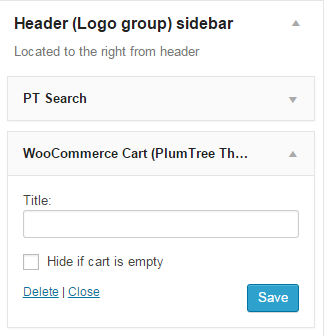
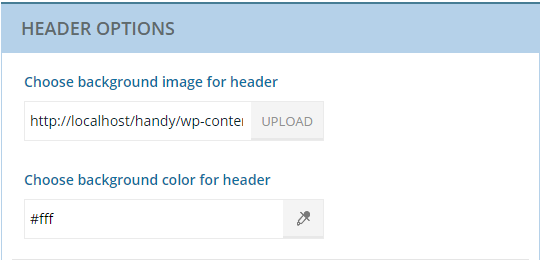
Hadny Theme's header can be modified in PlumTree->Site Settings->Header Options menu of your Dashboard control panel.
Here's what our demo header consists of:
Handy Theme menu is created with the help of Suppa Menu plugin. Please, watch the video tutorial on how it's done:
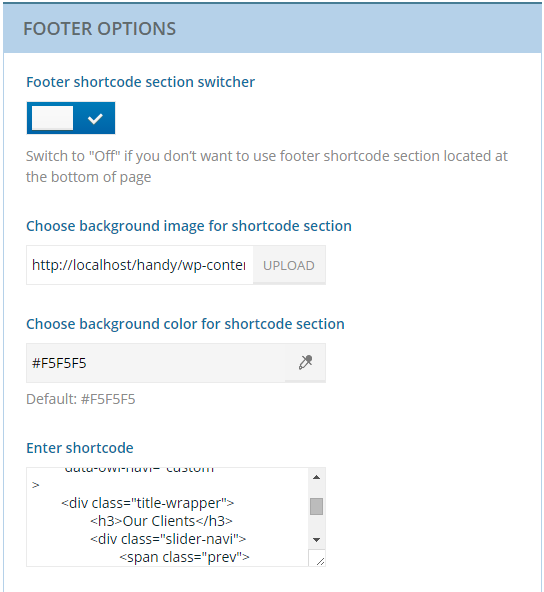
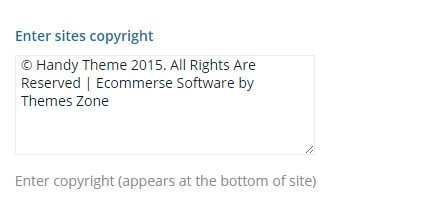
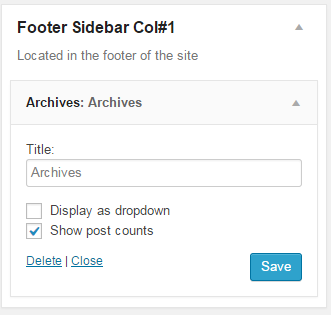
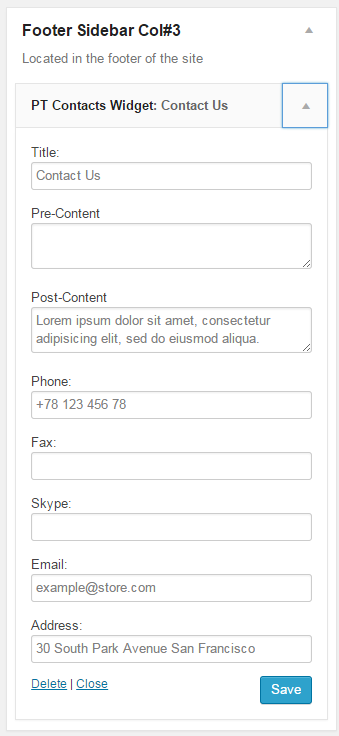
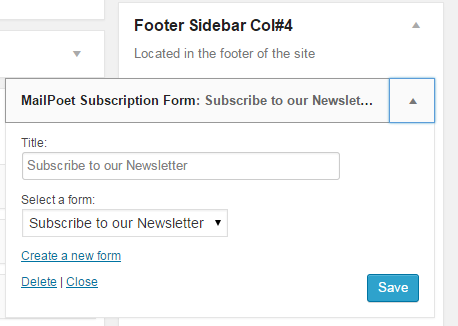
Hadny Theme's footer can be modified in PlumTree->Site Settings->Footer Options menu of your Dashboard control panel.
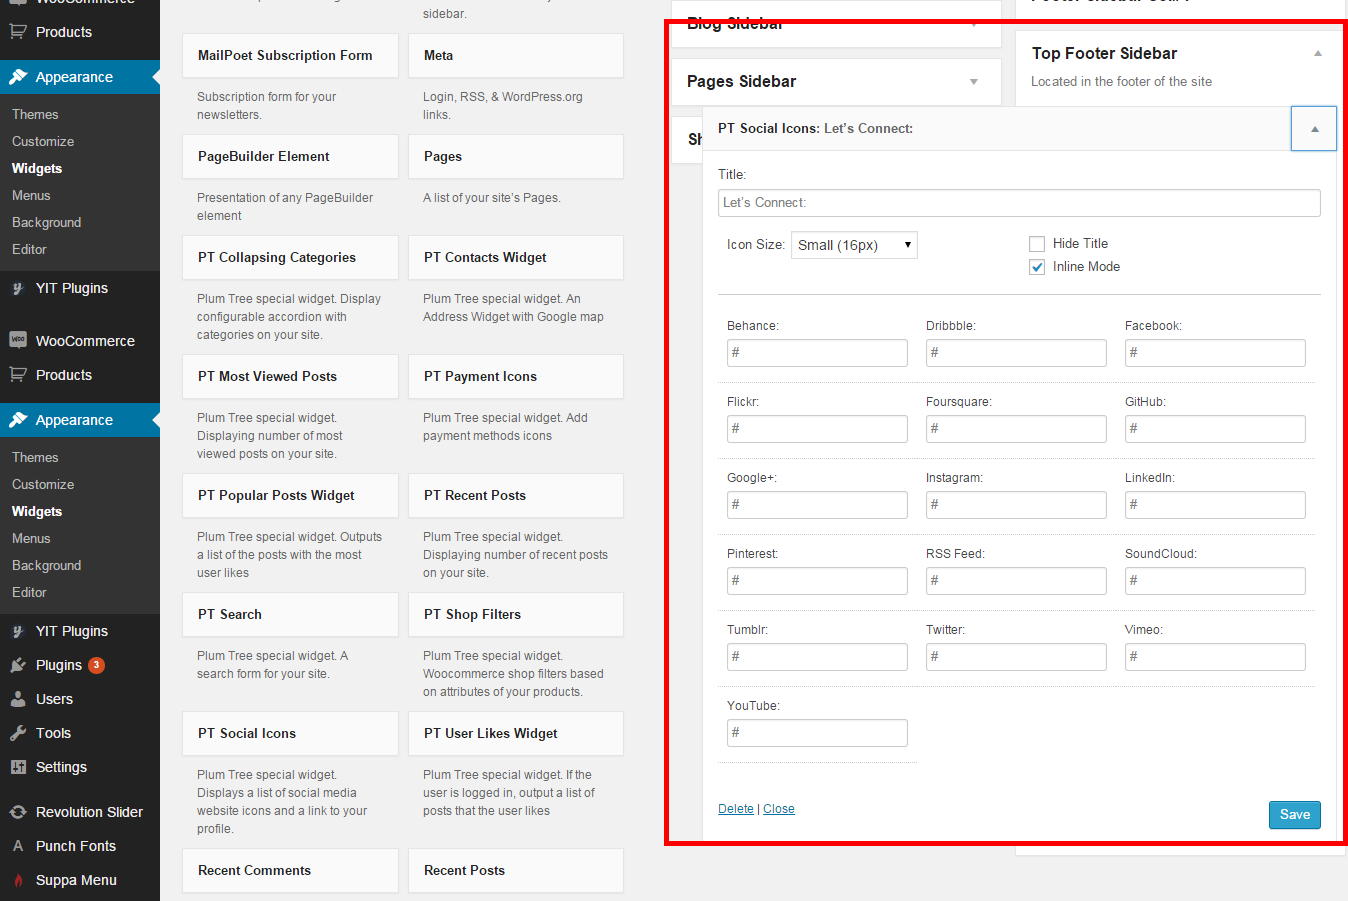
Our demo footer consists of:
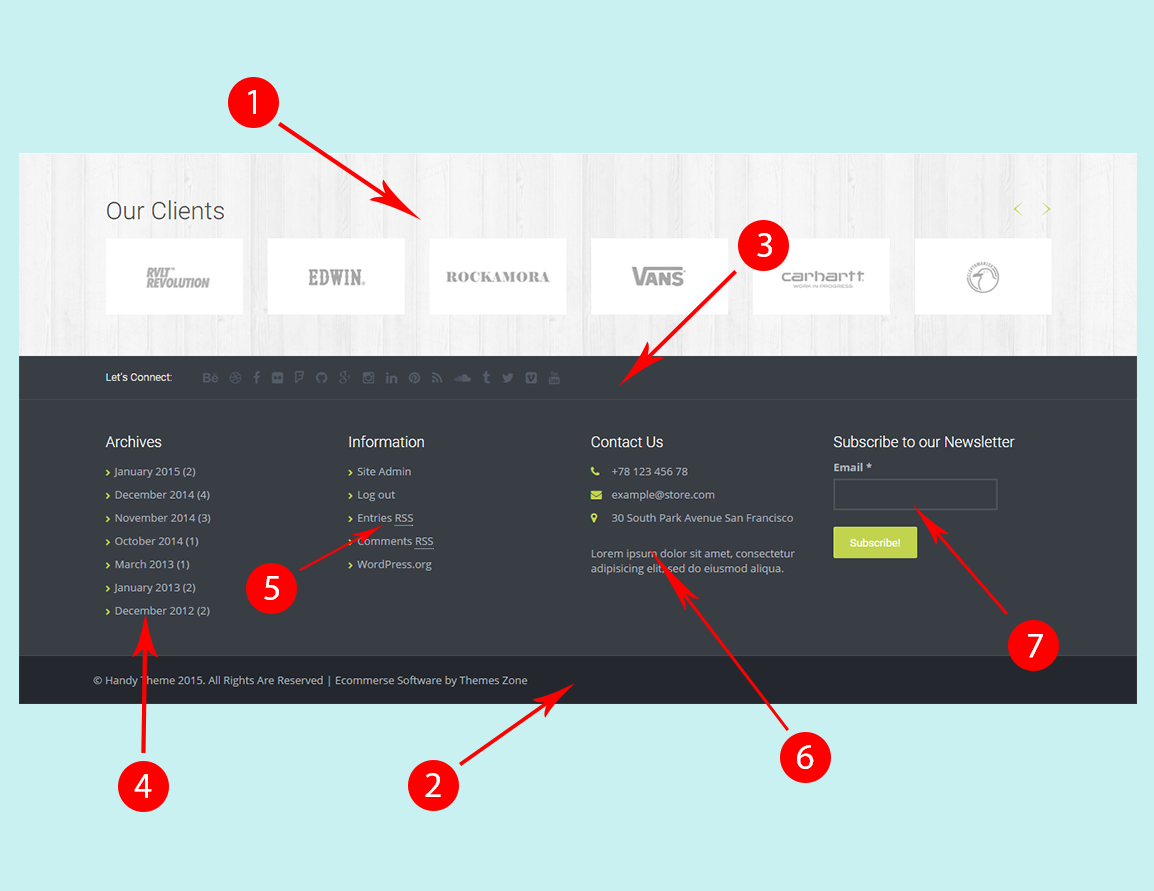
[ig_vendors_carousel el_title="Our Vendors" cols_qty="5" items_number="12" disabled_el="no" ][/ig_vendors_carousel]

Conent of Handy theme is located between header and footer. Our demo content consists of sidebars, WooCommerce elements, such as products, and other elements, which were created in PageBuilder. Below you are going to find video tutorials on how basic content pages of Handy theme were created with the help of PageBuilder plugin.
Before reading further make sure you have read and understood Theme Options, Using Plugins and Shortcodes
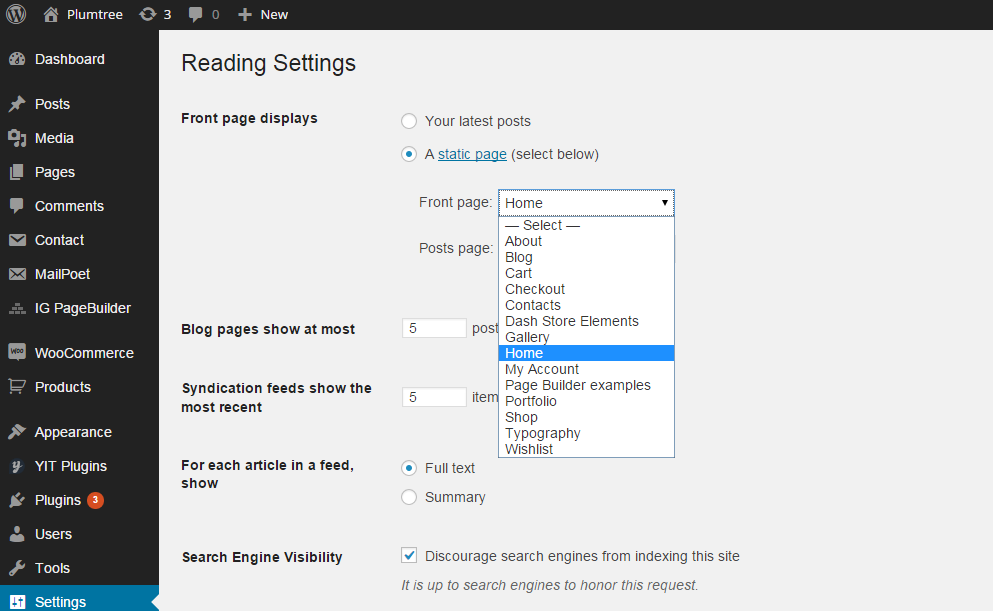
To create a Home Page go to the backend of your site and select "Pages" section, then click "Add New" button. Enter a page title (let's say Home Page), assign Full Width Page Template and click "Publish" button. Then go to "Settings" section and click on "Reading" settings, in the "Front page displays" section set to "A static page" and in the "Front Page" select box select a static page that you want to be displayed as a Home Page. Click "Save Changes" button.
Before creating Home Page you have got to have content ready to be published, if you are going to use products related shortocdes ([featured_products]...), blog posts related shortcodes ([recent-comments], [pt-from-blog]), or gallery related shortcodes ([gallery]) you have to add products to your catalog via backend, add posts and create gallery
Video Tutorial below will guide you through the process of creating a Home Page, you will be shown how to add different home page elements, but please mind that you are not limited in your home page options, the tutorial below shows how to create and add different elements.
Here's a video tutorial on how our demo "About Us" page was created:
This is how our demo "Contacts" page was created:
Handy Theme comes with a number of useful shortcodes that will help you build any kind of page from the components presented on the live demo of the theme
Handy Theme offers you a set of shortcodes and plugins that will help you build different kinds of home pages for different purposes.
Handy Theme package contains Page Builder plugin. It's a great plugin and we recommend using it as a primary tool for building your site's content.
Video tutorials below show various examples of Page Builder usage:
Using Carousel widget in Page Builder:
Using Contact Form widget in Page Builder:
Recent Posts widget in Page Builder:
Products on Sale in Page Builder:
Using Testimonials widget in Page Builder:
Revolution Slider comes with Handy Theme for free and should be used only with Handy Theme. Please read the documentation and tutorials on how to use Revolution Slider here
Handy Theme package contains slider sample data that you can import. To do that go to the backend of your site, click on Revolution Slider Section, find the "Import Slider" button and upload a handy_slider.zip package that is located in SAMPLEDATA folder of the Handy Theme package.
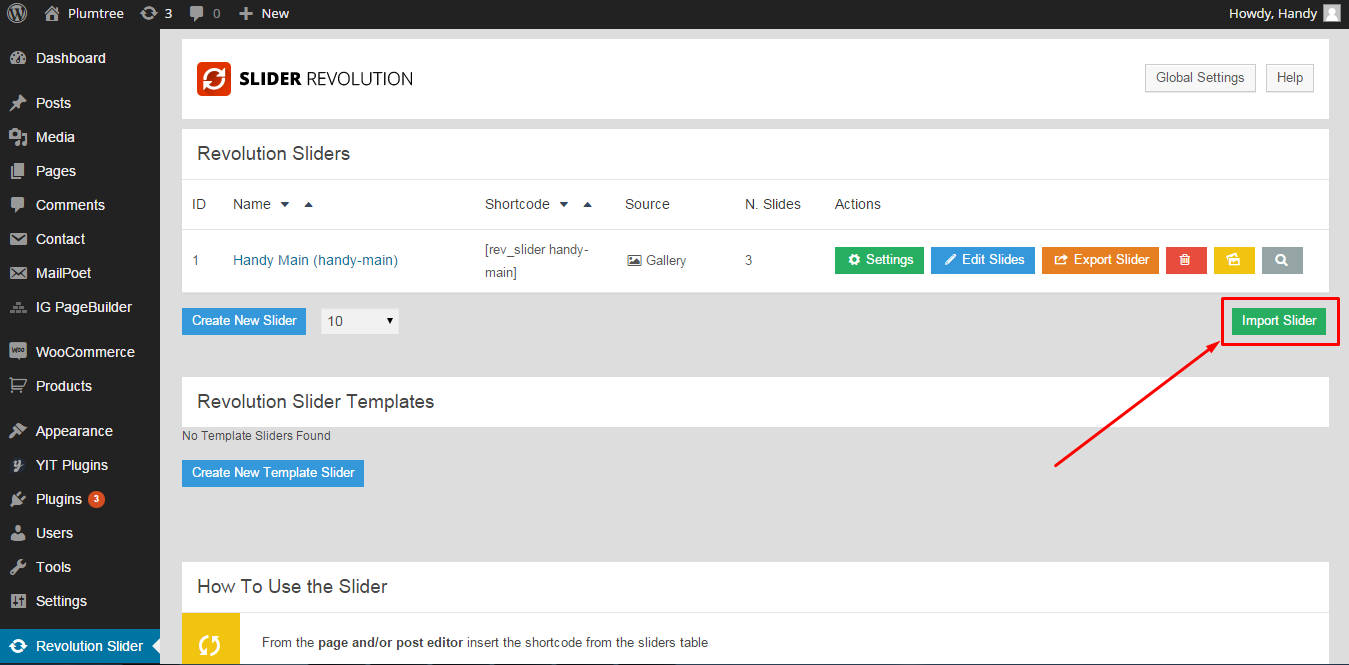
Once you create new or import an existing slider you will be given a shortcode that you can use do display the slider anywhere on page or blog post (See image below).

Before reading further it is recommended to read Woocommerce Getting Started Guide
Handy Theme is designed to fully support WooCommerce plugin. Once the plugin is activated in a new WordPress installtion (no woocommerce data in database), the plugin will prompt you to create WooCommerce Pages.

Click on "Install WooCommerce Pages" button, this will add necessary Pages to your WordPress site.
Each of the created pages contains a WooCommerce shortcode to display WooCommerce content, such as product listing, shopping cart, checkout form, customers account info and so on. Once you add products, categories, product tags you will see them displayed on the WooCommerce Pages.
It is important to get familiar with the functionality of the WooCommerce plugin before using it in the theme.
Wysija Newsletter Plugin is a comfortable way to create and manage newsletters, the plugin contains a newsletter form builder to create newsletter subscription forms, once you activate the theme and install plugins, it will be available to you through the backend of your site.
Before reading further it is recommended to watch this screencast for beginners.
The Contact Form 7 Plugin is a great contact form builder for WordPress, we have styled contact form elements to match the Handy Theme Style, thus you can create any kind of contact forms and use them anywhere on your site.

More in-depth information about the plugin can be found at Contact Form 7 Plugin Documentation
This plugins allows you to output your twits on your site using Twitter API.
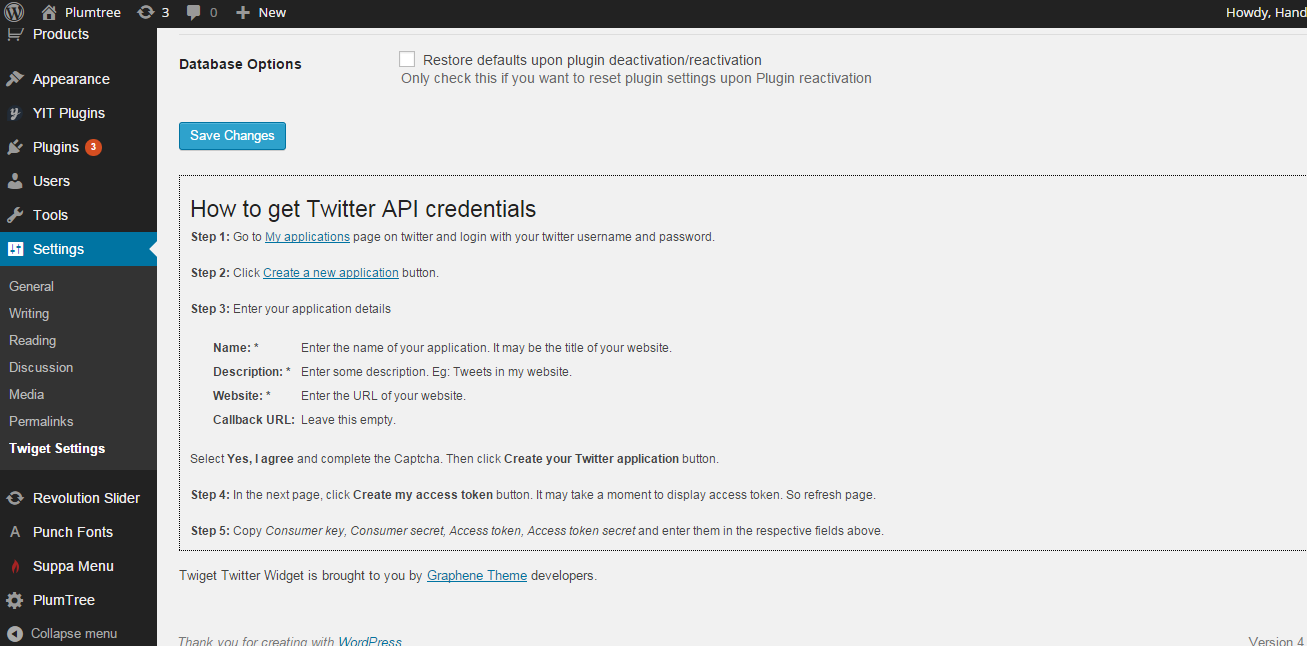
More in-depth information about the plugin can be found at Twiget Support Forum
These Plugins allow users adding products to wishlist and comparing them.

More info on how to use these plugins can be found at YITH WOOCOMMERCE WISHLIST DOCUMENTATION page and YITH WooCommerce Compare Documentation page
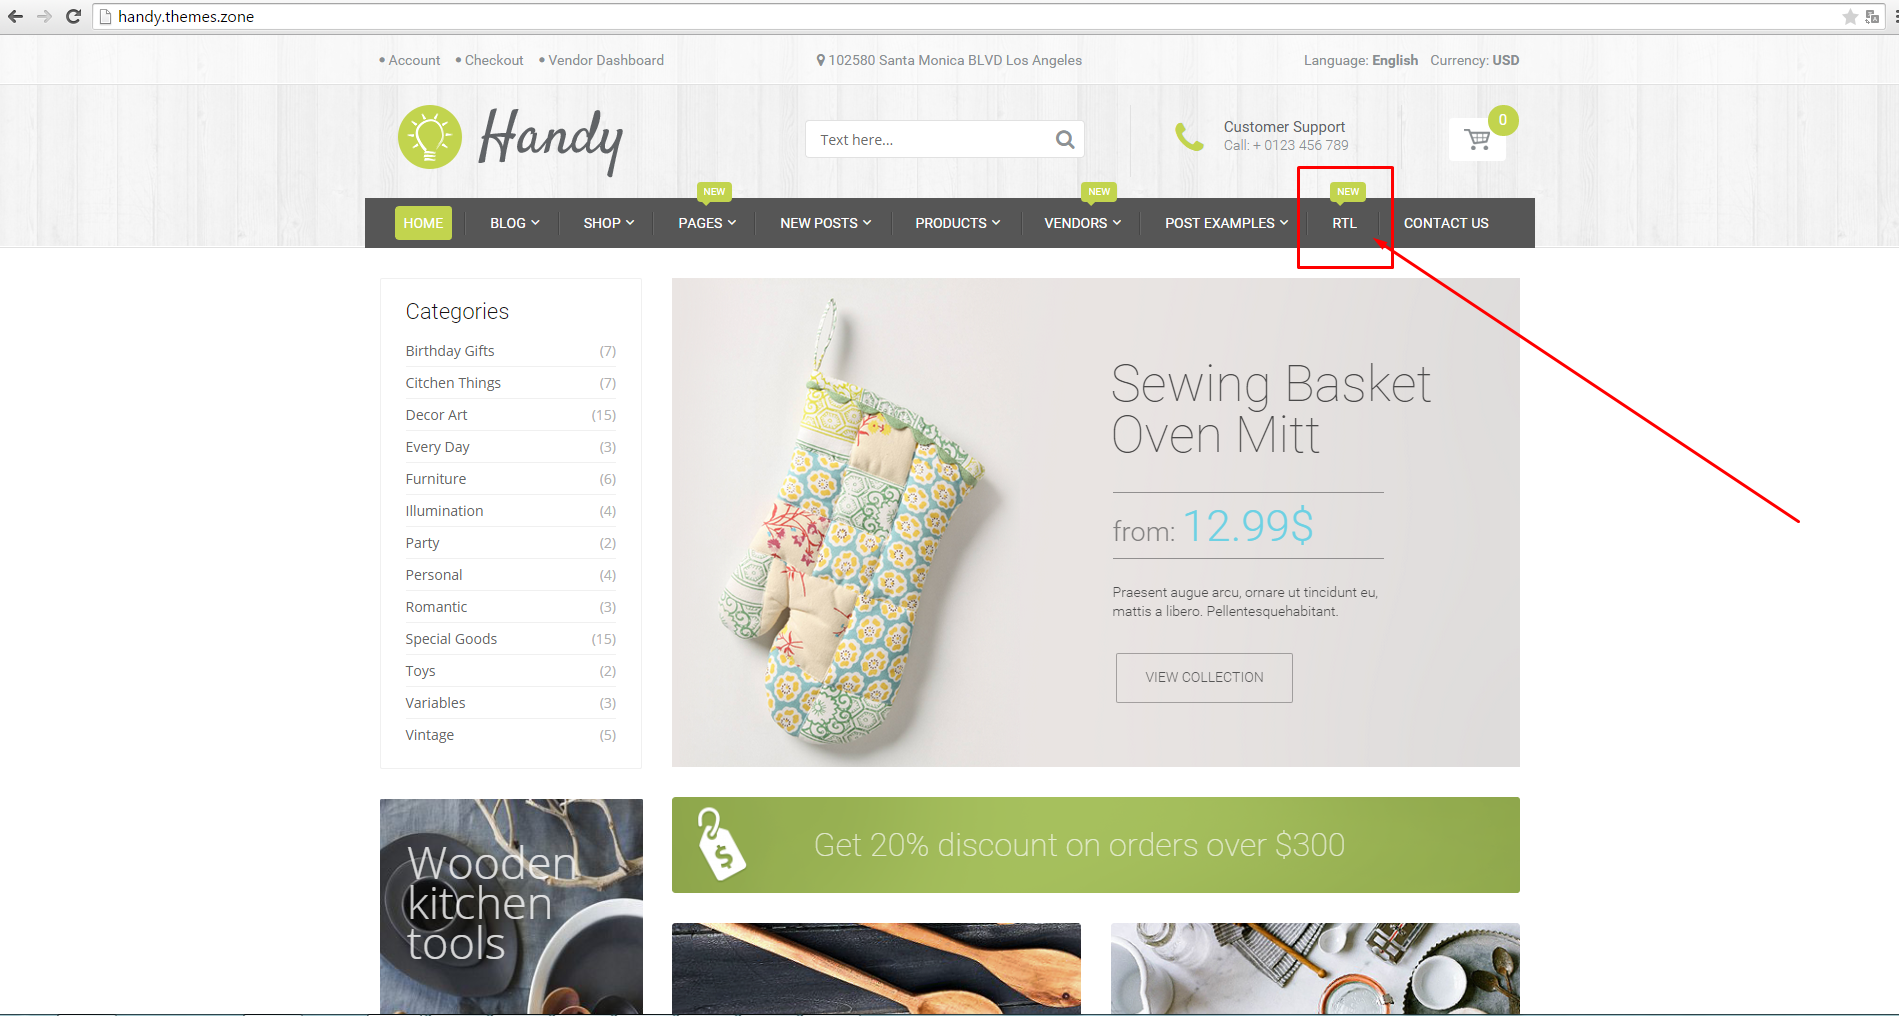
Since version 1.1 HandyStore theme received basic RTL (right-to-left) support.
To activate the basic RTL for you theme copy the code from RTL.css file, which can be found in you theme package, to the end of your style.css file. Then flip the rest of elements (like sidebars, menus, logo) from left to right manually, using HandyStore theme's controls.
You can see an example of RTL css in our RTL live demo section:
Read more about Wordpress RTL Support: https://codex.wordpress.org/Right-to-Left_Language_Support
Since version 1.1 HandyStore theme received WC Vendors plugin support.
Multi Vendor WooCommerce Plugin by WC Vendors is a popular feature-rich plugin that allows other sellers to set up their own store on your WooCommerce based website. And it's free.
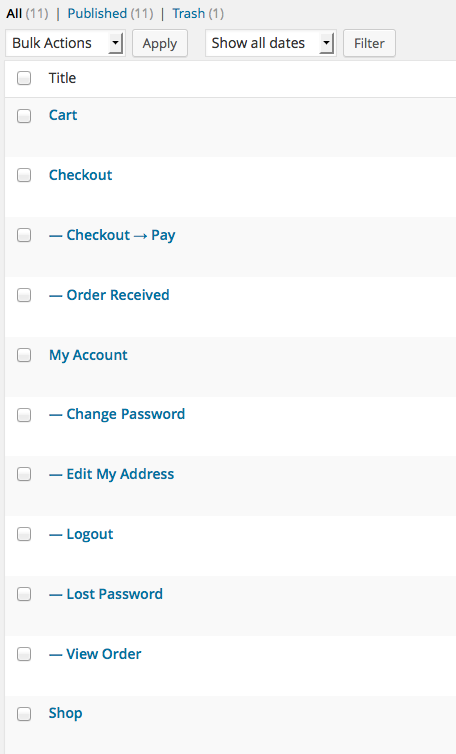
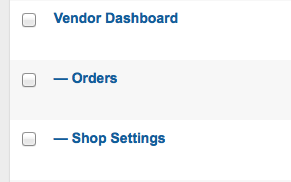
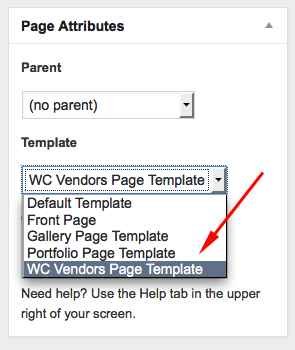
To use this plugin with HandyStore theme choose WC Vendor Template for the three pages, created by the plugin after installation:
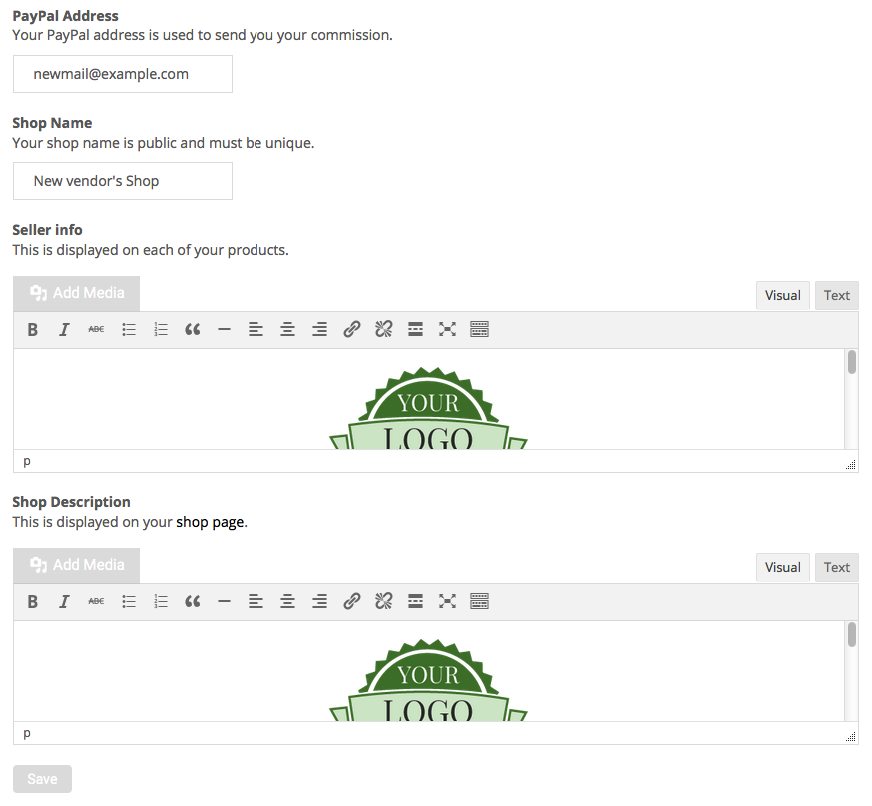
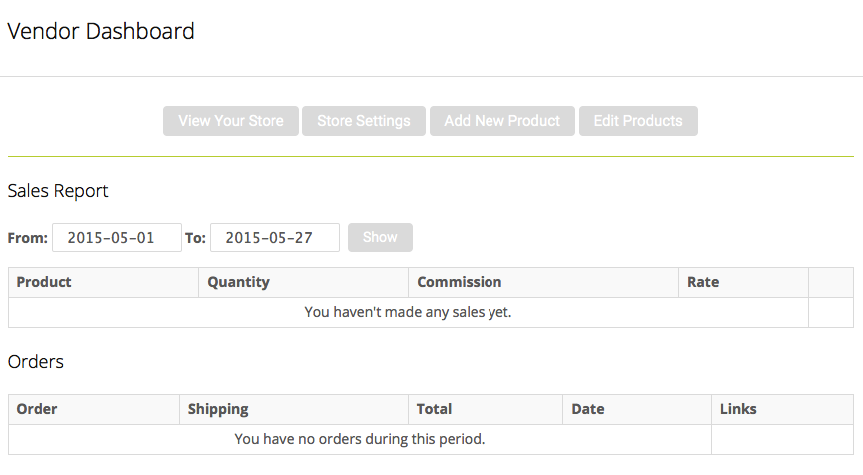
After that your clients will be able to style their own shop page and sell their own products:
Please, read the WC Vendors Setup Guide for more info
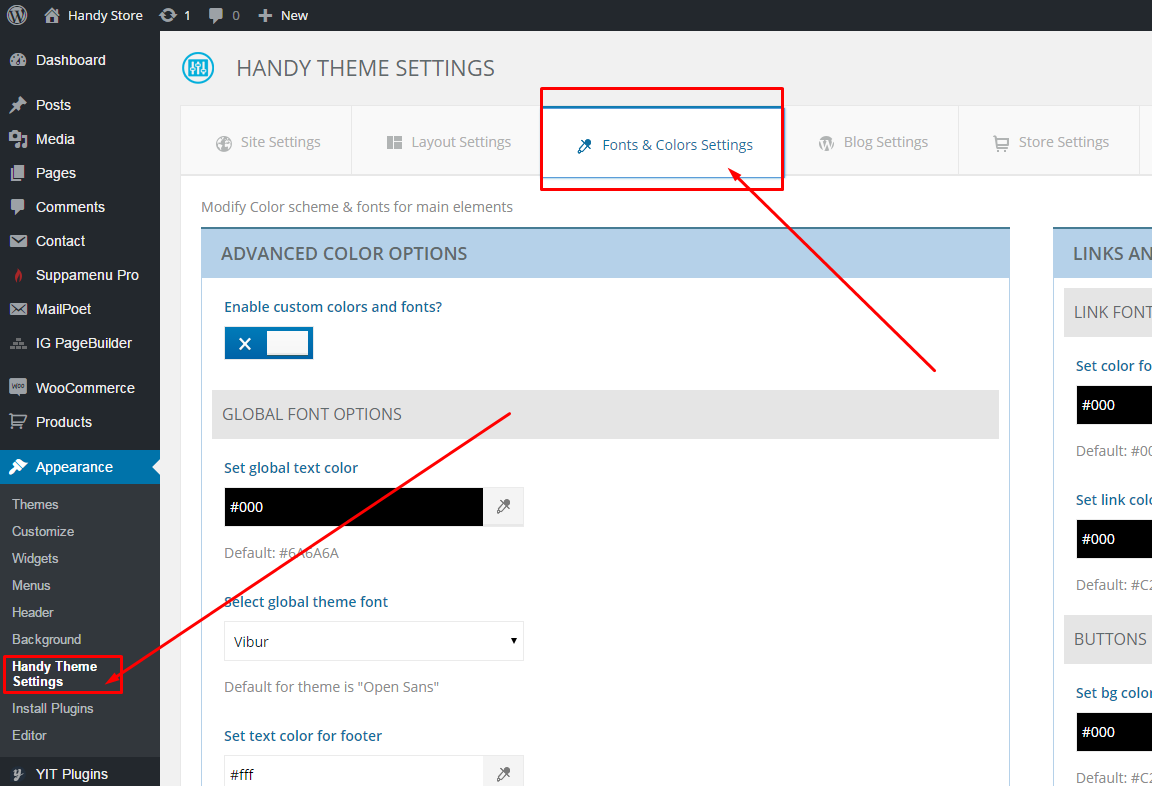
There are several ways to change main colors of Handy theme:
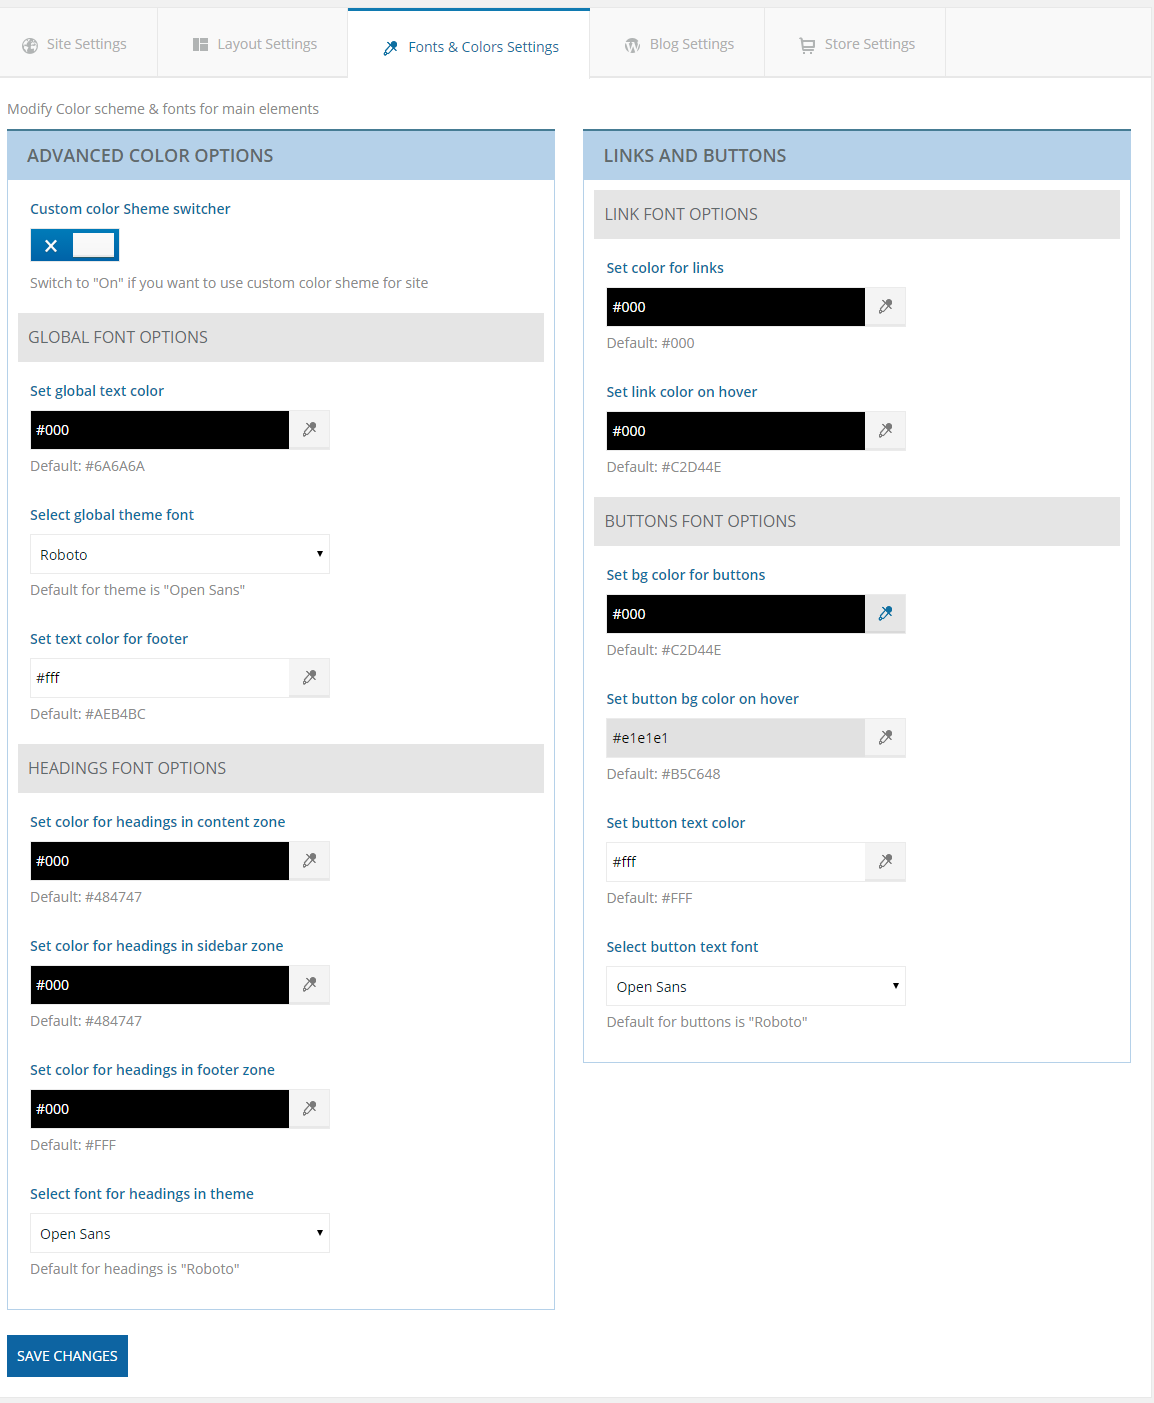
Theme settings. You can change theme fonts there, font color, as well as colors of links and buttons (only those buttons which were added in Page Builder):
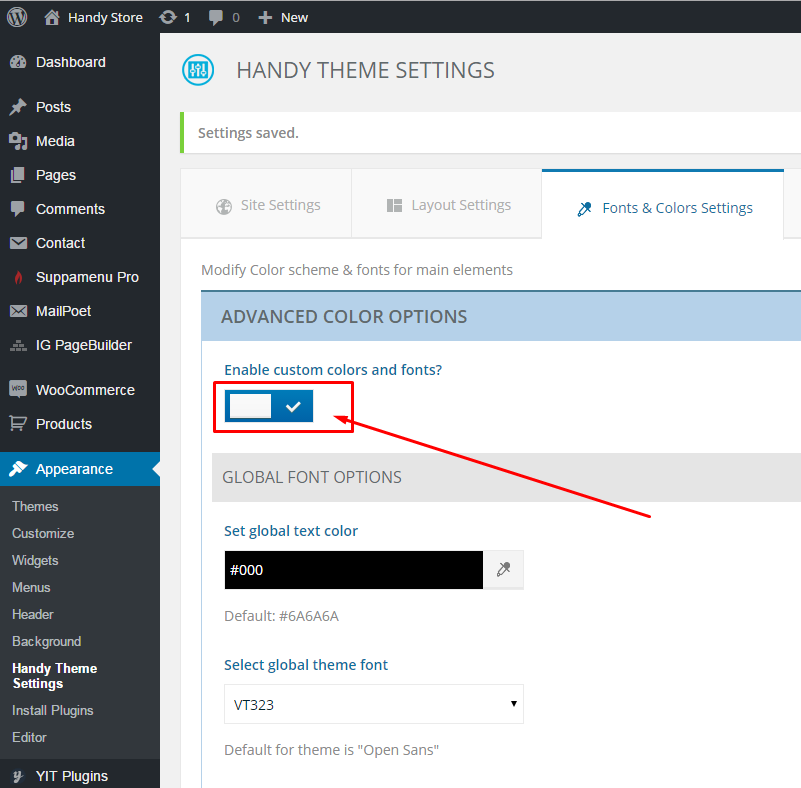
First you need to turn the "Enable custom colors and fonts?" switcher. This action will enforce all settings from this page:
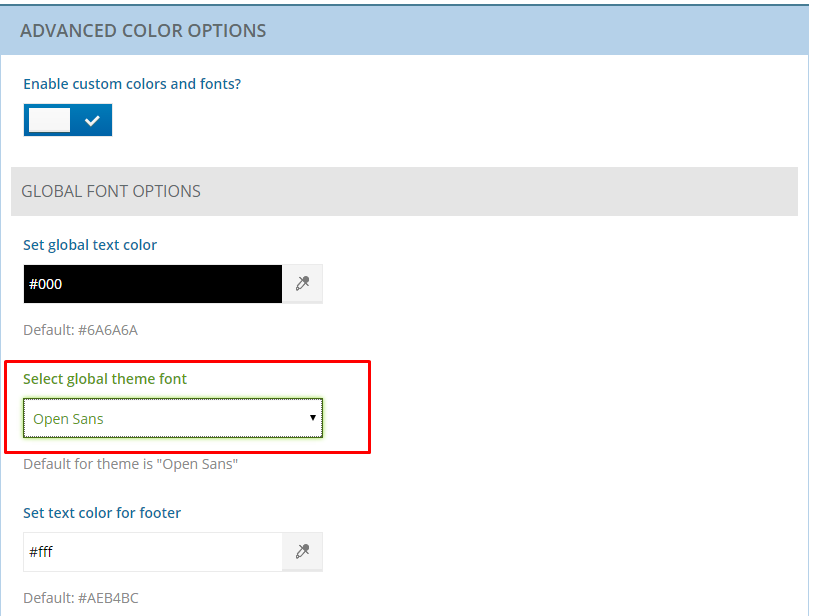
Make sure all fonts are set to Open Sans if you don't want to change the font to a different one:
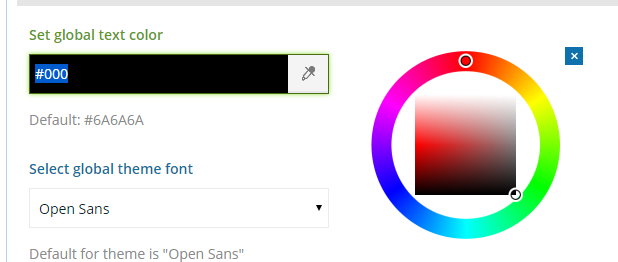
You can change colors by either picking a color on the palette, or by pasting the hex code in the text field:
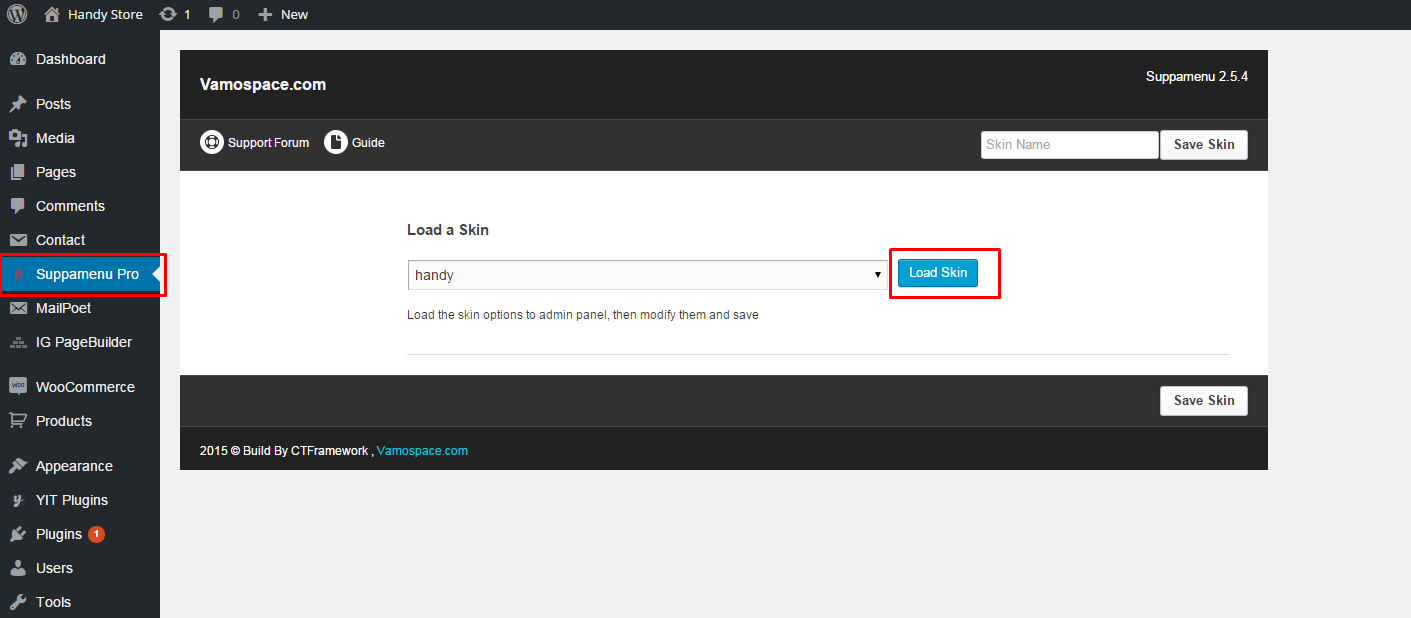
You can change your main menu colors in Suppamenu settings. Click on "Load skin" to start:
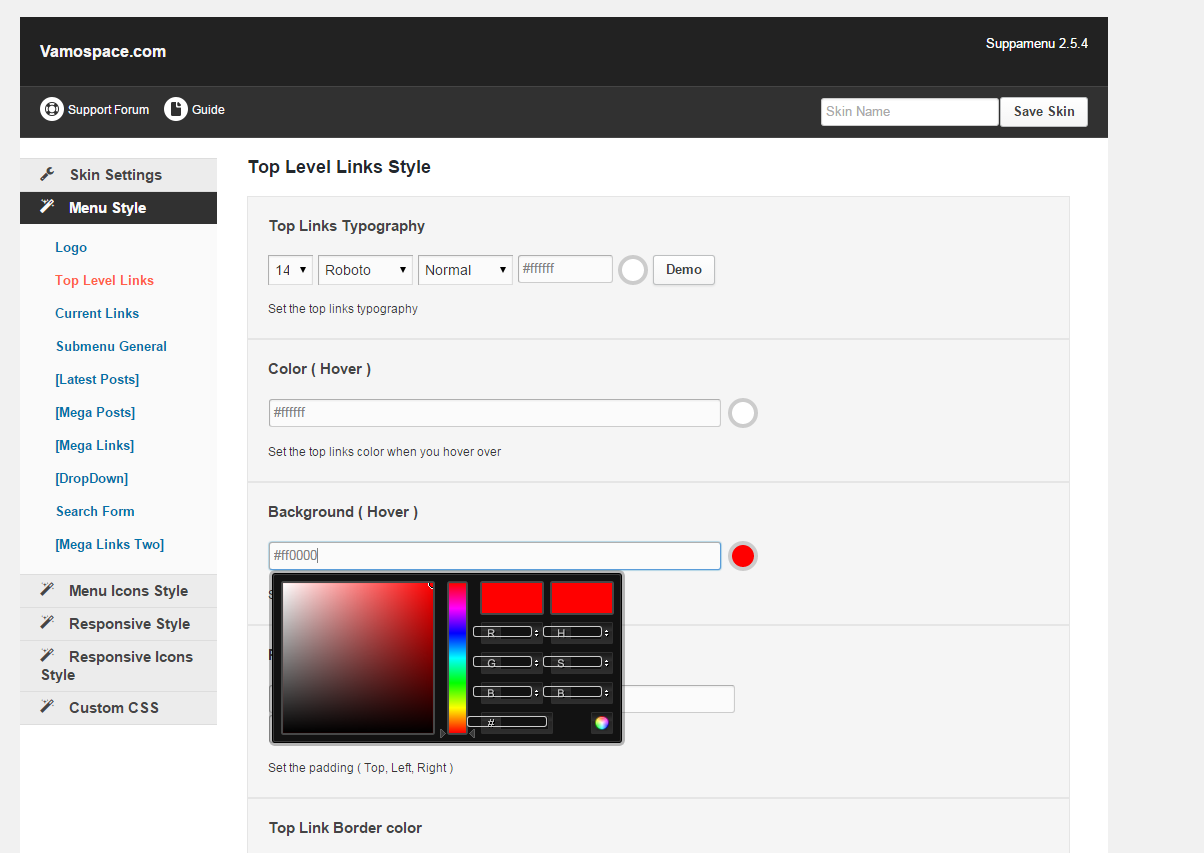
For example, I want to change menu button backgrounds to red:

I go to "Top level Links" and change the Color (Hover) to red:
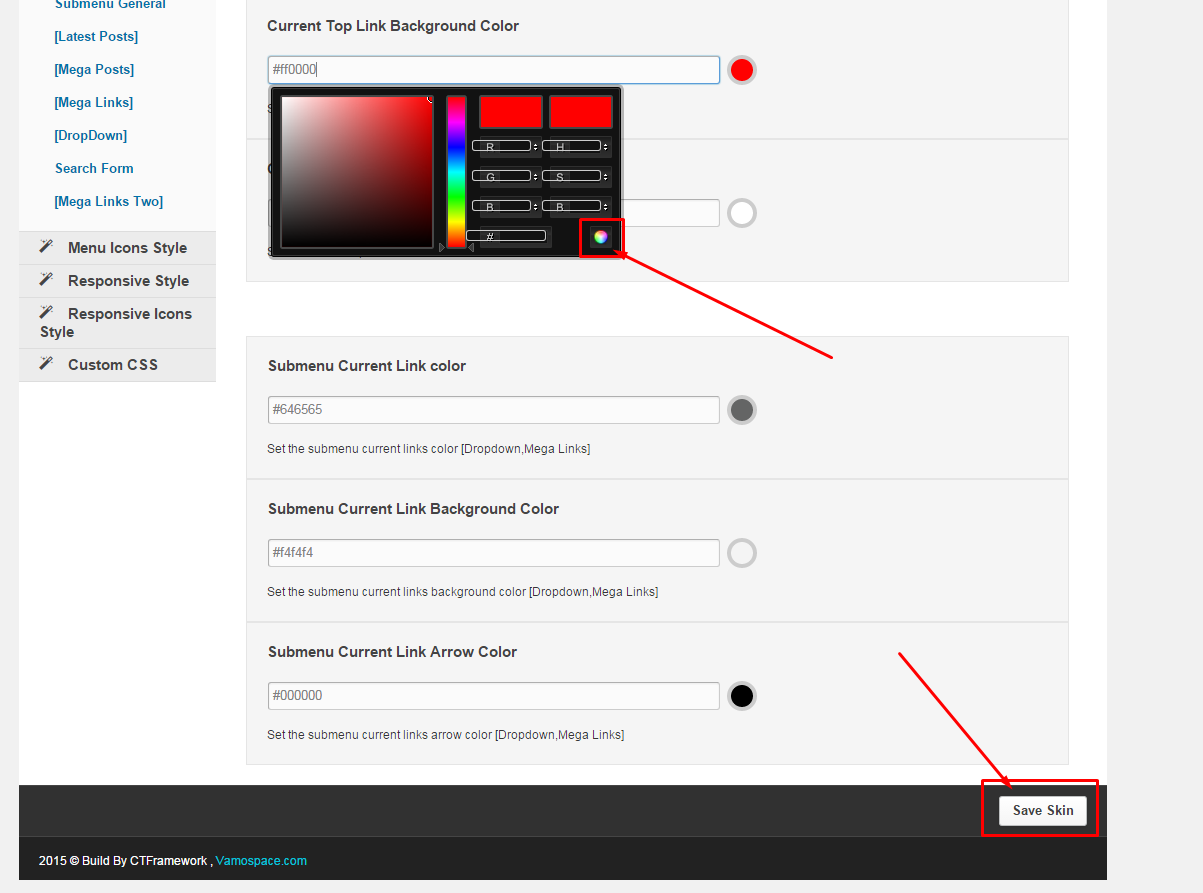
I also go to "Current links" and change Current Top Link Background Color to red:

It's important to press the little round button to apply the changes, and "Save skin" button to save them:
Here we go, the backgrounds and hovers of the menu links are now red:

You can learn more on how to style your menu from this video tutorial.
Another option is to edit style.css and woo-styles.css files of your theme manually.
You can quicken this process by performing a global find-and-replace over each of these files.
To do this you have to open each of these files in a text editor, search for the main theme's color code and replace it with your desired color's code.
For example, we can search for the green color (it's code is #c2d44e) and replace it with red - #ff0000.
Make sure you create bakup copies of these files before editing them and remember to save your changes.
(for developers) You can also create new styles for your theme using SASS files. You can download them here.
There's a lot on information on how to make your site work faster on the Internet. We are going to list certain general recommendations below, as well as recommendations on HandyStore theme customization.
It's important to choose a nice hosting for your site. Cheap hosting usually isn't the fastest one.
WordPress, WooCommerce and our theme need resources. A $3-per-month host most likely won't have them, and your HandyTheme experience, as well as our support duty, will turn into a nightmare.
We usually recommend WordPress hosting plans from MediaTemple to be used with our themes.
You can use caching plugins.
We recommend acuiring and activating one of such plugins after your site's development is over.
Most important ones are:
You can use CDN.
What CDN does is it creates copies of your site's static content (images, css and javascript files) on different servers around the world. When a visitor comes to your site, he or she gets these static files from the nearest server. So, let's say, North American visitors get your site's files from Canada, and European visitors get them from Norway. This increases your site's loading speed dramatically.
Here are some of the popular CDN service providers:
You can optimize your images.
Images usually are the "heaviest" part of your website and take the most time to load. Reduce your images' initial sizes online or offline before uploading them to your site.
These are some of the popular online services for image size reduction:
These are some of the popular offline applications for image size reduction:
You can optimize you database.
The essence of database optimization is deleting drafts, not used (deleted) elements, such as spam comments etc. from your database.
These are some of the popular plugins for database optimization:
You can minify your css and js
After your site's development is over you can minify all your styles and scripts
Online services for css:
Online services for js:
Plugins:
Useful links on the matter:
You can use Lazy Load libraby
With Lazy Load technology user is going to load only those images of your site which he sees in his browser window. Thus your site's load speed will decrease.
Here's the plugin: https://wordpress.org/plugins/bj-lazy-load/
The following video tutorials describe the new features which became available in Handy since v.2.0 update:
The demo code from the widget:
New Multivendor Features in version 3.x.x
If you need a human being to help you with Handy Theme - please, create a ticket at our support system .
This is a list of most common known issues you may encounter
Please watch our detailed video tutorial on sample data installation.