Get Started
Thank you for purchasing DiCi Store Theme. This manual will show you how to work with your theme, how to edit it and create a "live" website of your dream.
Recommended Server Requirements:
- PHP version 5.6 or greater
- MySQL version 5.6 or greater
- The mod_rewrite Apache module (for permalinks)
- PHP max_input_vars 3000 or greater
- WP Memory limit 64 MB or greater (128 MB or higher is preferred)
- PHP Time Limit 60 or greater
- post_max_size 32M
- upload_max_filesize 32M
- WP Multisite usage is not recommended
You can find more information on system requirements here: Wordpress Requirements, Hosting Wordpress, Woocommerce Server Requirements.
Theme Installation
Learn how to configure settings for Scribbler, such as your syntax highlighting preference and the default saving folder location.
                    DiCi Theme is a WordPress theme, therefore it is important to get to know WordPress CMS before you continue. If you are not familiar with WordPress please visit WordPress getting started guide

                    You may find a detailed documentation of WordPress functionality at WordPress Codex

                    Please, make sure to use original WordPress copy from wordpress.org website. Do not use the pre-installed copy provided by your hosting company.
Once downloaded, unzip the compressed folder to see the structure of package.
1. Go to THEME folder, there you will find a packaged dici.zip folder, upload the package to wp-content/themes/ folder of your WordPress and uncompress it. Once uncompressed, the theme can be activated.
2. Go to backend section of your WordPress site (http://link_to_your_site/wp-admin/), then go to Appearance -> Themes and activate the DiCi Theme).
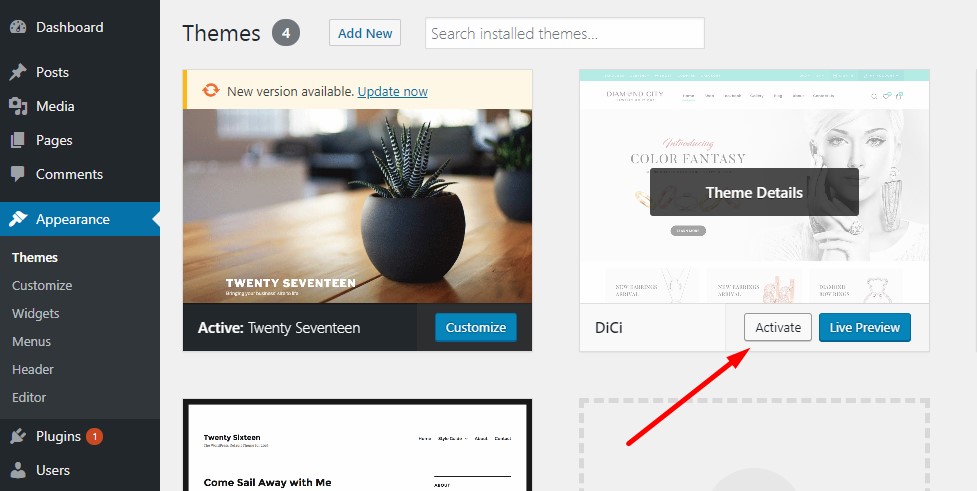
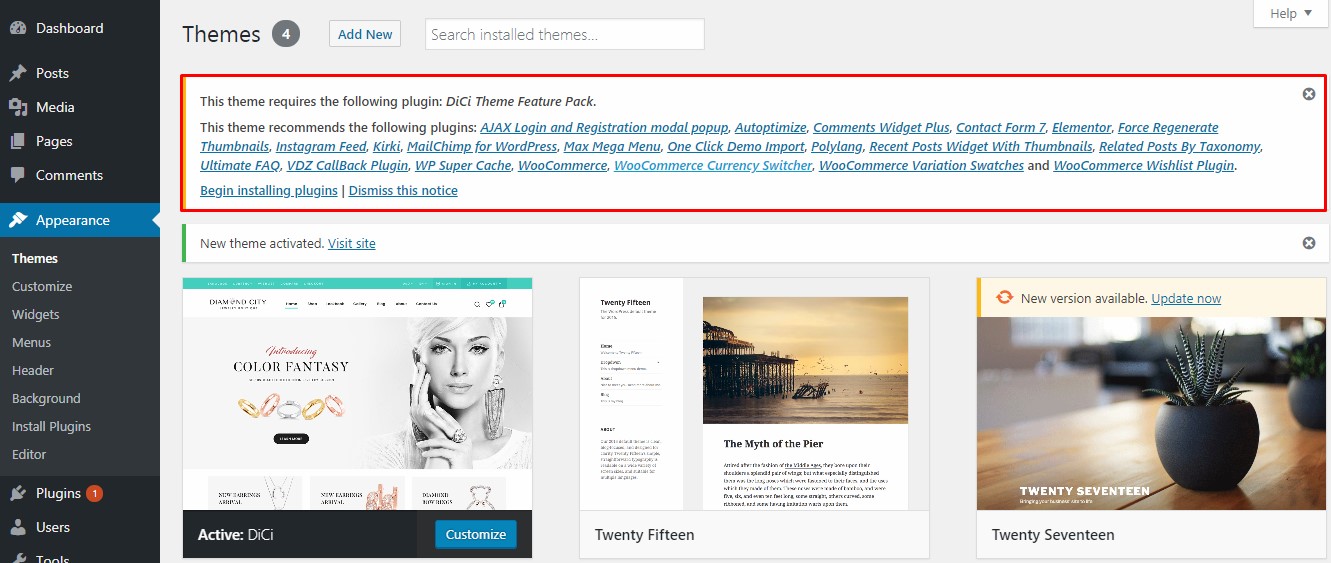
3.When you click on "Activate" button to activate DiCi Theme, you will see the a notice offering you to install required and recommended plugins. Click "Begin installing plugins", on the screen that appears, next select the plugins you want to be installed, pick "Install" in Bulk Actions select box and click "Apply" button. For optimal user experience install and activate all recommended plugins.
Demo Data Installation
                    Warning! It is recommended to install sample data on a clean WordPress installation!
                    Otherwise full or partial data loss may occur!
Please note that demo data sets which come with our themes use both free and paid stock images from a variety of sources. These images and videos are not included with your purchase, and you are required to buy a license for any "PAID" image or video if you wish to use them. Also, please note that even free images can't often be used for commercial purposes. Always make sure you read the details of each resource to fully understand the license it comes with. Here are resources we have used to generate dummy data for our demo, some of them are not for commercial use: Link
After you activate your theme and install required plugins you may want to install sample data to make your site look like Live Demo of our theme, which can be found here: http://dici.themes.zone/.
These are the steps you need to follow to install sample data:
Watch a detailed video tutorial on sample data installation for DiCi Theme
Recent Elementor plugin update brought some problems to our theme – sample data does not install well. While we are working on fixing the issue, we came up with these steps so you could fix the problem on the spot: https://themes.zone/docs/broken-demo-data-for-dici-solution/
1. Log in to your WordPress dashboard
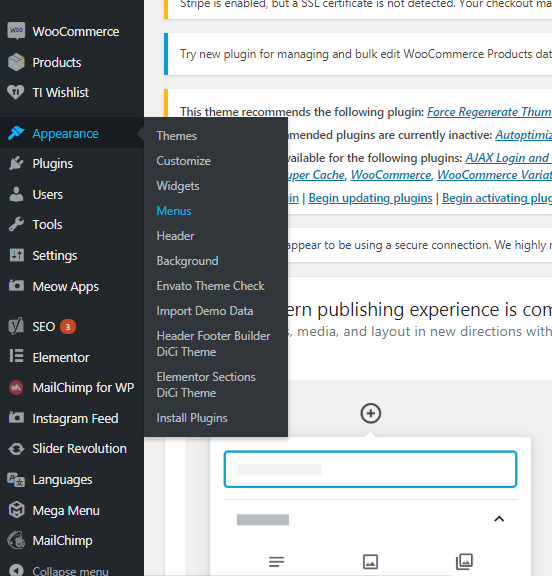
2. Before you begin, make sure all the required plugins are activated. To begin installing sample (demo) data, in your WordPress dashboard go to Appearance -> Import Demo Data, click the Import Demo Data button once
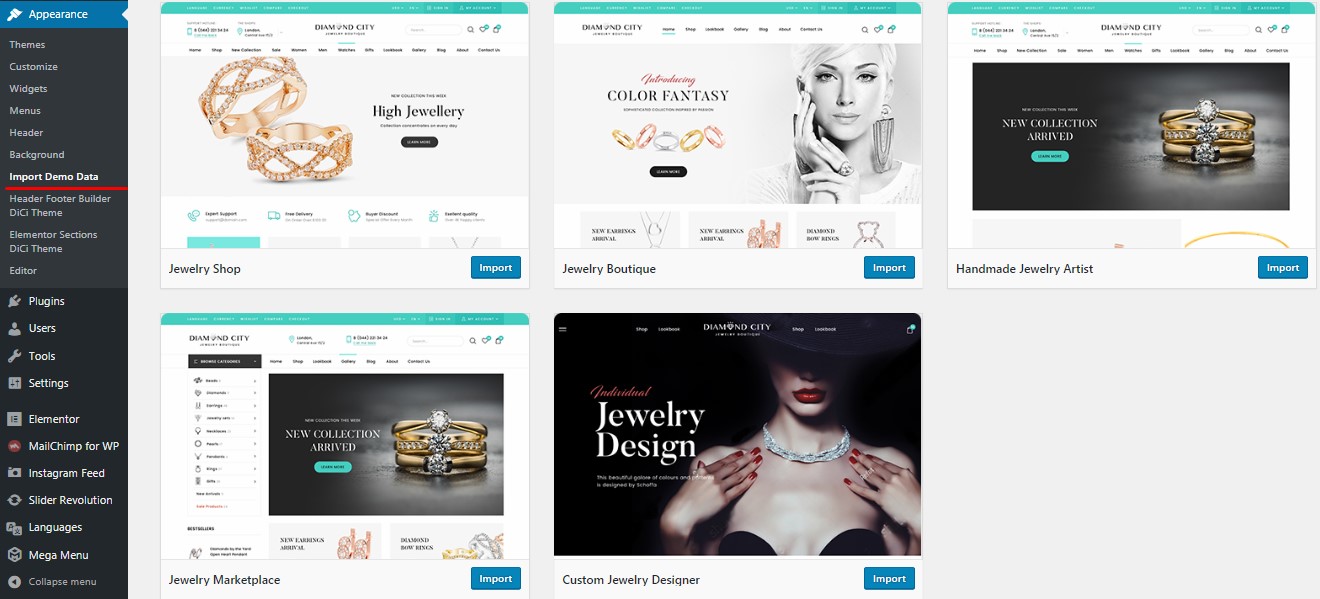
and wait till installation is over. The process may take several minutes. As you can see, once you entered "Import Demo data" area, there will be 5 available demo datas: DiCi Demo (Jewelry Shop), DiCi Demo (Jewelry Boutique), DiCi Demo (Handmade Jewelry Artist), DiCi Demo (Jewelry Marketplace), DiCi Demo (Custom Jewelry Designer). Import needed version. You should know that there is enough just to import only 1 Demo data. Other templates come with theme package (dummy data directory) and can be imported anytime via Elementor's Import tool.
3. Import the demo slider (if needed). To import the demo slider in your WordPress dashboard go to Slider Revolution -> press the Import slider button.
Important Notice: Revolution Slider plugin is currently removed from the theme package. Please create a ticket here with a title "Revolution Slider" to receive your copy. We apologize for the inconvenience and are working on new automated ways of distributing the plugin.
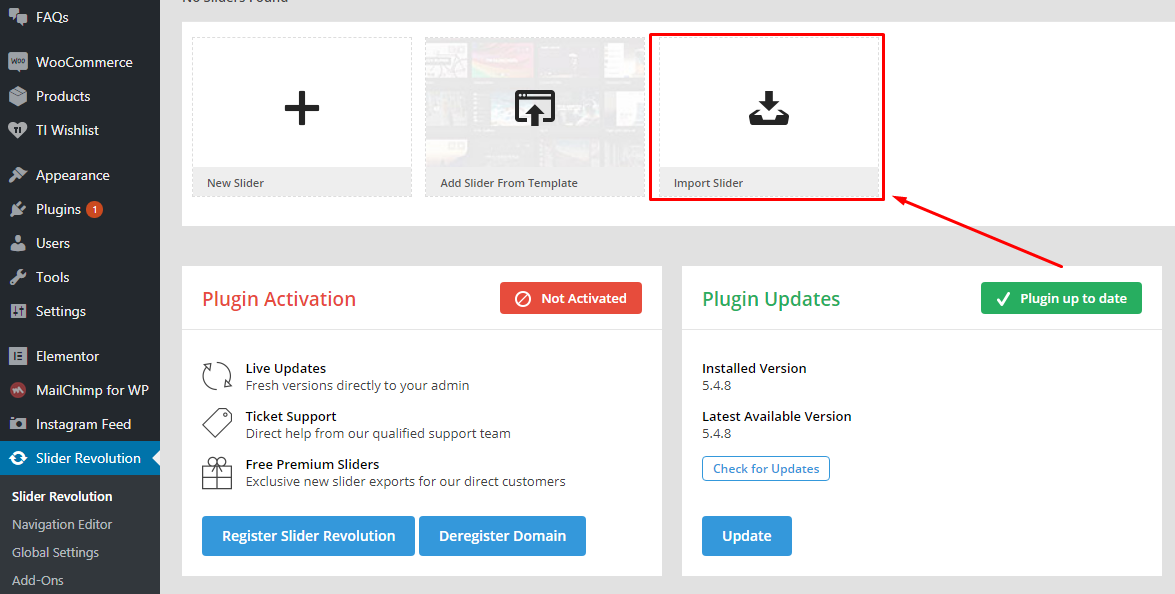
Press choose file and exact demo slider from the theme package you downloaded and press import.
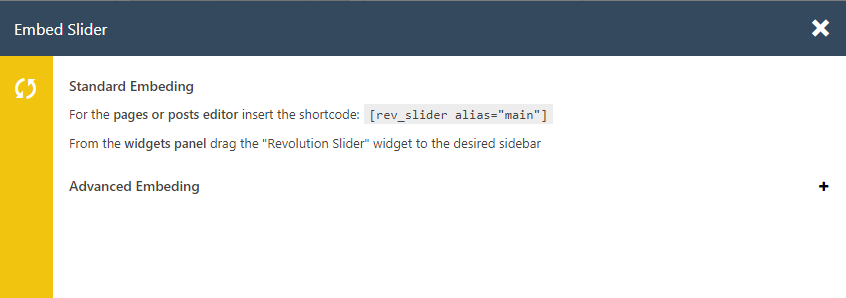
Make sure your recently imported slider shortcode matches exact one on the home page of your site. Most likely it won't. By default our demo home page is looking for slider with this shortcode [rev_slider alias="main"], imported slider will have a different shortcode. So you should to go to your imported slider settings, find its shortcode, then go to editing your demo home page and change to imported one using Elementor.
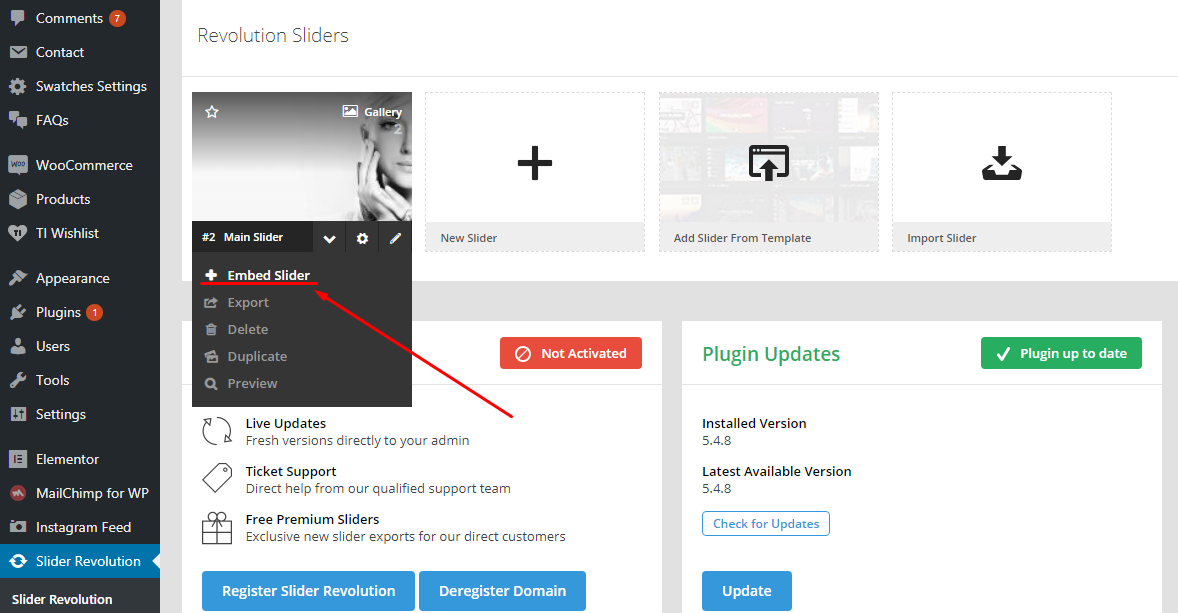
To find the demo slider's shortcode go to Slider Revolution menu in your WordPress dashboard, click on the slider you just imported, then choose embed slider:
Please follow these links to find detailed tutorials on each demo installation:
Creating a child theme
We strongly recommend you to create a child theme and use it for customizing DiCi. This way you can update the theme and it's plugins without fear of loosing implemented changes.
You can download the blank child theme we created for you here.
Please read this article to get a better understanding of WordPress child theme purpose, creation and usage: https://codex.wordpress.org/Child_Themes
Updating your theme
It is recommended that you always update your theme to the latest version. When a new version of the theme is availabe Envato will usually send an e-mail notifictaion to you on this matter. Theme update information will also be bublished in the theme's comments section on themeforest. The latest changelog file is also going to be available online.
Here is the general theme update algorithm:
- Create a full backup of your site. All site files and the database. You should do this to be able to restore the site in case of an unsuccessful update.
- Through your WordPress dashboard update plugins to their latest version. At least the very important ones, like WooCommerce.
- Through your WordPress dashboard switch your site to a neutral theme, like Twenty Seventeen.
- If you made customization in the theme you want to update, make sure that customization is going to be moved to the new updated version of the theme. Otherwise you may loose it. If the customization was significant you may want to use the help of an experienced developer to properly move it to the updated theme version.
- Download the latest theme version from Envato. Prepare it for the upload.
- Delete the old theme in your WordPress dashboard or via FTP/SSH.
- Upload the new updated version of the theme via WordPress dashboard or FTP/SSH.
- Activate it (or child theme, if you use one) in your WordPress dahsboard.
- Finish moving customization if any.
Your WordPress install and plugins should also be updated along with the theme. In this context you may be interested in reviewing the following materials:
Updating WordPress: https://codex.wordpress.org/Upgrading_WordPress
Updating WooCommerce: https://docs.woocommerce.com/document/updating-woocommerce/
Setting up Header
The header of your site is typically the first thing people see, therefore it'd better be good. Luckily DiCi theme offers you a magnificent and informative header which will make your site stand out among others.

Header Top Panel includes additional Menu on the left side.

Feel free to enter wp-dashboard-->appearance-->menus and edit menu according to your personal needs or deactivate it at all:
Then edit menu according to your personal needs or deactivate it at all:
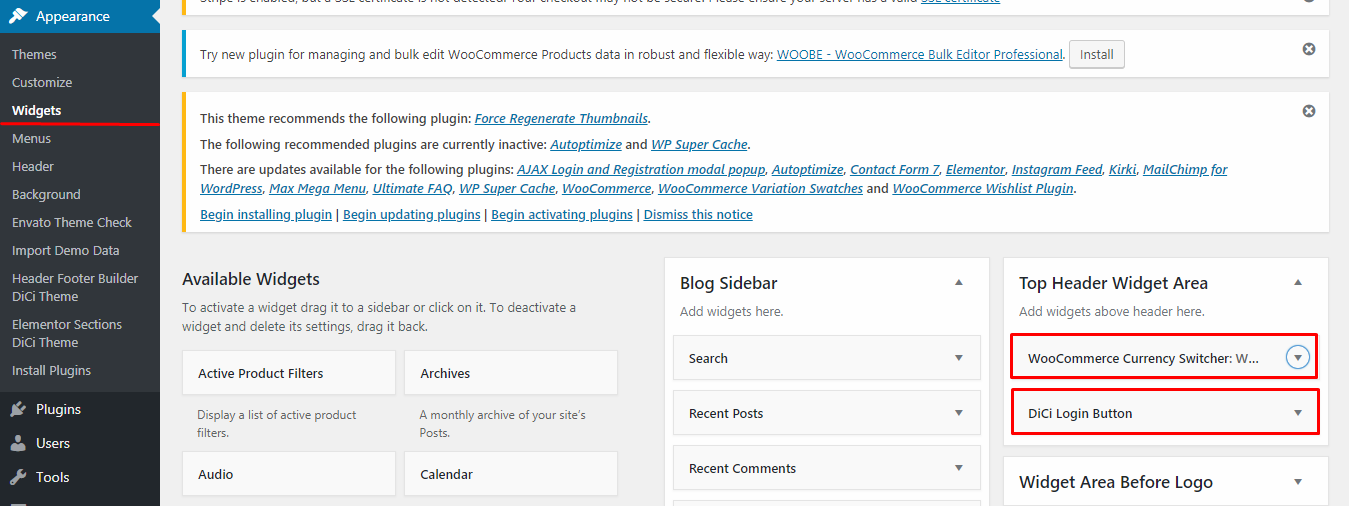
Right side of Header Top Panel is fulfilled with "WooCommerce Currency Switcher" and unique "DiCi Login button" widgets. Make sure that "WooCommerce Currency switcher" plugin is installed and activated, otherwise, this widget will not be available! Both widgets should be added straight within wp-dashboard-->appearance-->widgets-->top header widget area
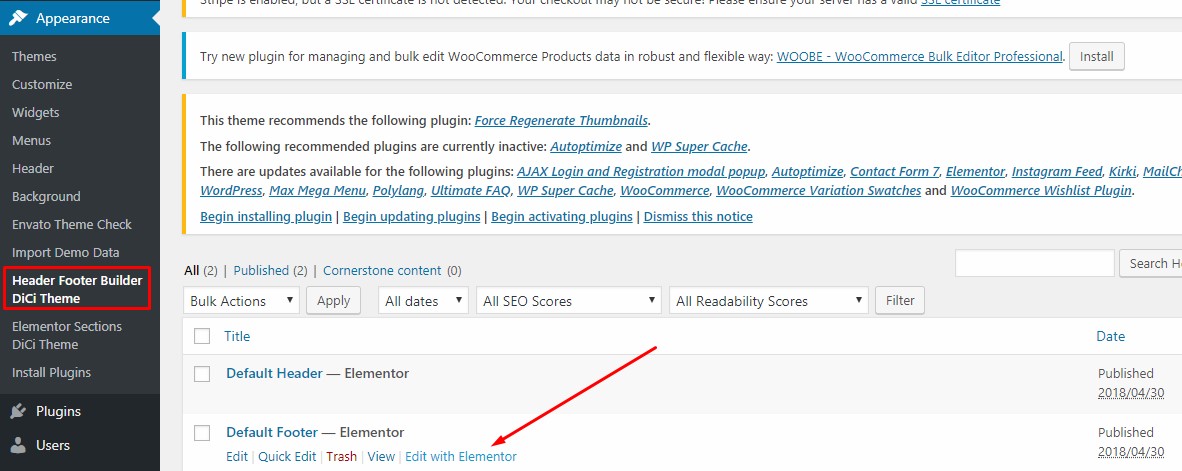
Let's discuss all elements that are used in header section of our live demo. The same result can be achieved after Demo data installation or manual setup. First of all, feel free to follow: wp-dashboard-->appearance-->Header/Footer Builder DiCi Theme to enter Elementor's features then type dici and be ready to drag & drop needed widgets:
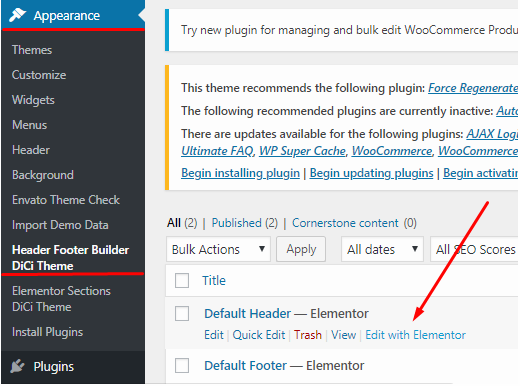
Then be ready to drag & drop needed widgets:
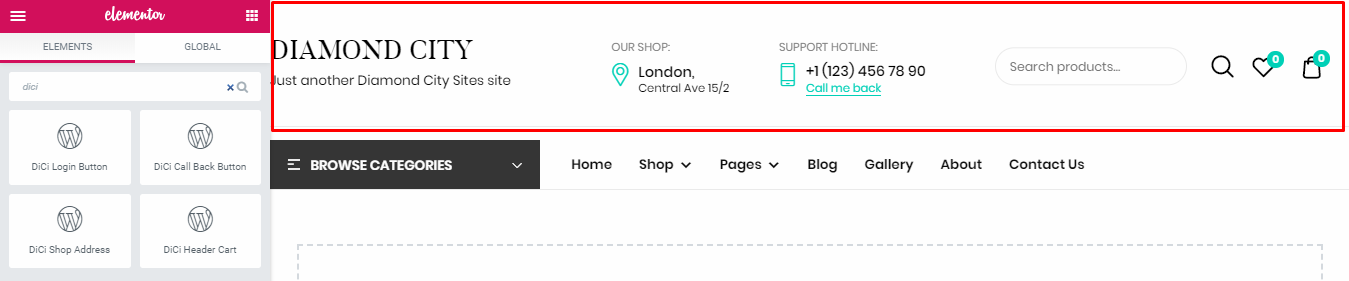
- Site logo. Logo was added with the help of Site Logo element.

- Shop address info widget. Shop address functionality was added with the help of unique "DiCi Shop Address" Element.

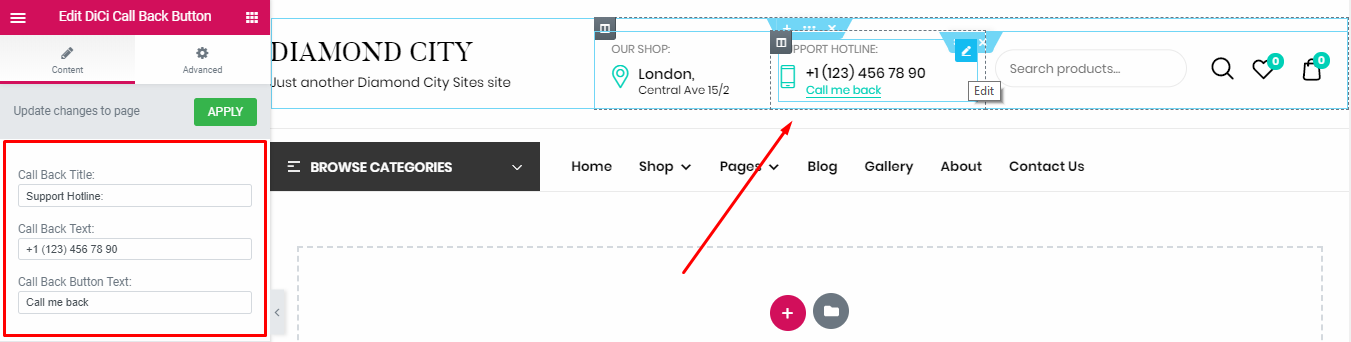
- Phone info block. Shop info block can be added with the help of unique "DiCi Call me back" Element.
- Search element. Search functionality was added with the help of native Product Search widget.

- Wishlist counter. TI Wishlist Products Counter widget is responsible for this part of functionality.

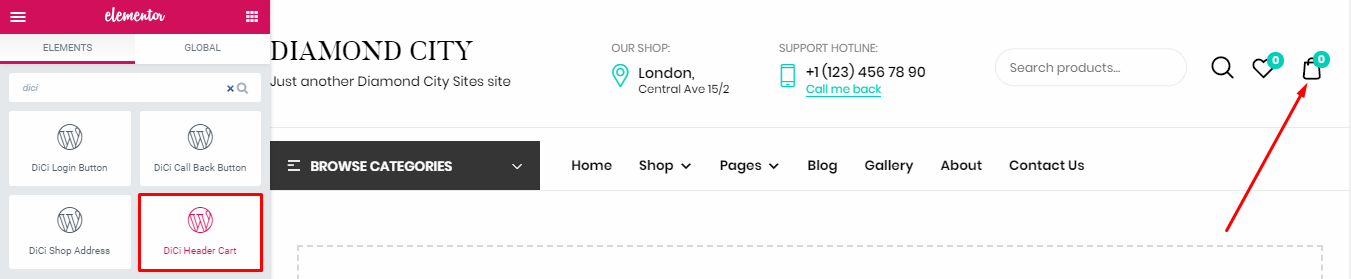
- Cart widget. Attached custom "DiCi Header Cart" for Woocommerce widget is unique and was developed/styled for cart purpose in DiCi theme.
You can learn more about WordPress headers in the following article of WordPress Codex: https://codex.wordpress.org/Designing_Headers
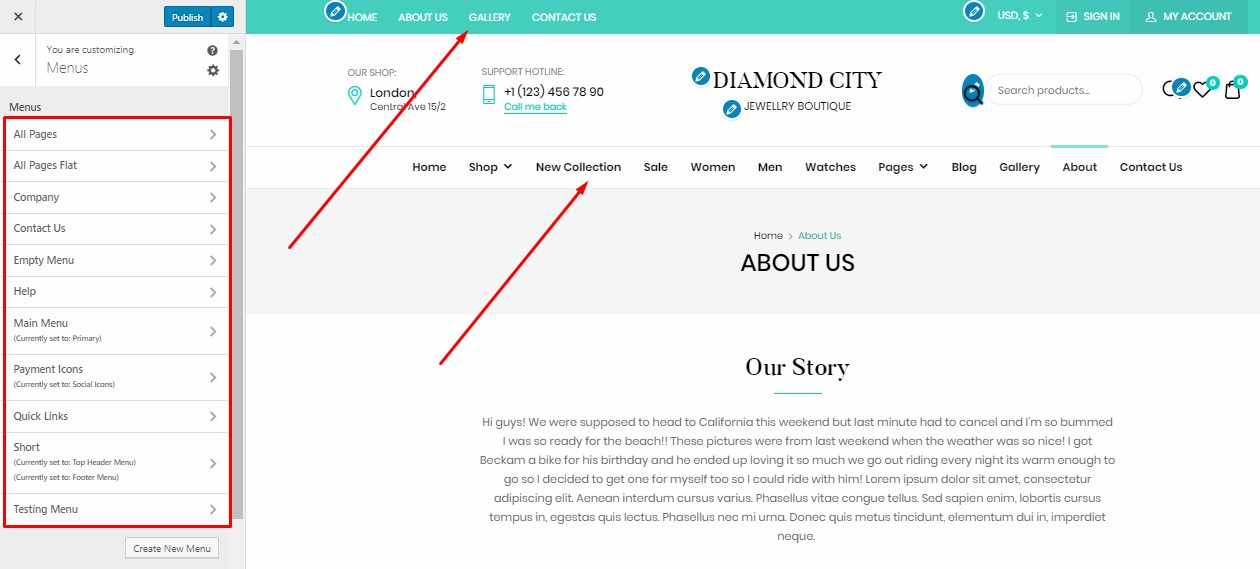
Setting up Menu
Usually main menu is the most important navigational element of a website. WordPress includes easy to use mechanisms for creating and maintaining navigation menus.
This is the main menu which comes with DiCi sample data:

It can be accessed at Appearance -> Menus section of your WordPress dashboard.
In our theme we use Max Mega Menu plugin: https://wordpress.org/plugins/megamenu/
When Demo Data installation procedure will be finished,set Demo Menu and edit it according to your needs. If you want to edit menu appearance or color scheme, just follow this link https://www.megamenu.com/documentation/installation/ and stay informed with plugin's official documentation.
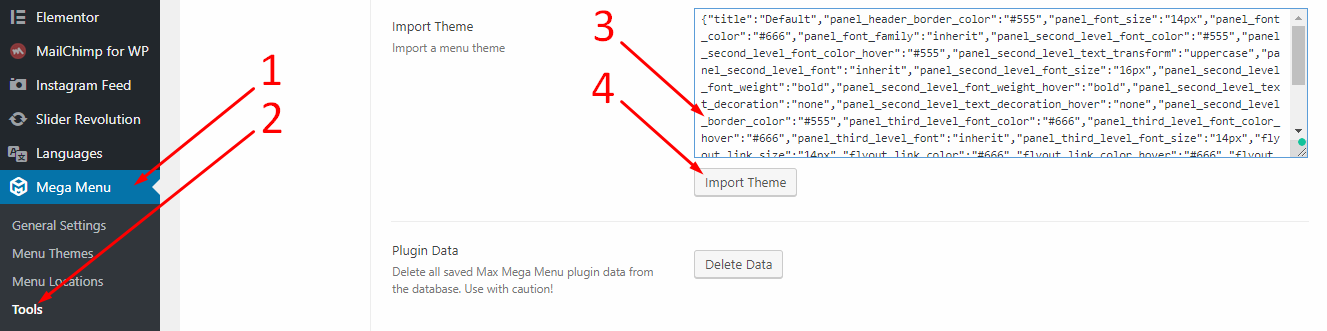
If you want to install mega menu separately, without full demo data, follow wp-dashboard --> Mega Menu--> Tools and fill out "import Theme" field with code below and hit "import" button: follow the link to download file with DiCi theme demo menu
In this case all custom menu features will be applied to your current menu,but mega menu should be created from the very beginning.
Mega Menu official documentation: https://www.megamenu.com/documentation/mega-menus/
You can learn more about WordPress menus in the following articles:
https://codex.wordpress.org/Navigation_Menus
https://codex.wordpress.org/Appearance_Menus_SubPanel
https://docs.woocommerce.com/document/docs-menus/
Setting up Pages
In WordPress, you can write either posts or Pages. Pages are for content such as "About," "Contact," etc. Pages live outside of the normal blog chronology, and are often used to present timeless information about yourself or your site - information that is always applicable.
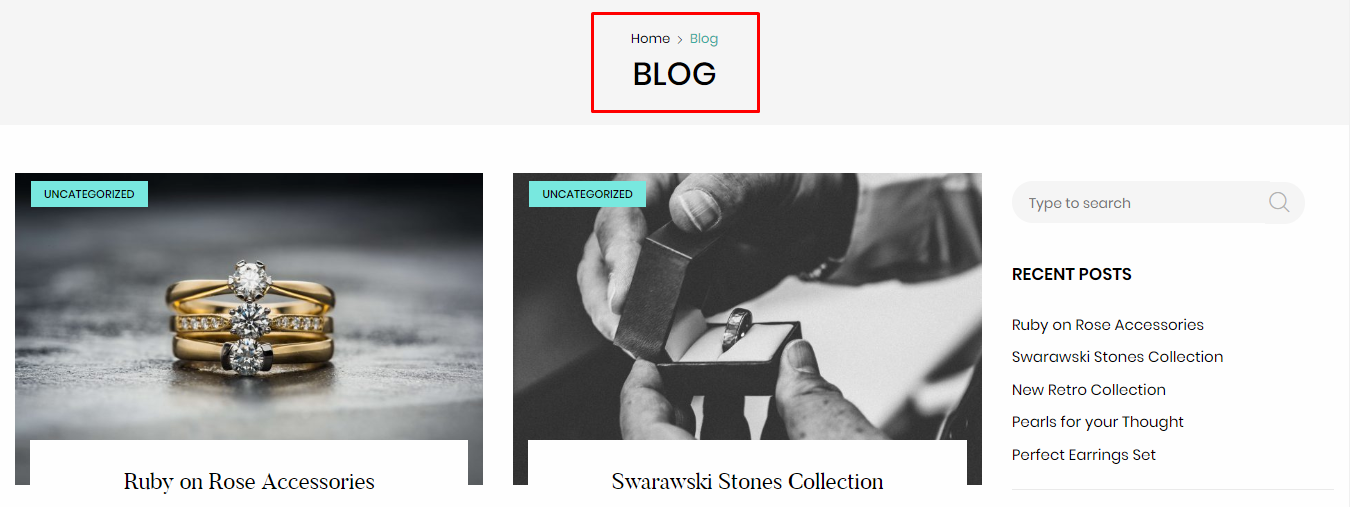
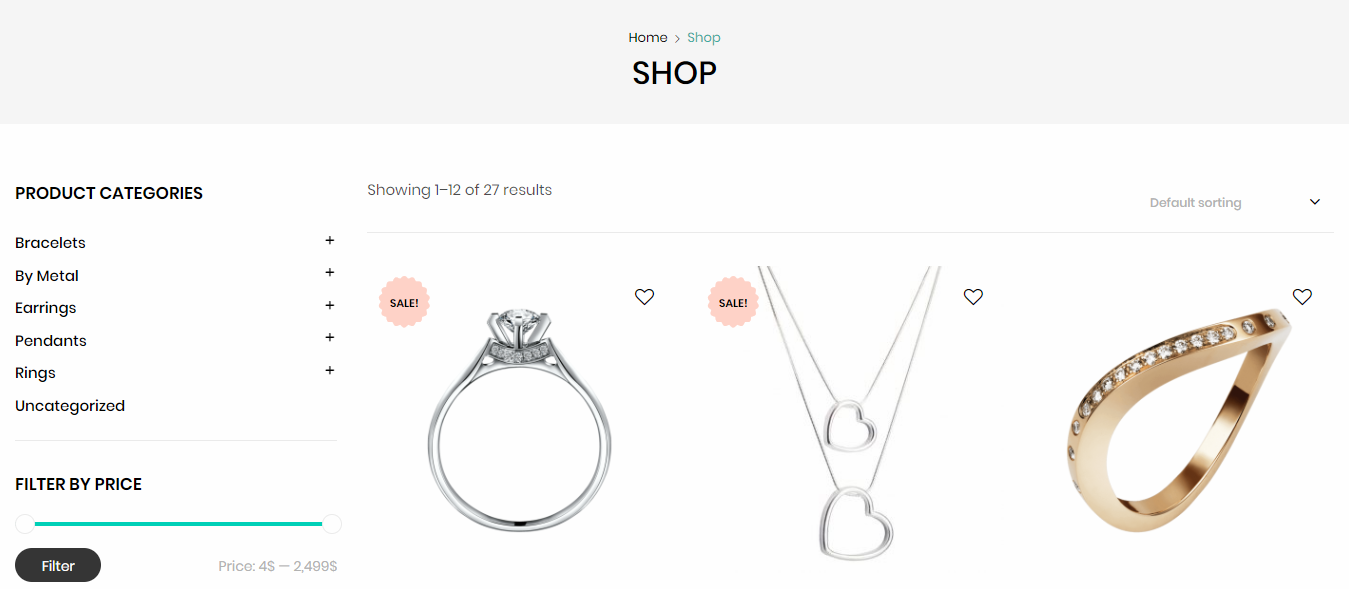
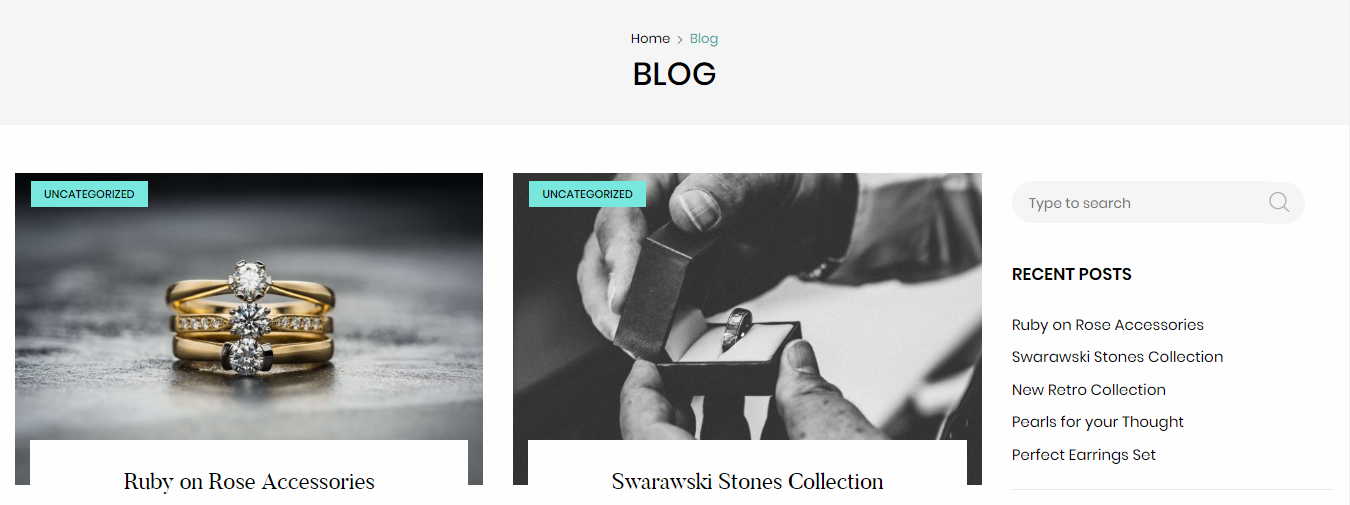
Breadcrumbs
If you plan on using Yoast SEO Plugin on your site, DiCi theme allows integration of Yoast breadcrumbs on all pages except shop. Shop pages are using standard WooCommerce breadcrumbs.
To add YOAST breadcrumbs to your site please follow these simple steps:
1. Install and activate Yoast SEO plugin
2. Go to SEO -> Dashboard -> Features in your WordPress Dashboard
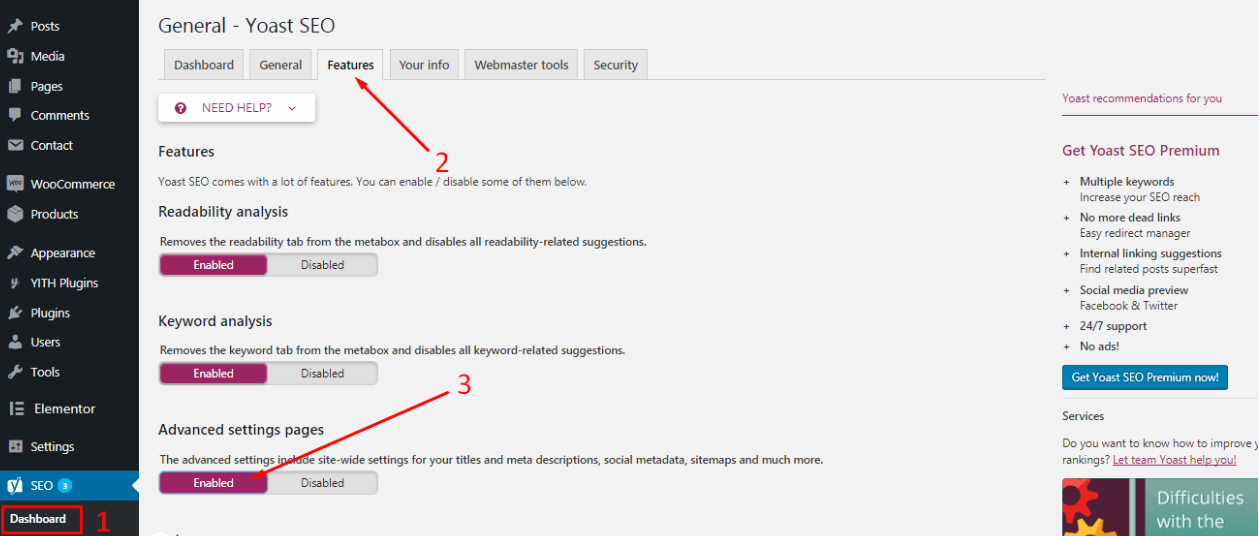
3. Switch Advanced setting pages option to enabled
4. Go to SEO -> Advanced -> Breadcrubms
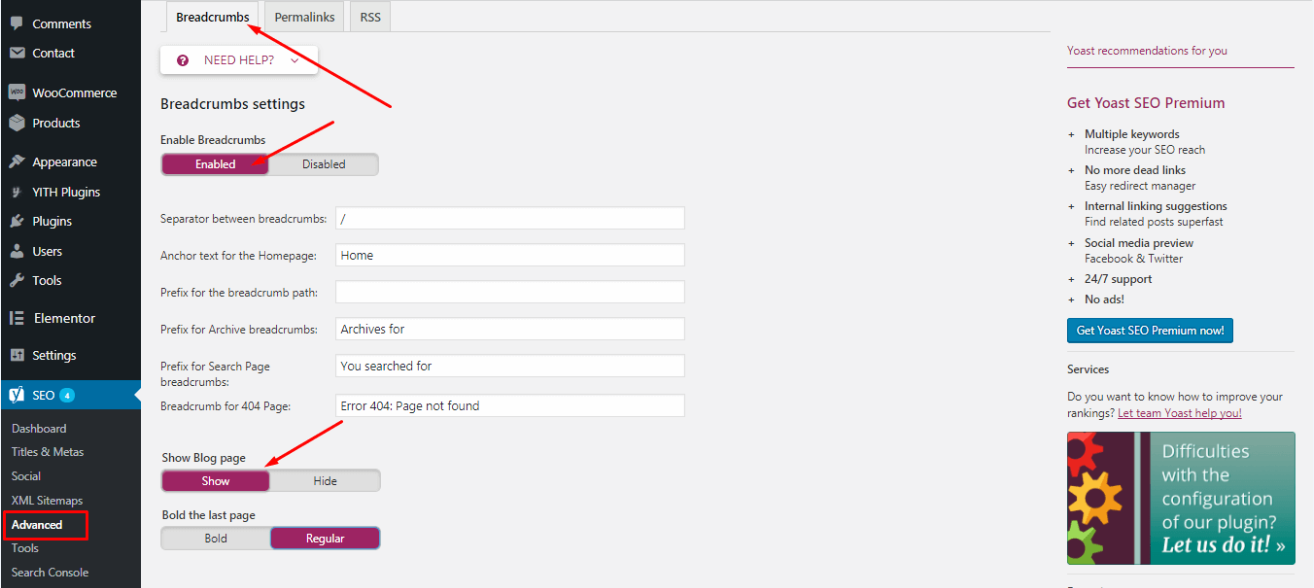
5. Switch Breadcrubms to enabled and make an additional setting if needed
You can learn more about WordPress pages in the following article of WordPress Codex: https://codex.wordpress.org/Pages
Setting up Shop
In DiCi WordPress theme ecommerce functionality is introduced by WooCommerce plugin. With endless flexibility and access to hundreds of free and premium WordPress extensions, WooCommerce now powers 30% of all online stores - more than any other platform.
Please be sure to check out the very detailed WooCommerce documentation: https://docs.woocommerce.com/documentation/plugins/woocommerce/
Setting up Blog
In DiCi blog is a part of your website where you can maintain an ongoing chronicle of information. It consists of the main blog page - an archive of blog entries presented as a list of entries in reverse chronological order with thumbnails and pagination, and the actual blog entry pages, on which you can see full content of each particular blog entry. Blog entries can be commented by your site's visitors which gives you additional opportuniry of interacting with your existing and potential customers.
Blog is a great place to deliver your message to the world, show the best sides of your business, and attract new customers. And since we have created great designs and layouts for your blog entries to look gorgeous, you just need to come up with some excellent content to type in that blog.
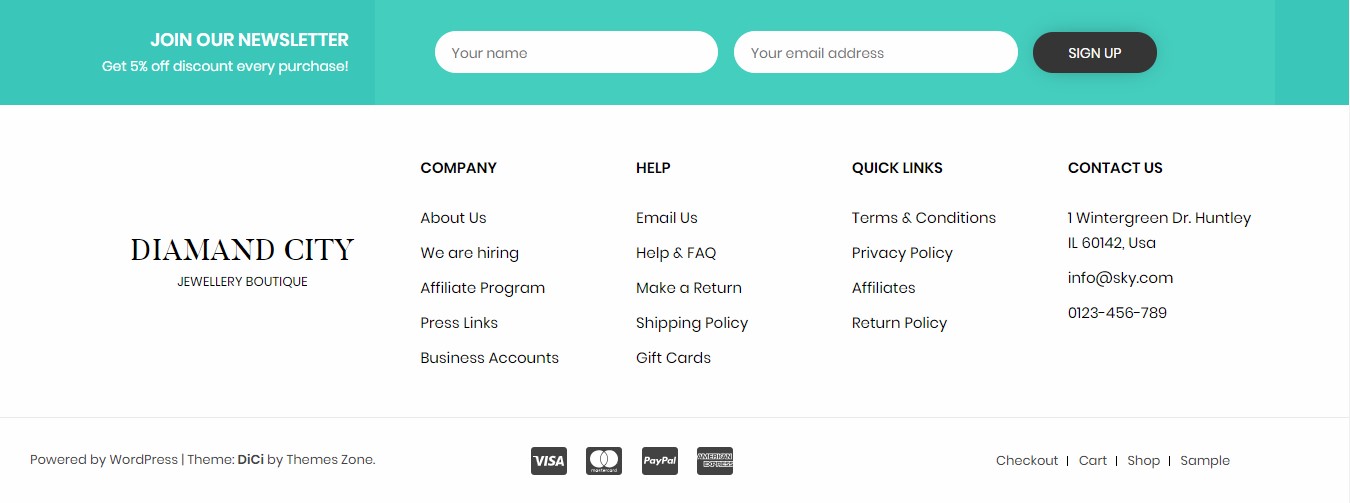
Setting up Footer
Technically, footer represents the bottom section of a web page which contains information like copyright notices, social links etc. It also often contains code and scripts that a WordPress theme developer would want to include in the page but after loading the rest of the page content. In DiCi all scripts are included in the theme footer.
Let's discuss all elements that are used in header section of our live demo. The same result can be achieved after Demo data installation or manual setup. First of all, feel free to follow: wp-dashboard-->appearance-->Header/Footer Builder DiCi Theme to enter Elementor's features then type dici and be ready to drag & drop needed widgets:
Then, be ready to drag & drop needed widgets:
Mailchimp Wordpress plugin is responsible for top footer sign-up form, therefore, make sure that this part of functionality is successfully installed and activated within wp-dashboard-->plugins-->Mailchimp

Create needed form within wp-dashboard-->Mailchimp for WP-->form
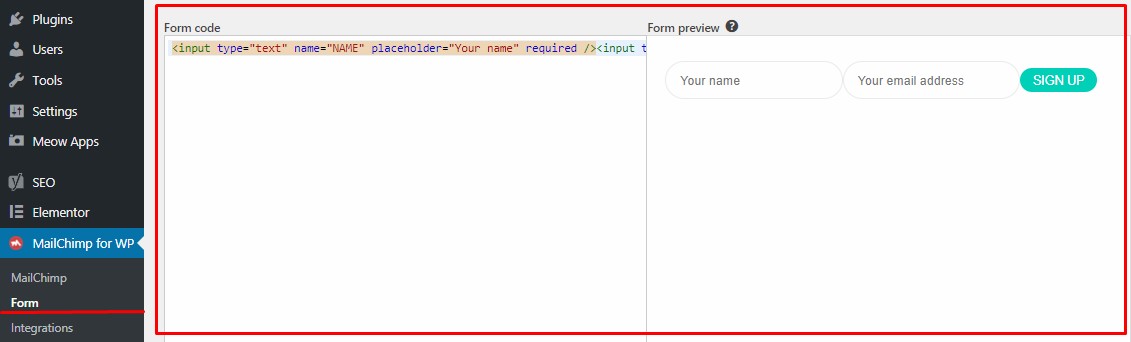
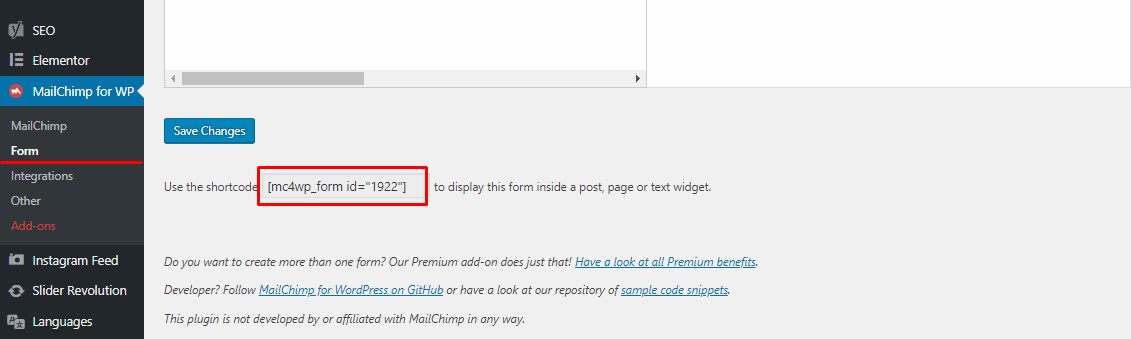
Or just use generated shortcode to locate created form wherever you need on your site:
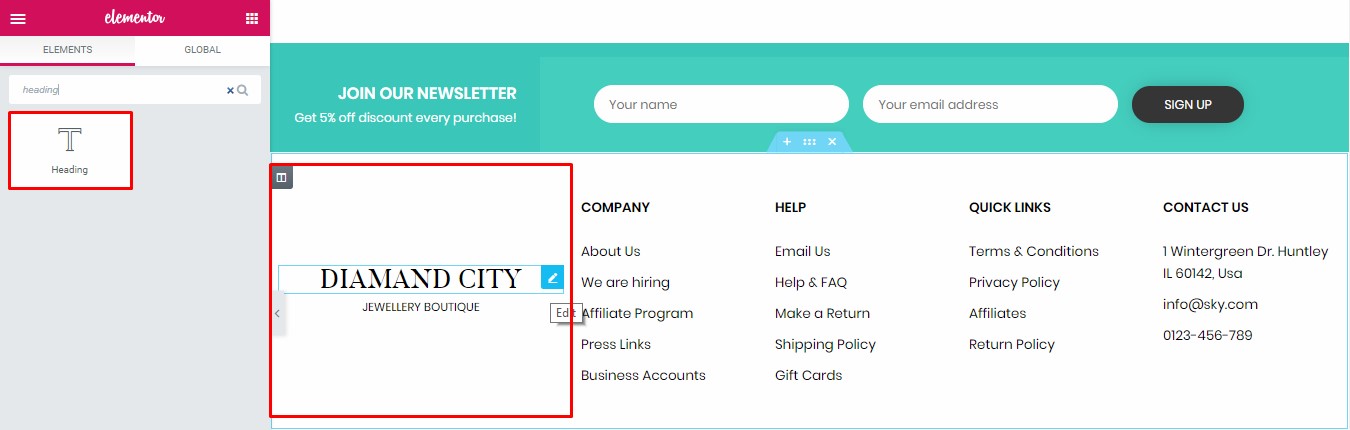
- Footer Col#1 includes simple HEADING element.
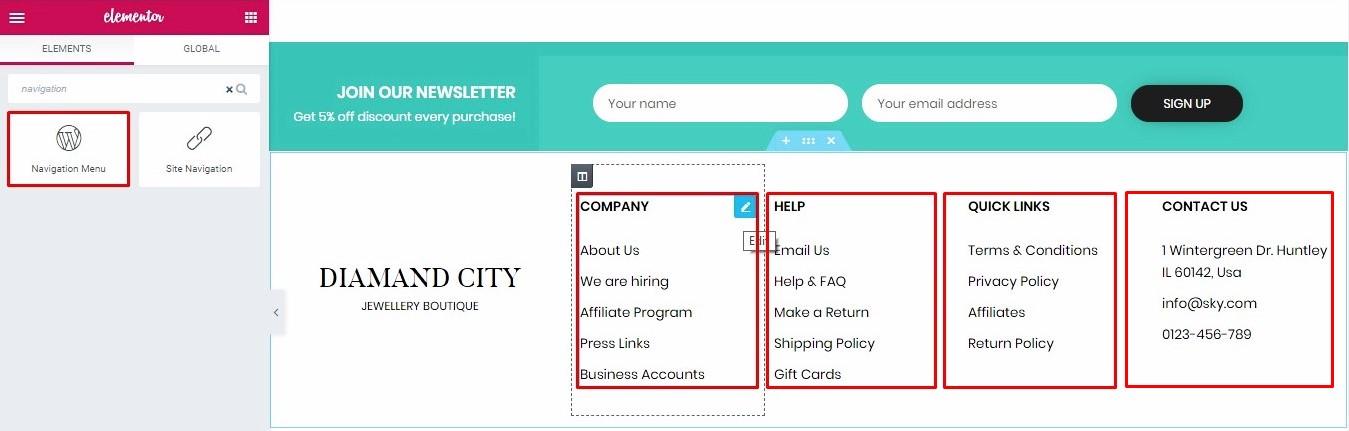
- Footer Col#2 / Col#3 / Col#4 / Col#5 elements were reproduced by previously created Navigation Menu elements.
In DiCi theme footer also contains Copyright section, Payment Icons and bottom menu:

- Copyright info can be edited within .

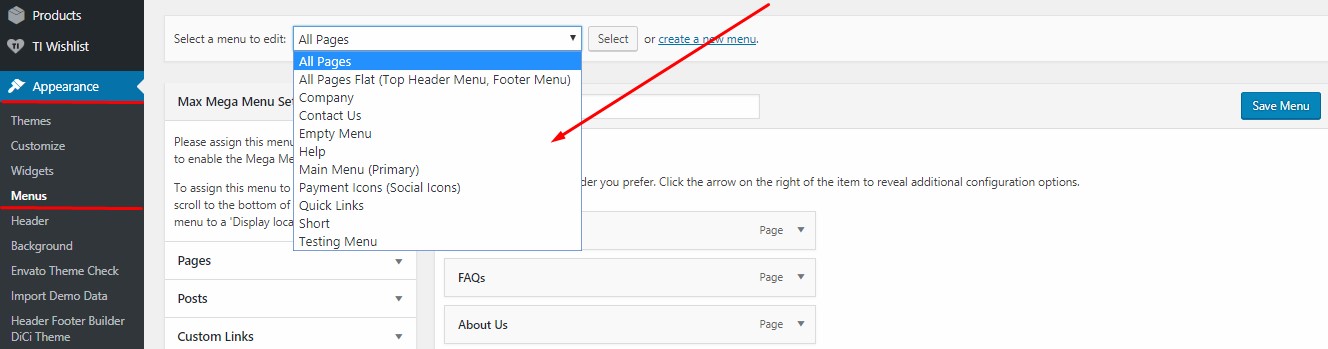
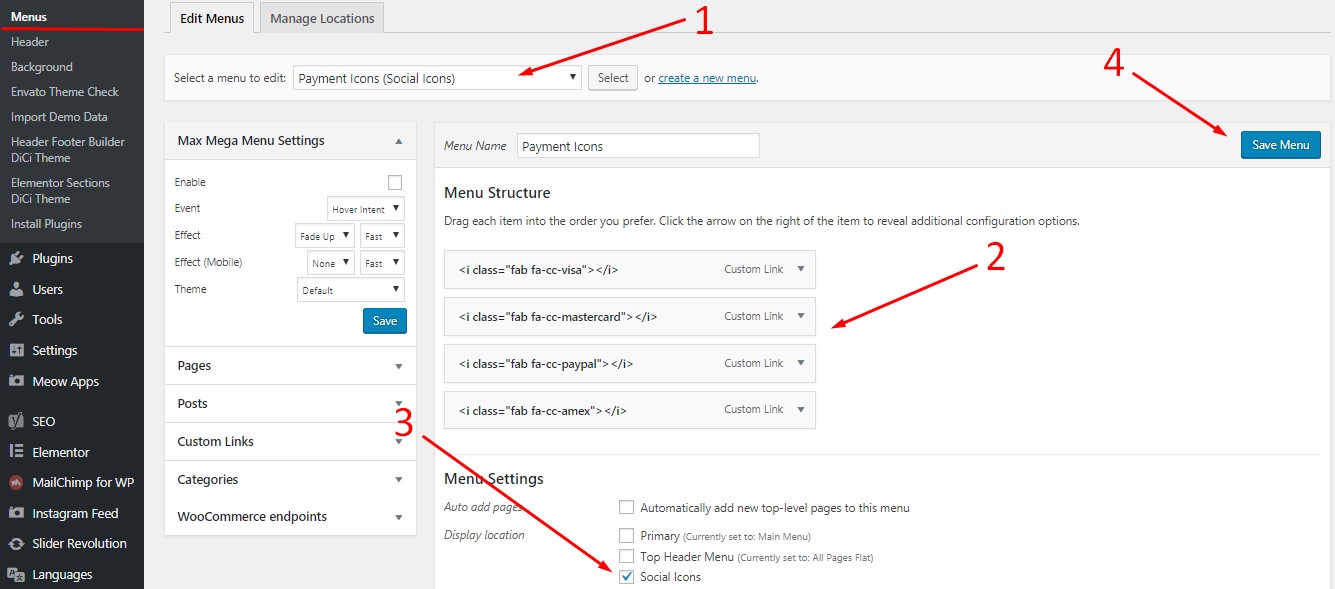
- Payment Icons element was created within wp-dashboard-->appearance-->menus-->Payment Icons menu.

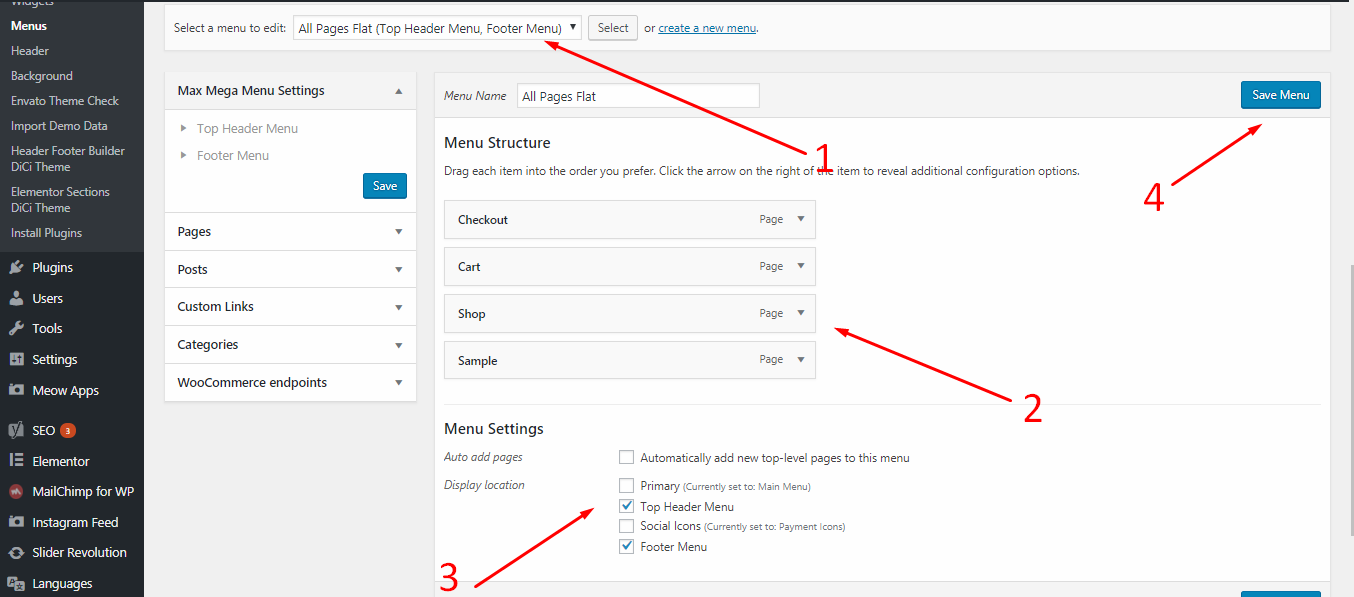
- Bottom Menu was created within wp-dashboard-->appearance-->menus-->All Pages (footer menu) as well.

Edit mentioned menu according to your personal needs or deactivate it at all:

Set correct "Footer Menu" location and this menu will be displayed at the bottom of your site.
Theme Options
DiCi has a powerful set of theme options on board to make your user experience pleasant and to provide you with effective customization tools. One of importan peculiarities of DiCi theme options is that they are available through WordPress Customizer and will change depending on the page you are customizing at the moment.
DiCi theme options facilitate control over certain crucial areas of your DiCi-based website.
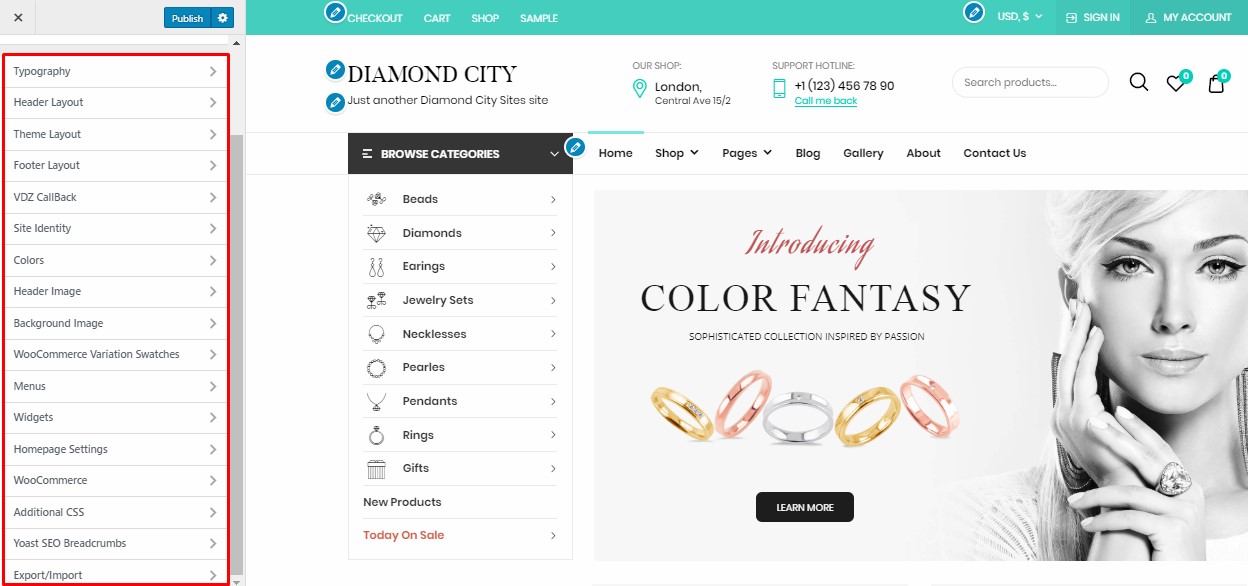
Theme options can be accessed in your WordPress menu at Appearance -> Customize. DiCi theme options consist
of 16 sections: Typography , Header layout , Theme layout , Footer layout , WDZ Callback , Site Identity , Colors , Header Image , Background Image , WooCommerce Variation Swatches , Menus , Widgets , Homepage Settings , Additional CSS , Yoast SEO Breadcrumbs , Export/Import.
Typography options
This set of theme options allows to manage Typography/Colors features within customizer.
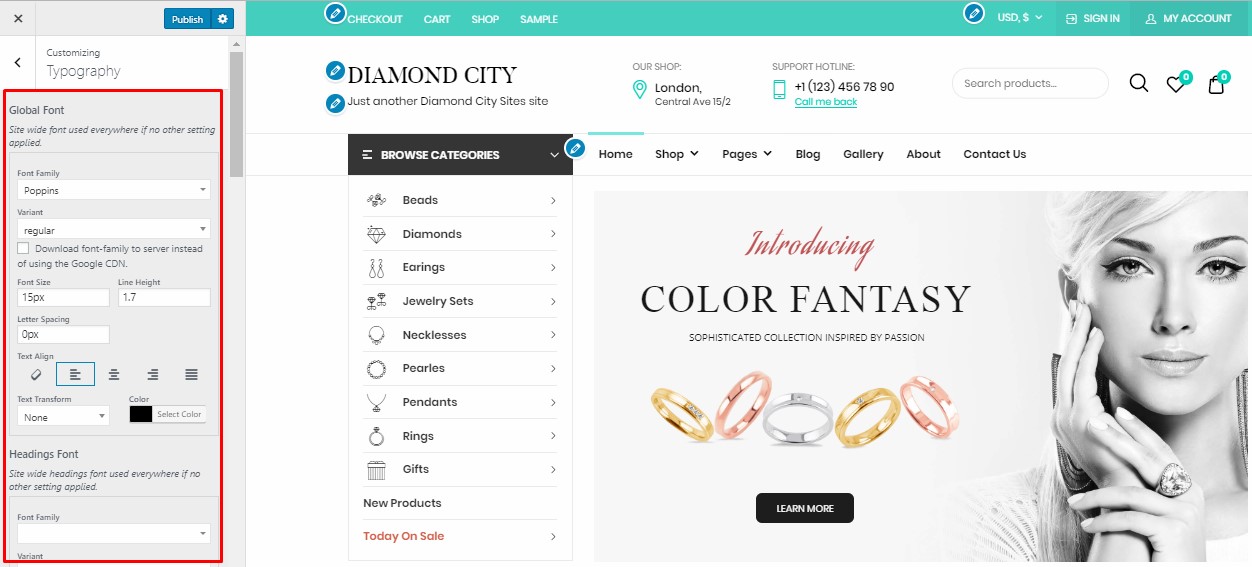
This section consists of a constant and a variable part, which changes depending on the page you are editing in Customizer at the moment. These are the main typography option blocks:

Option blocks have Font family dropdown selector with Google Fonts in it, a variant of the font - regular, italic, different font weights, font size, line height, letter spacing options, text alignment, text transform, text color options. These options provide you with supreme control over fonts on your site.
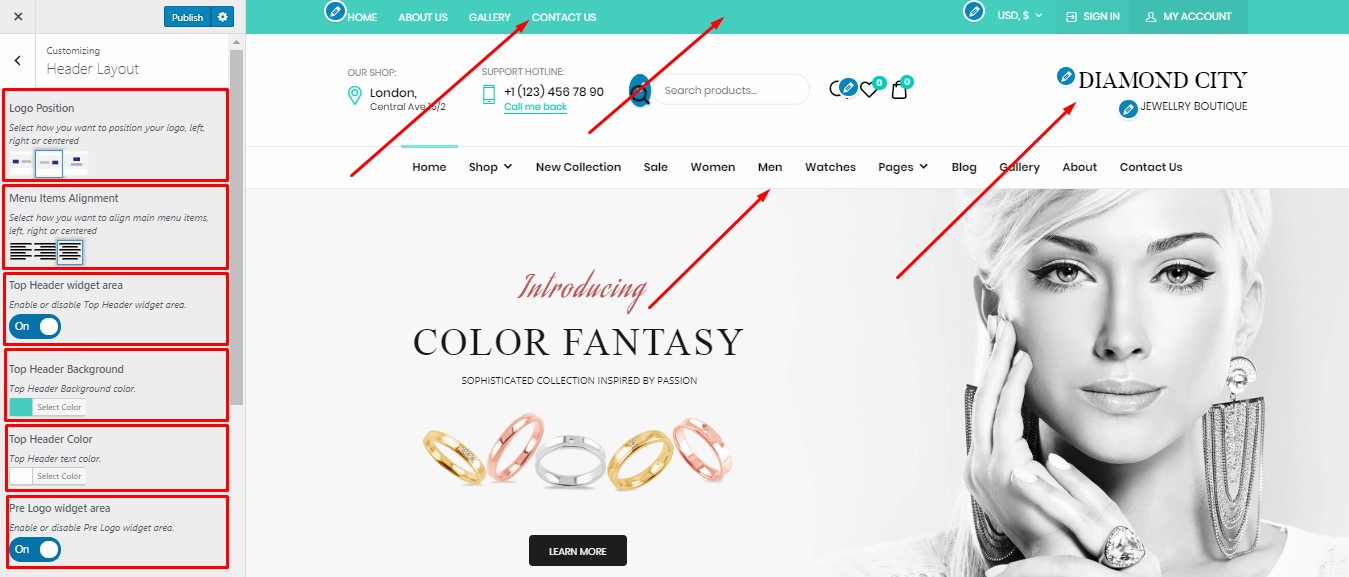
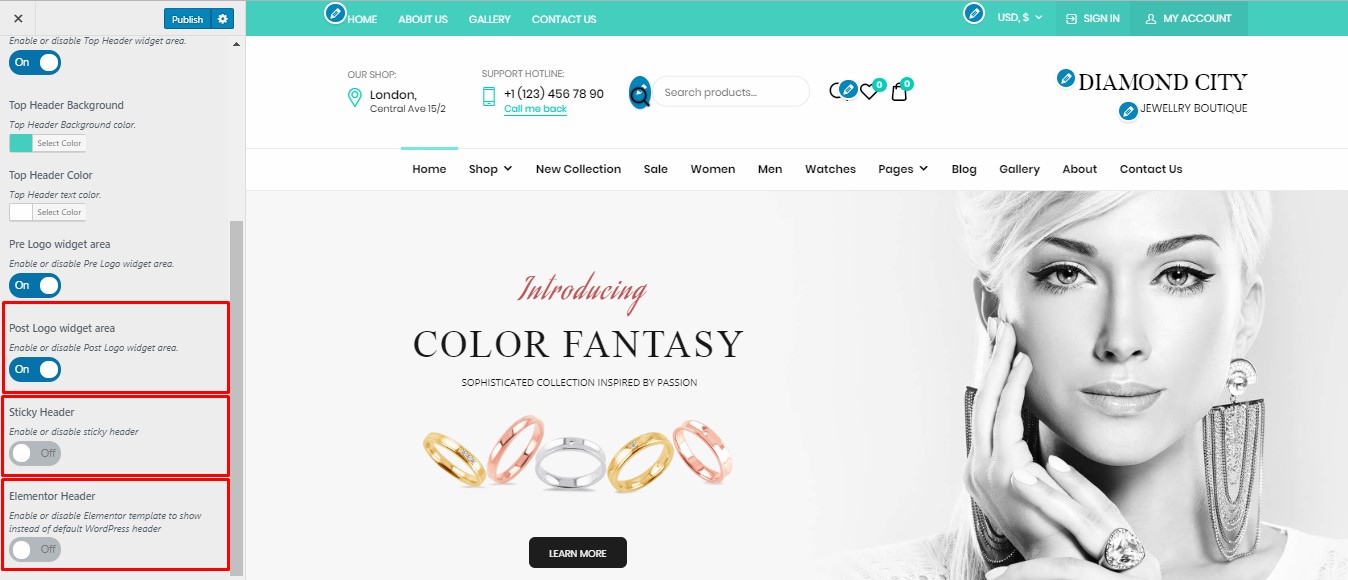
Header Layout helps to manage header elements
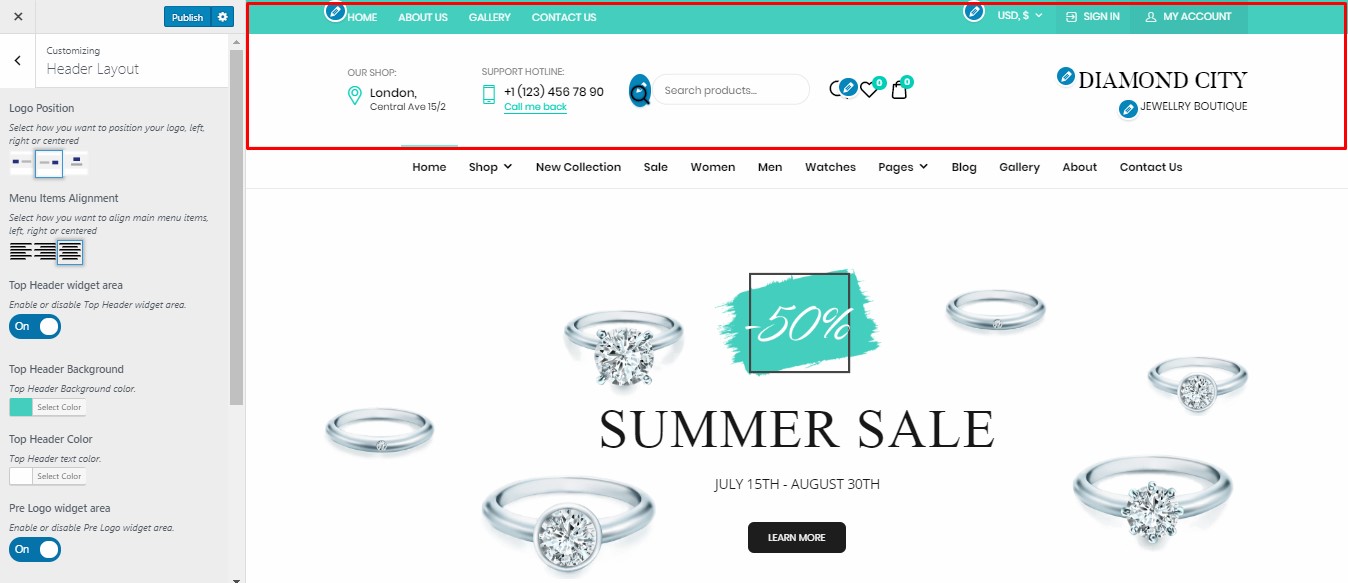
- Logo Position. Relocate site logo according to your needs;
- Menu Items Alignment. Edit menu alignment using this feature;
- Top Header widget area. Enable/disable top header widget area;
- Top Header background. Edit color of top header background;
- Top Header color. Edit color of top header links;
- Pre Logo widget area. Enable/disable pre-logo widget area;
- Post Logo widget area. Enable/disable post-logo widget area;
- Sticky Header. Enable/disable sticky header on your site;
- Elementor Header. Enable/disable Elementor template to show instead of default Wordpress header;
Page Layout. Select how you want to position your sidebar, left, right or no sidebar on exact page

Footer Layout. Select how you want to edit all elements and sections within site footer.
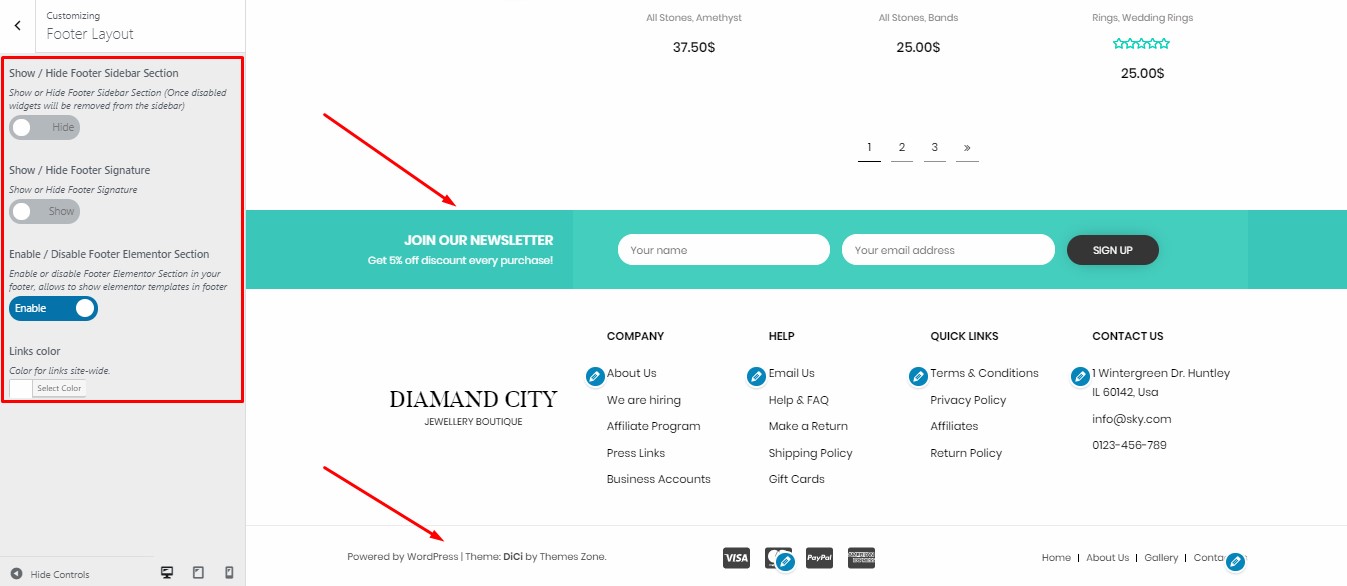
- Show/Hide Footer Sidebar section. Once disabled, widgets will be removed from footer sidebar;
- Show/Hide Footer Signature;
- Enable/Disable Footer Elementor Section. Allows to show Elementor templates in footer;
- Links color. olor for links site-wide.
Shop Page Options allows you to manage elements within SHOP page.
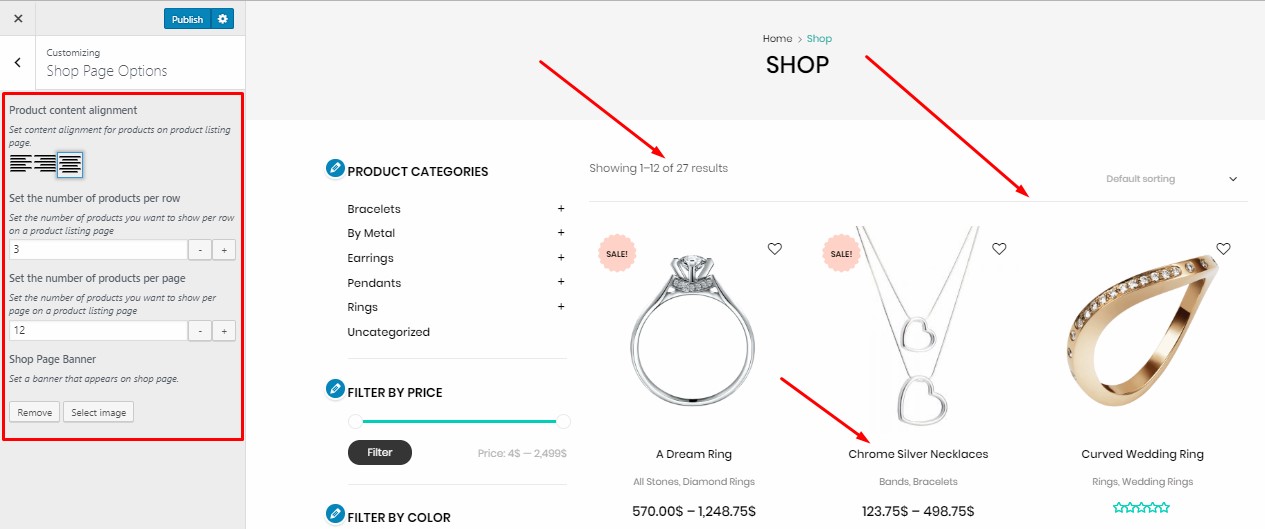
- Product content alignment. Set content alignment for products on product listing page.;
- Set the number of products per row. Set the number of products you want to show per row on a product listing page;
- Set the number of products per page. Set the number of products you want to show per page on a product listing page;
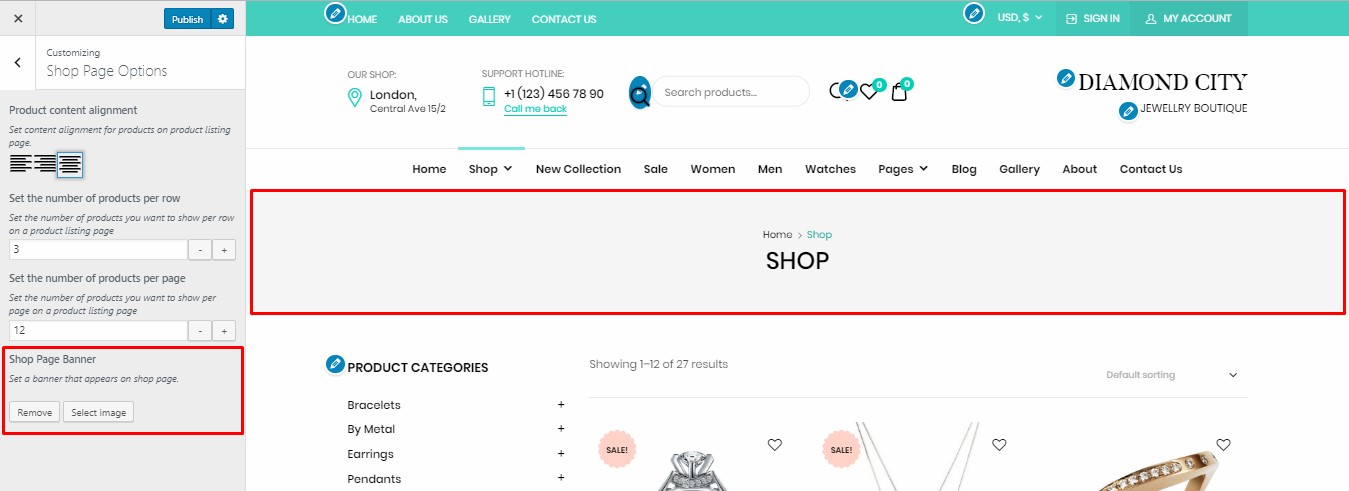
- Shop Page Banner. Set a banner that appears on the top of shop page.
VDZ CallBack Widget Settings. Alloes to output VDZ CallBack Widget on Front.

Enter Plugin Settings within Customizer or just follow wp-dashboard-->settings-->VDZ Callback settings

Site Identity allows setting site logo, site title and favicon.

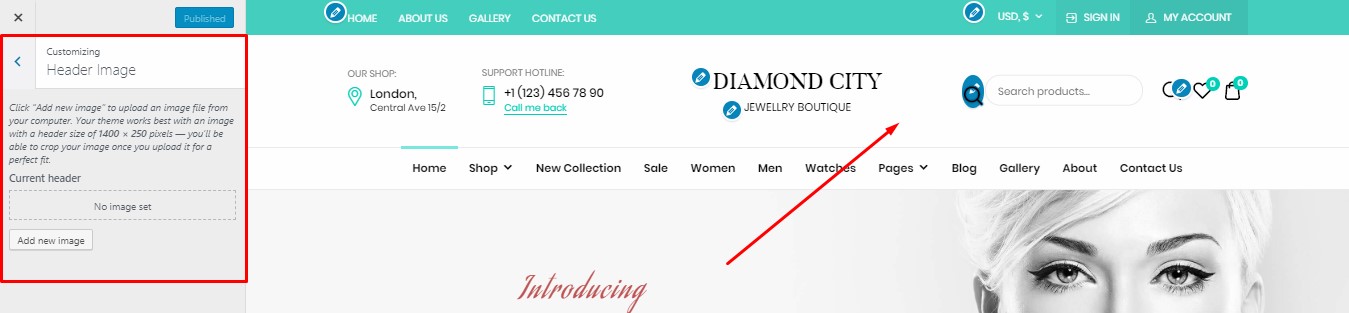
Header Image. Click “Add new image” to upload an image file from your computer. Your theme works best with an image with a header size of 1400 × 250 pixels — you’ll be able to crop your image once you upload it for a perfect fit.
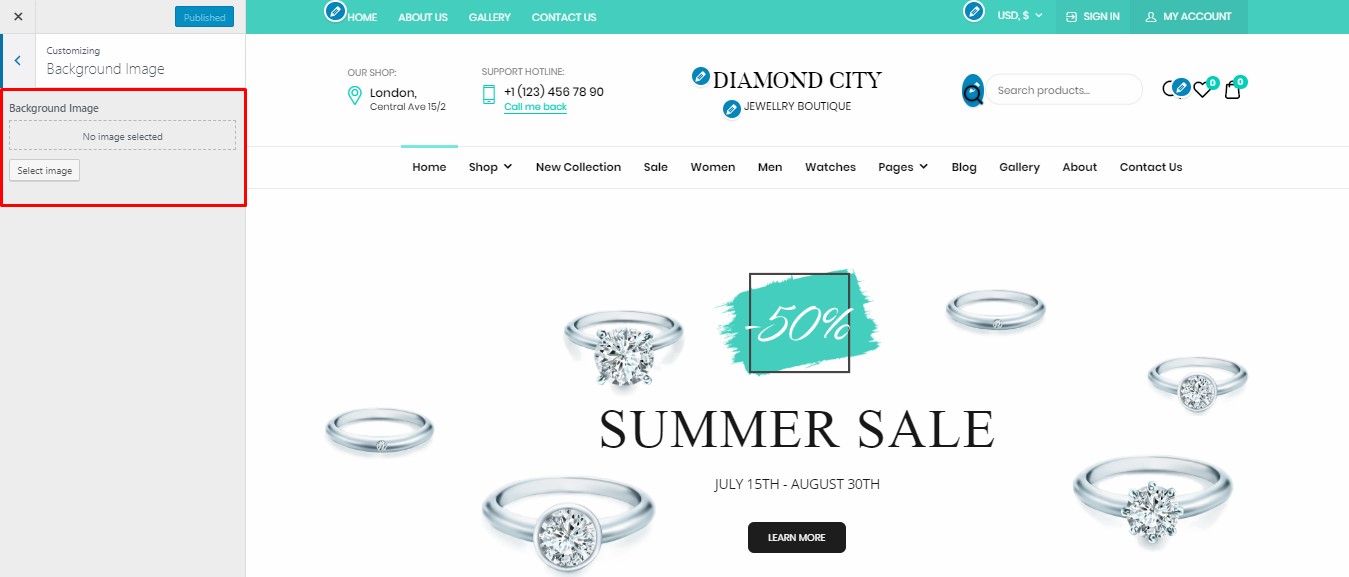
Background Image. Click “Select image” to upload an image file from your computer. You’ll be able to crop your image once you upload it for a perfect fit.
Woocommerce Variation Swatches.
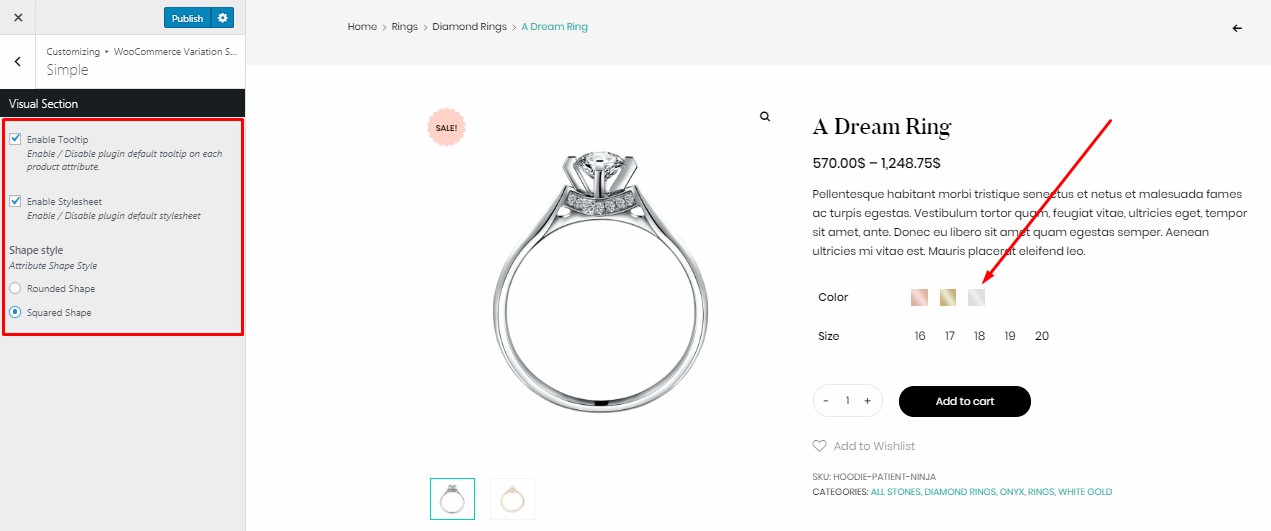
Advanced options are available as well.
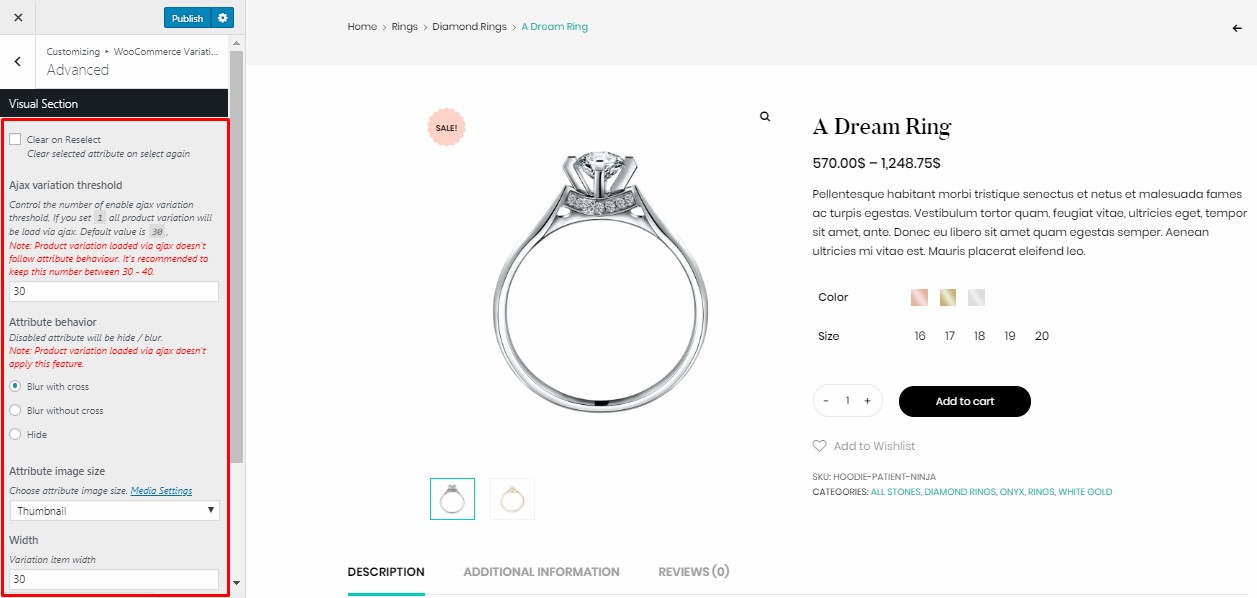
Advanced options are available as well.
Menus. This feature allows creating new menus or just setting previously created ones.
Elementor
Our coders find drag & drop Elementor Page Builder really well-coded and decided to build all theme content on it. This user-friendly environment allows creating good-looking pages with needed layout.

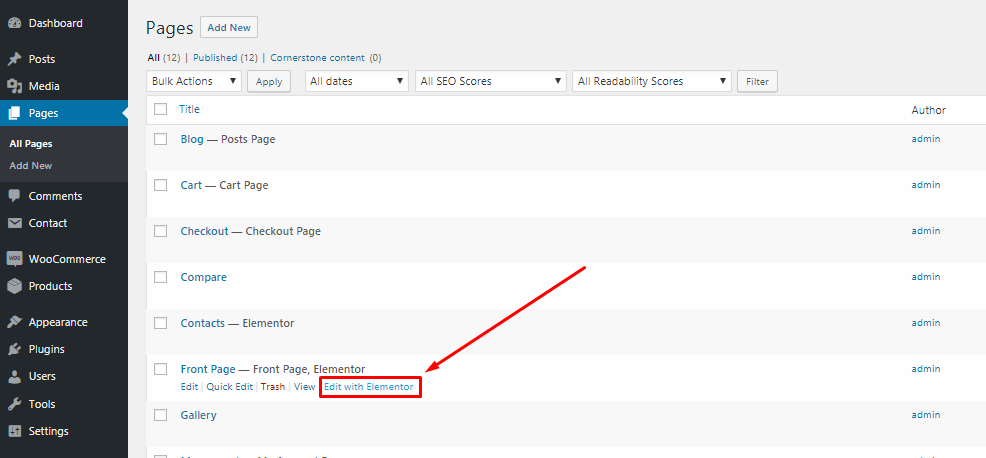
Integrated front-end editor gives an opportunity to implement changes on your website using visual editor and observe applied changes almost immediately. If you are ready to get started, there are to ways how to enter additional Elementor's dashboard: Just push additional button on the top of needed page to enter Elementor's editor:
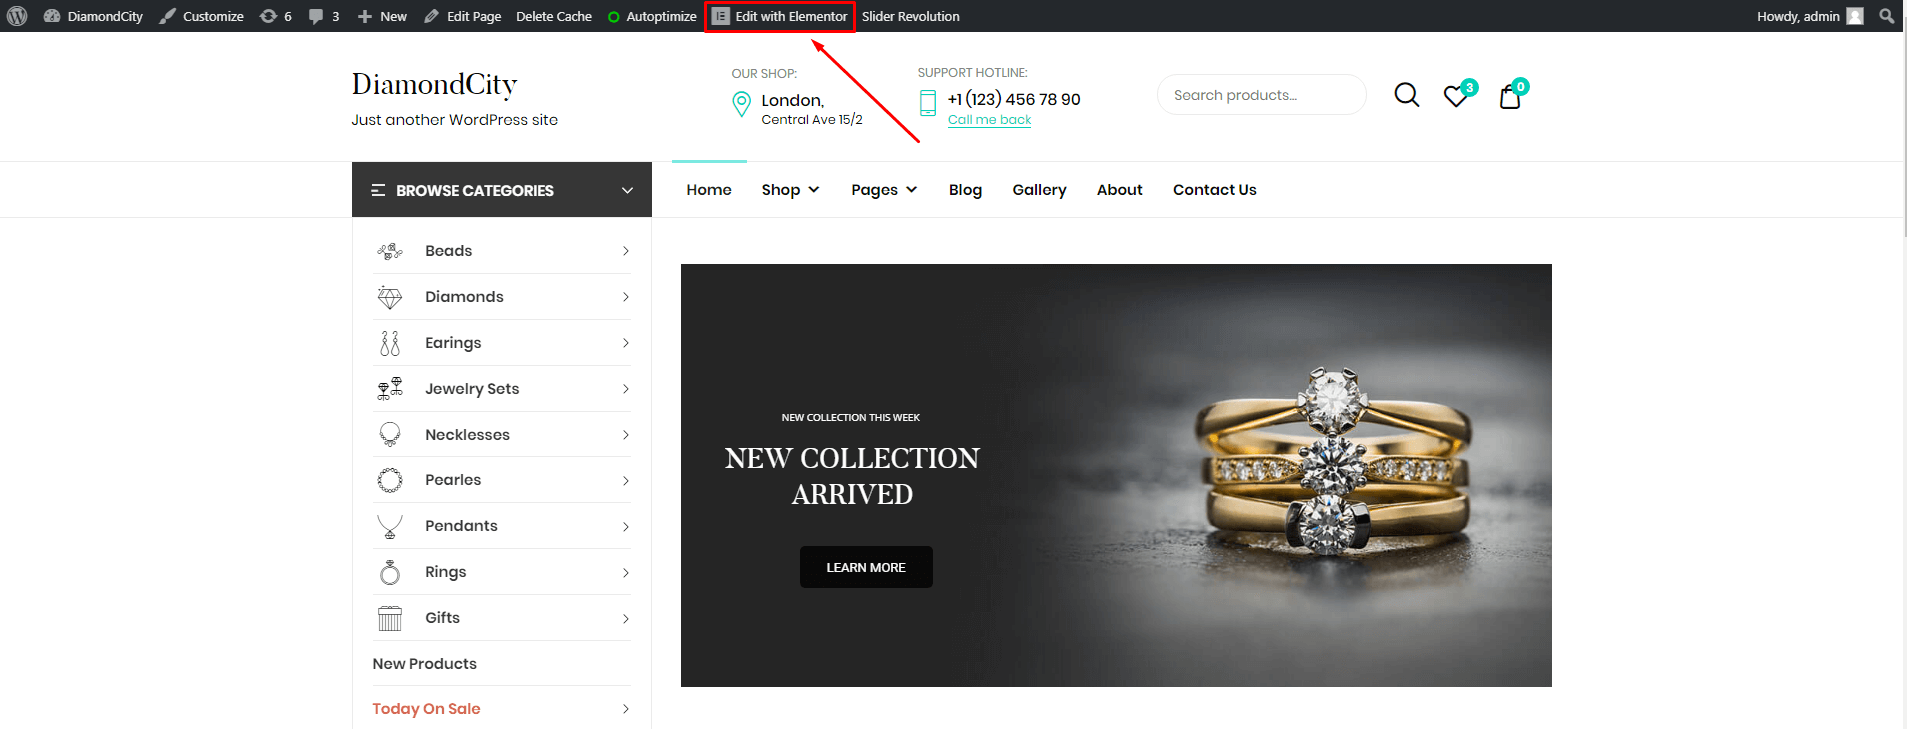
Or follow: wp-dashboard-->pages and push "edit with Elementor" within needed page.
Once you have entered Elementor, additional admin panel will appear on the left side of your screen.
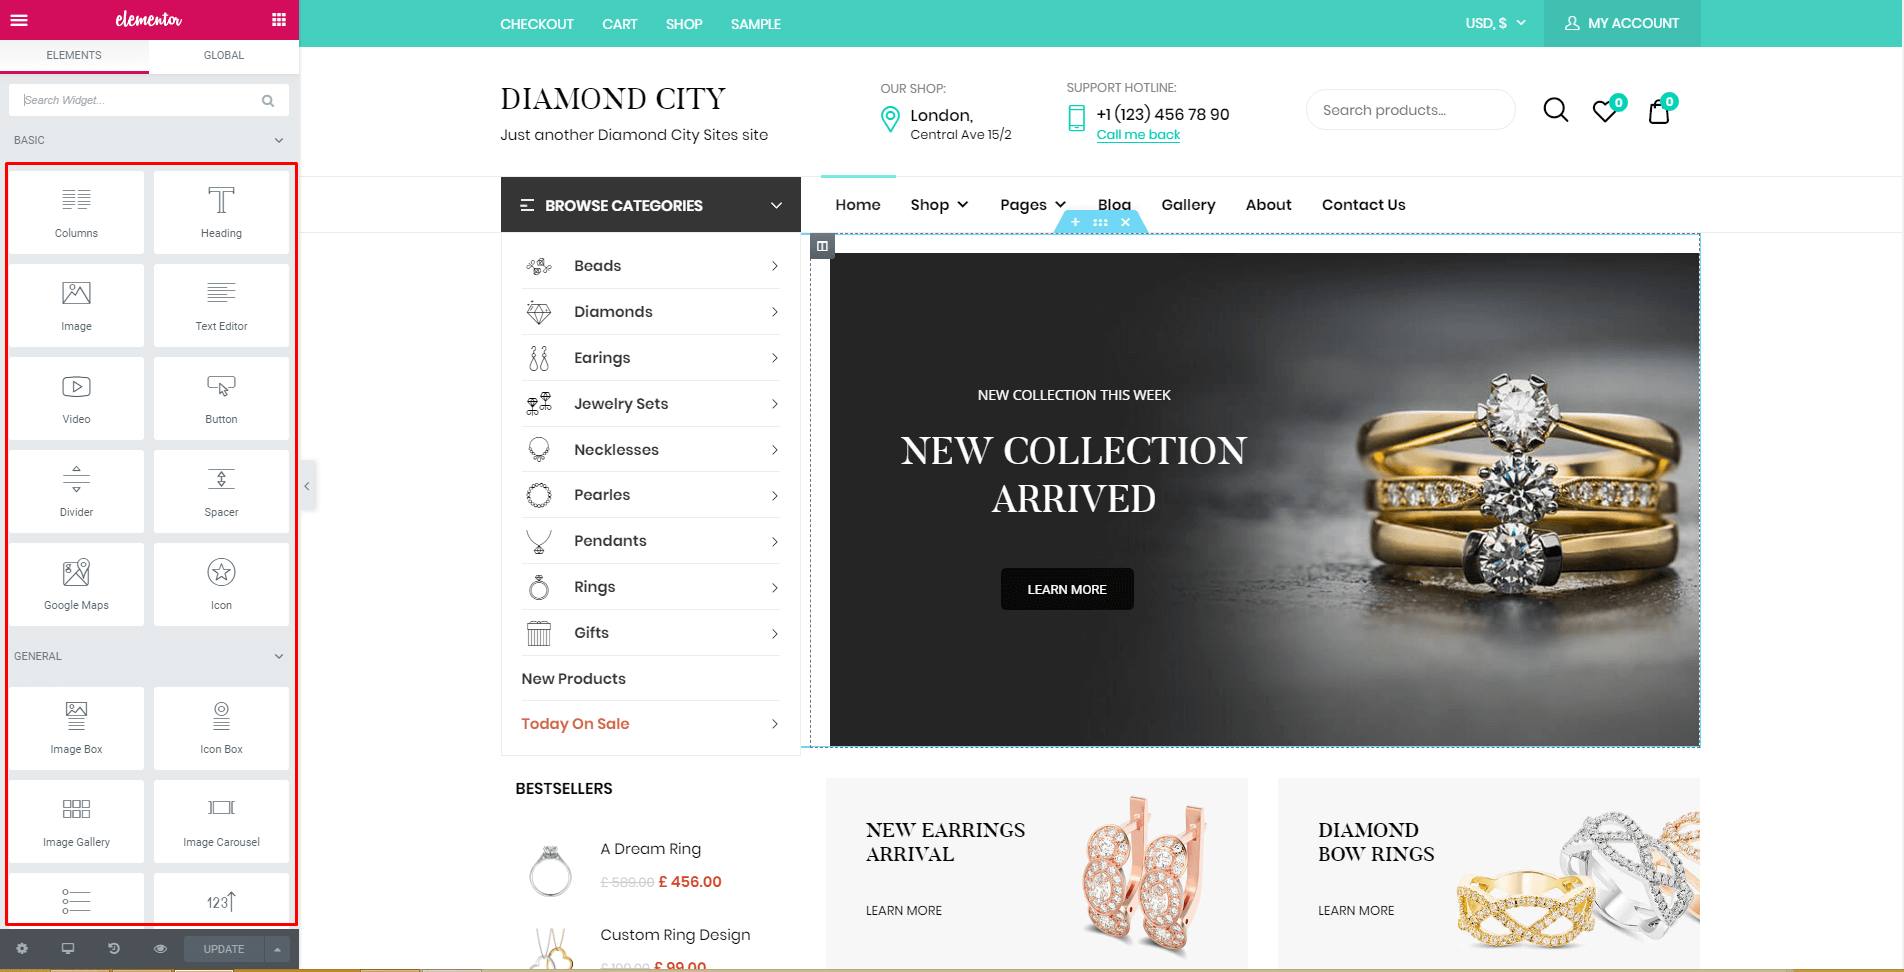
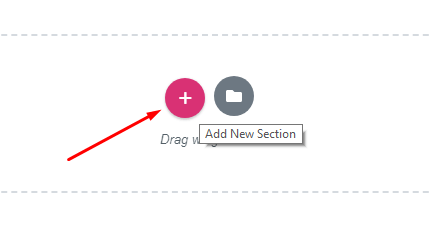
First 2 steps include "add section" and "set page structure"
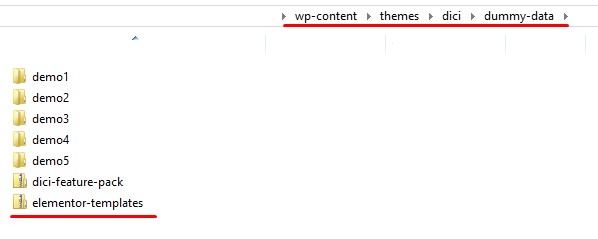
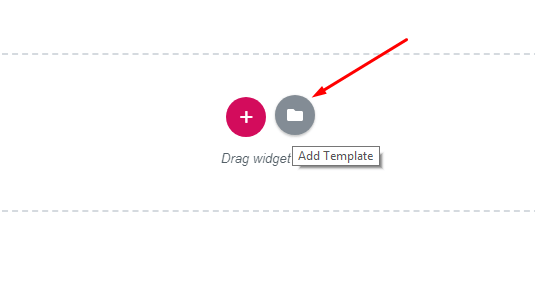
Like lots of other popular page builders, Elementor gives and oportunity to import pre-built pages from library. All templates that are used in our Demo Datas can be found in "Demo Data" folder in the root of theme package. Just import needed one and move forward:

Each section has its own settings, such as: layout/style/advanced;
- Layout (allows to edit content width, height, content gap, position etc.)
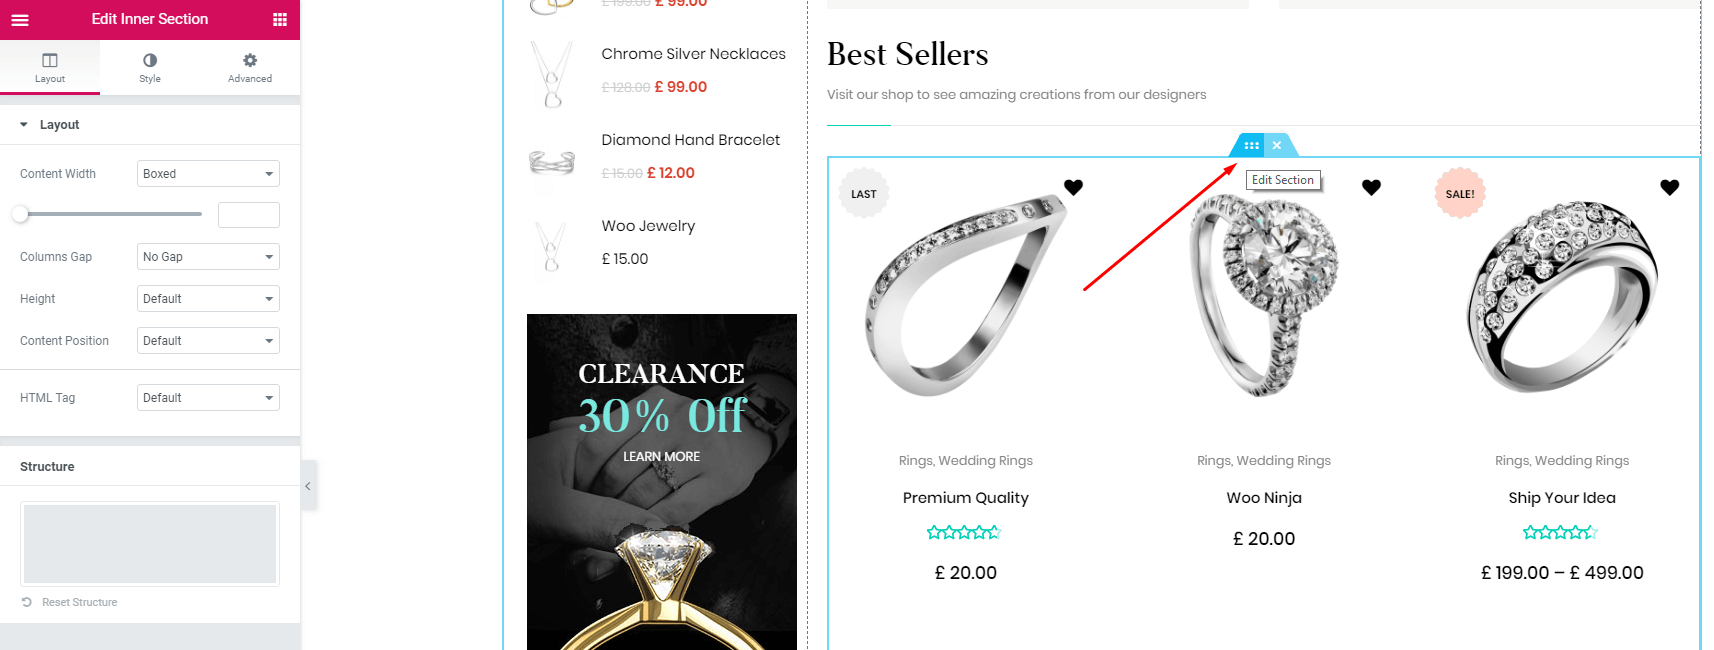
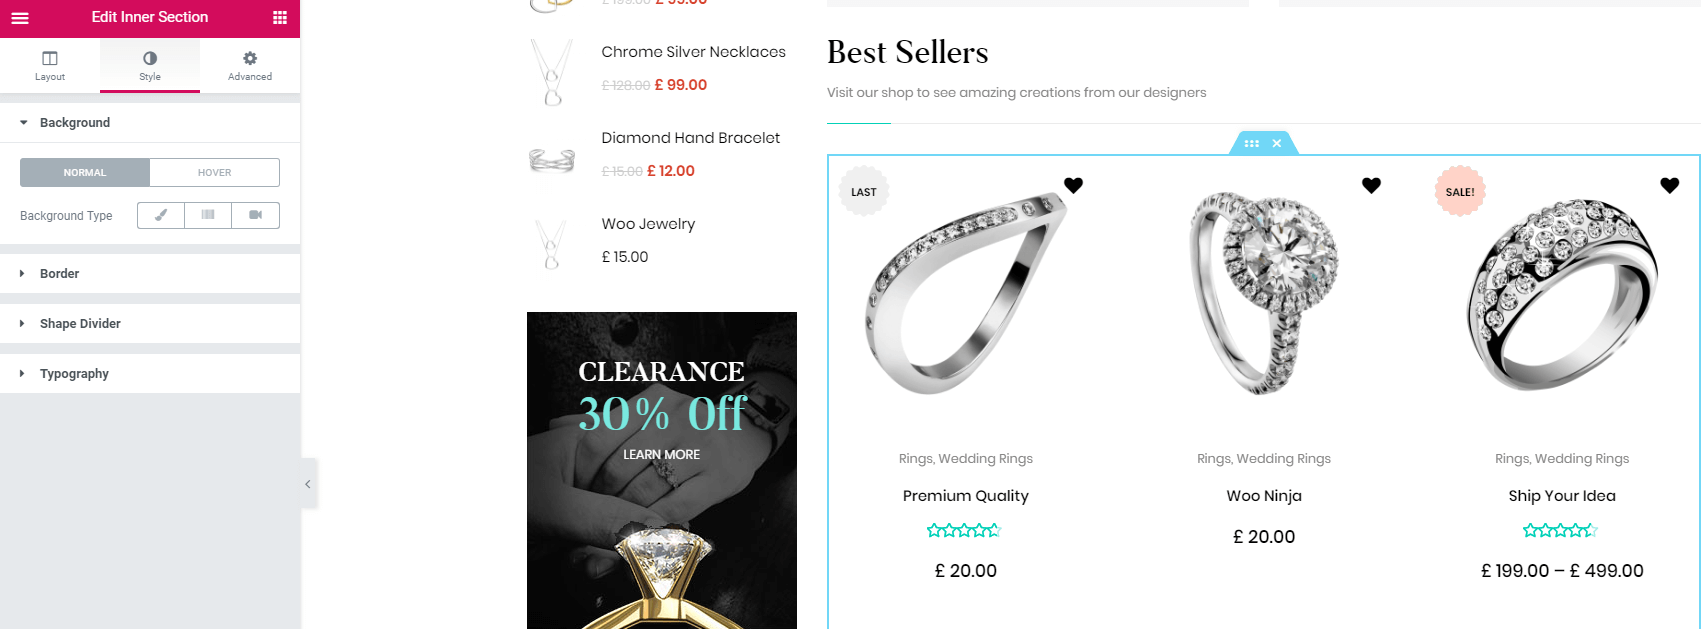
- Style (brings the possibility to edit background, border, shape divider, typography etc.)
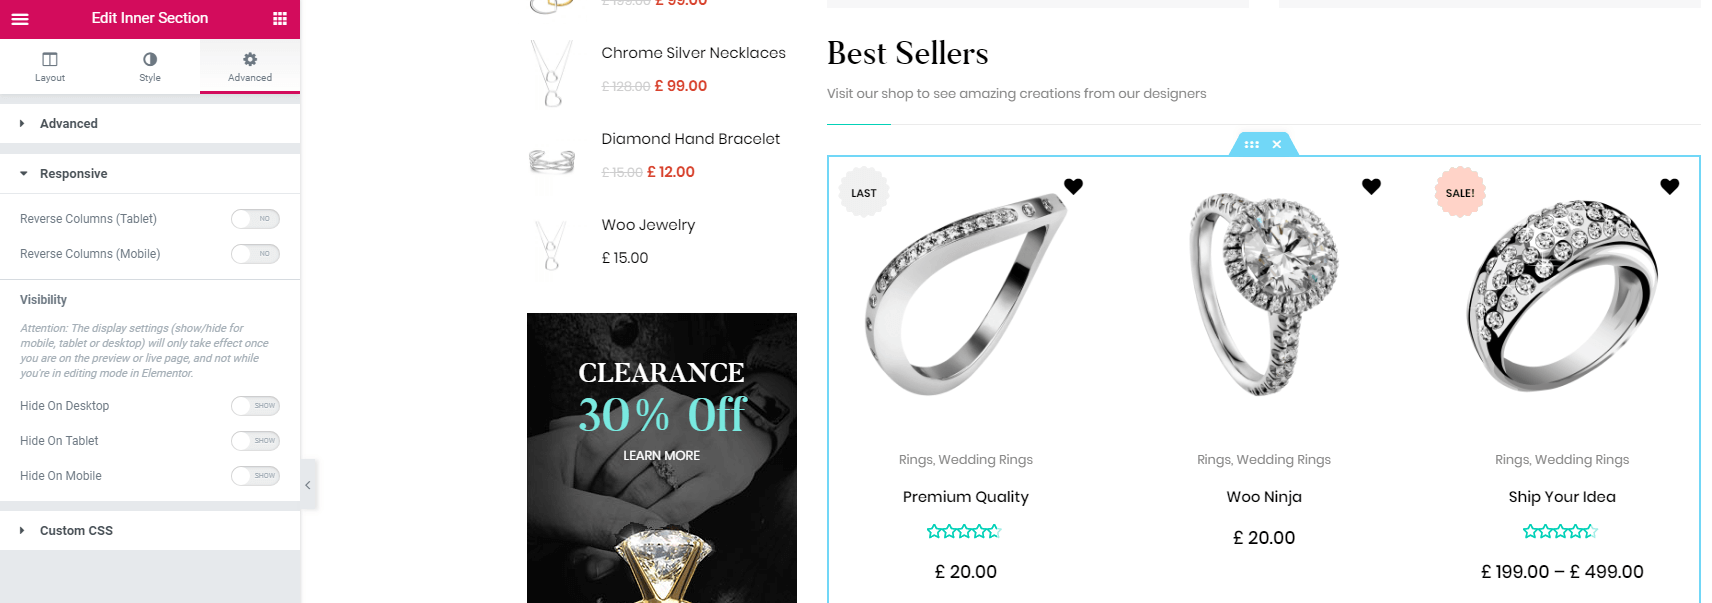
- Advanced (secton margin, padding, z-index, hover effects, responsive features and even custom CSS possibility)
Elementor allows you to manage number of content widgets and content elements, which you can place anywhere on the page and relocate them according to your needs anytime via full drag-and-drop support. Default DiCi theme functionality is equipped with more than 20 unique custom elements & widgets. Just drag element and locate wherever you want, save changes and move forward. All default Woocommerce and WordPress widgets are included as well.
In our DiCi WordPress theme you can observe several page layouts. Demo Data of this WordPress theme gives an opportunity not to waste time with building each layout from the very beginning and use pre-built ones:
All templates come with theme package (dummy data directory) and can be imported anytime via Elementor's Import tool
Let's look deeper at the 7 most used unique widgets that were developed especially for Elementor content builder and are used in DiCi theme. Enter Elementor dashboard and type "TZ" in Search field and system will light out all of them for you:

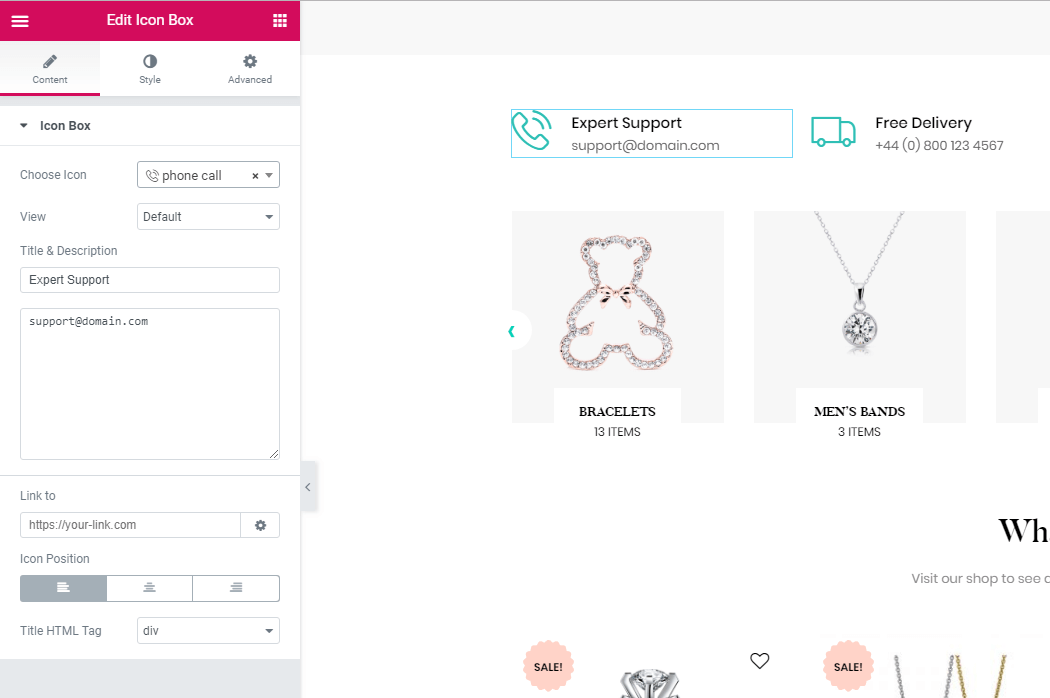
- Icon Box - the element allows you to choose icon out of the predefined list, add text next to it and link the whole element
to a URL
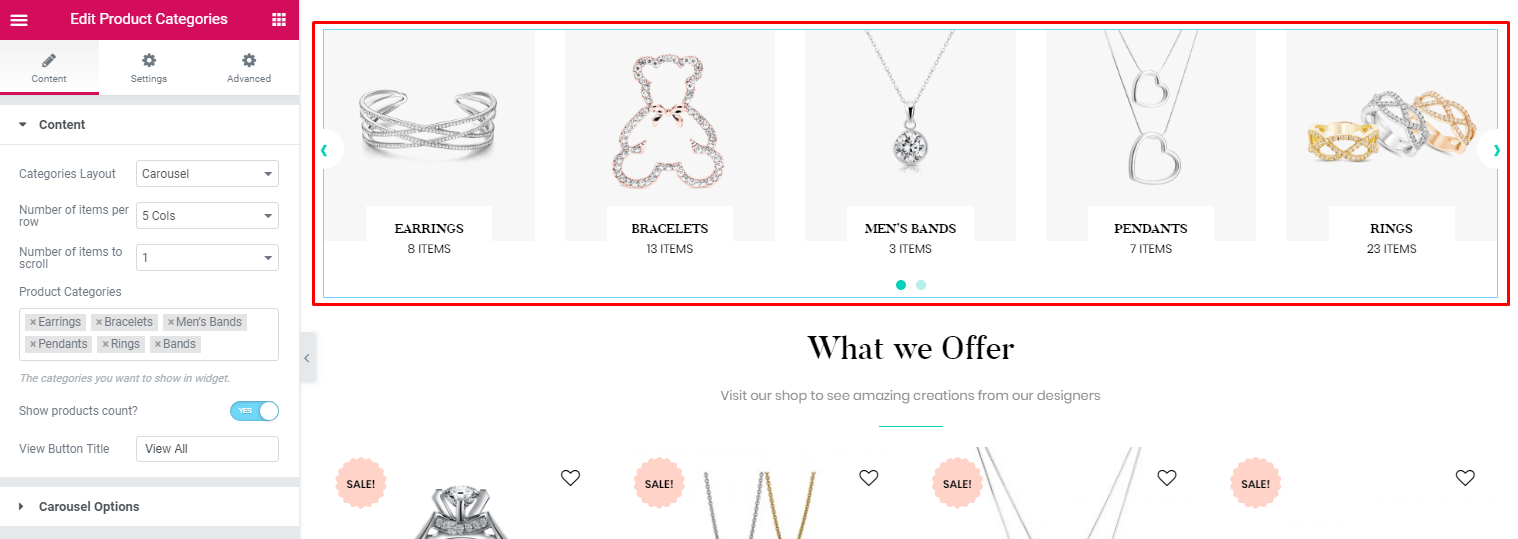
- Product Categories - the element outputs the desired product categories in a carousel
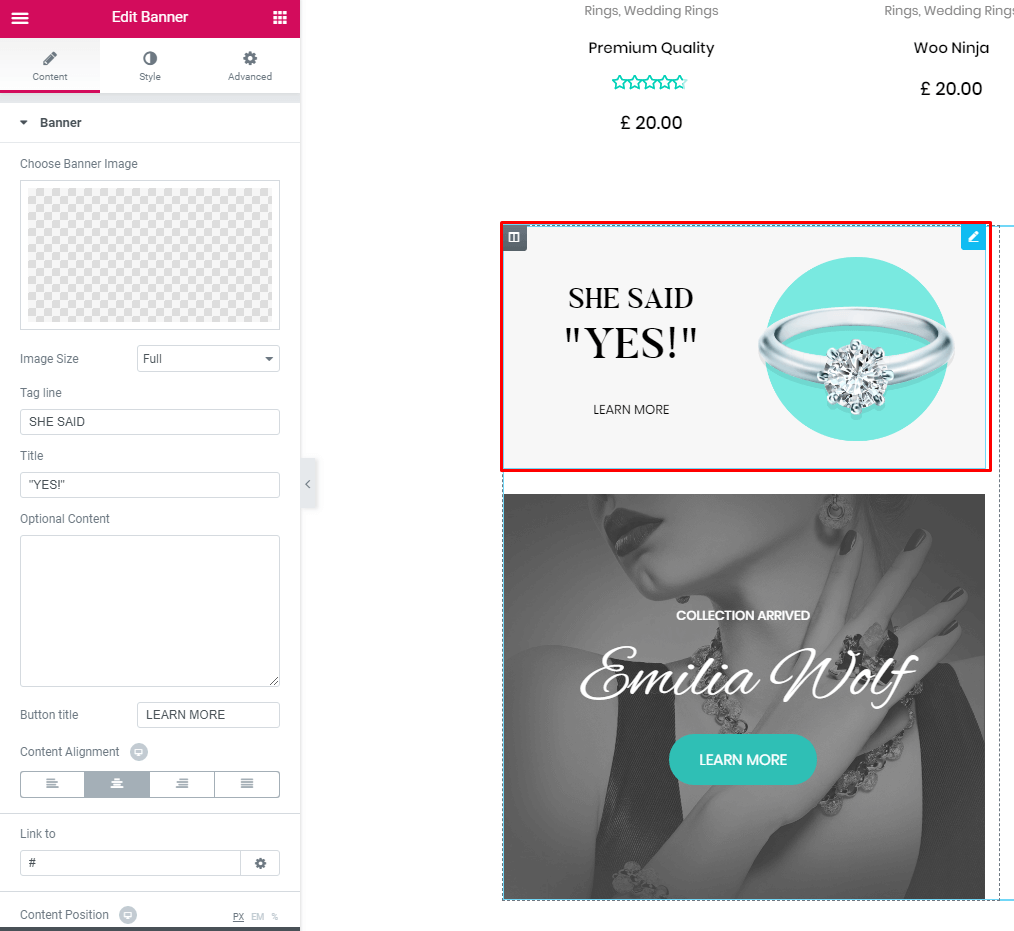
- Banner - allows you to add an image, text and link the resulting banner to a URL
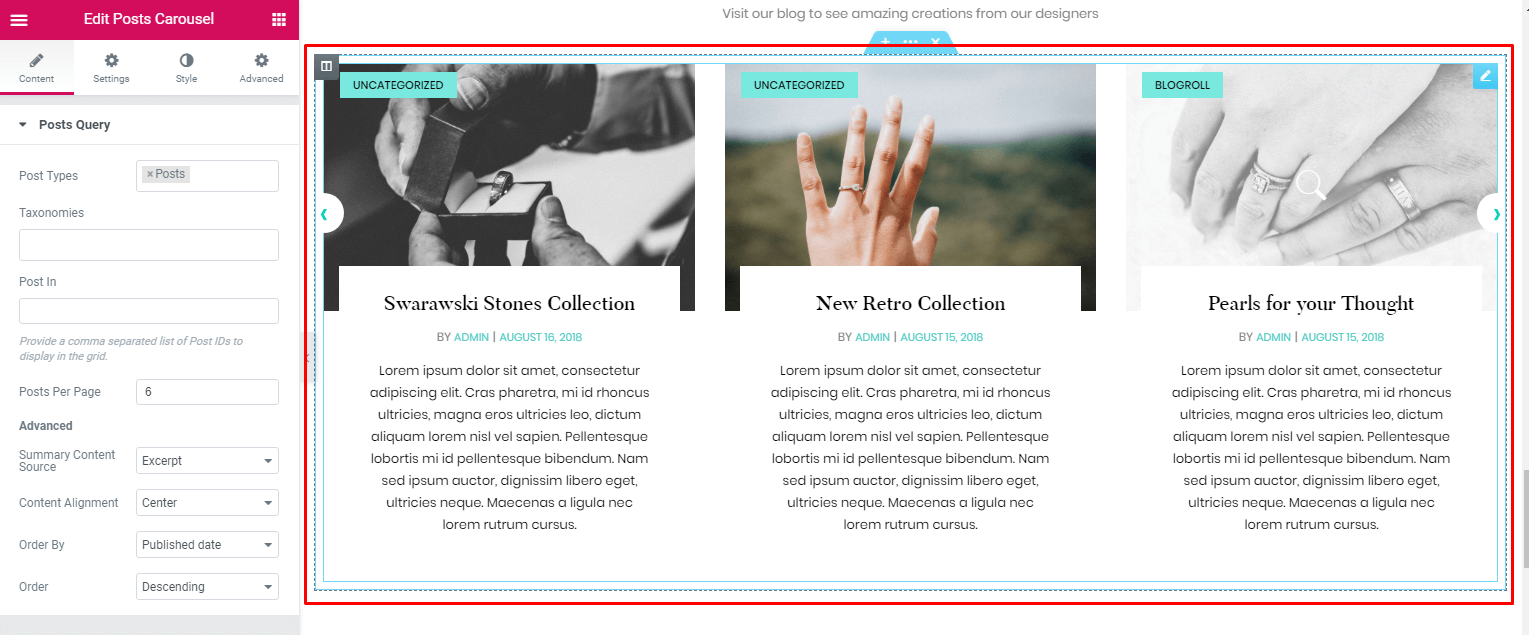
- Posts Carousel - outputs posts in a carousel
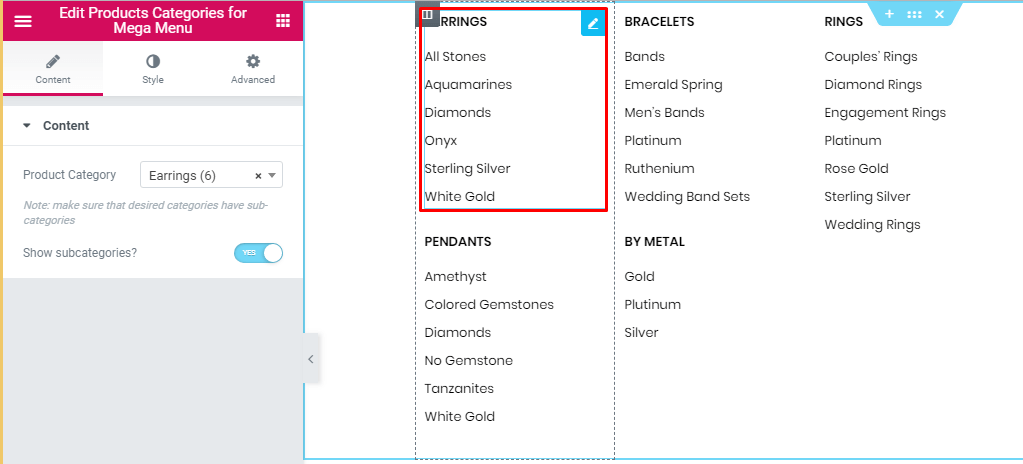
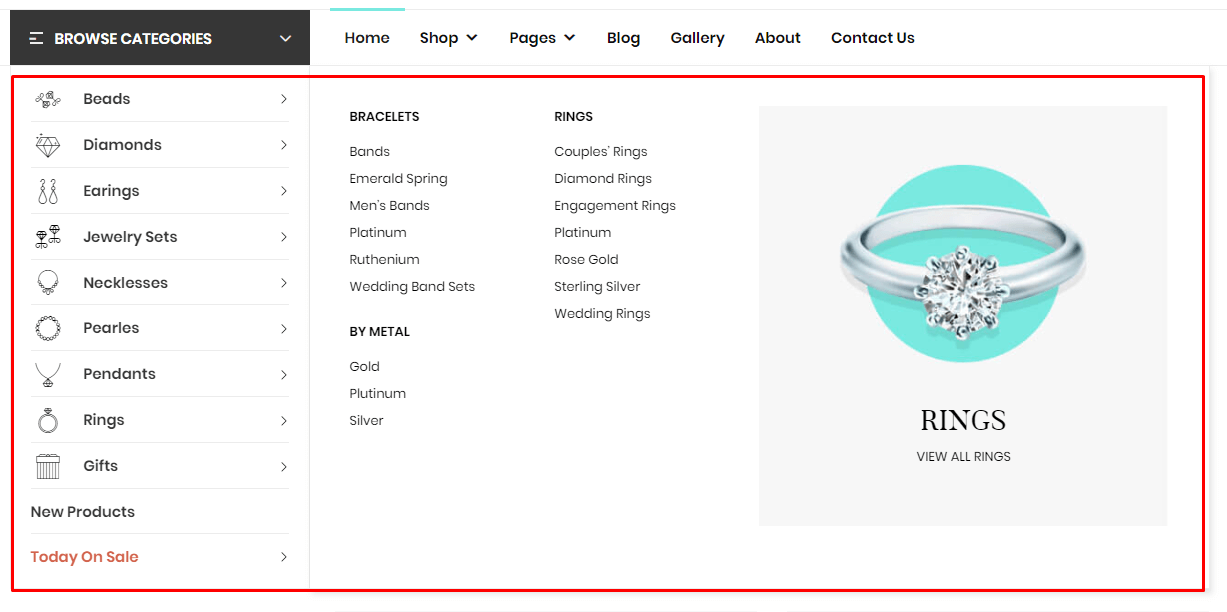
- Products Categories for Mega Menu - allows you to add product categories to the mega menu
- Advanced Tabs - outputs tabs with other Elementor elemets inserted in each tab with the help of a shortcode
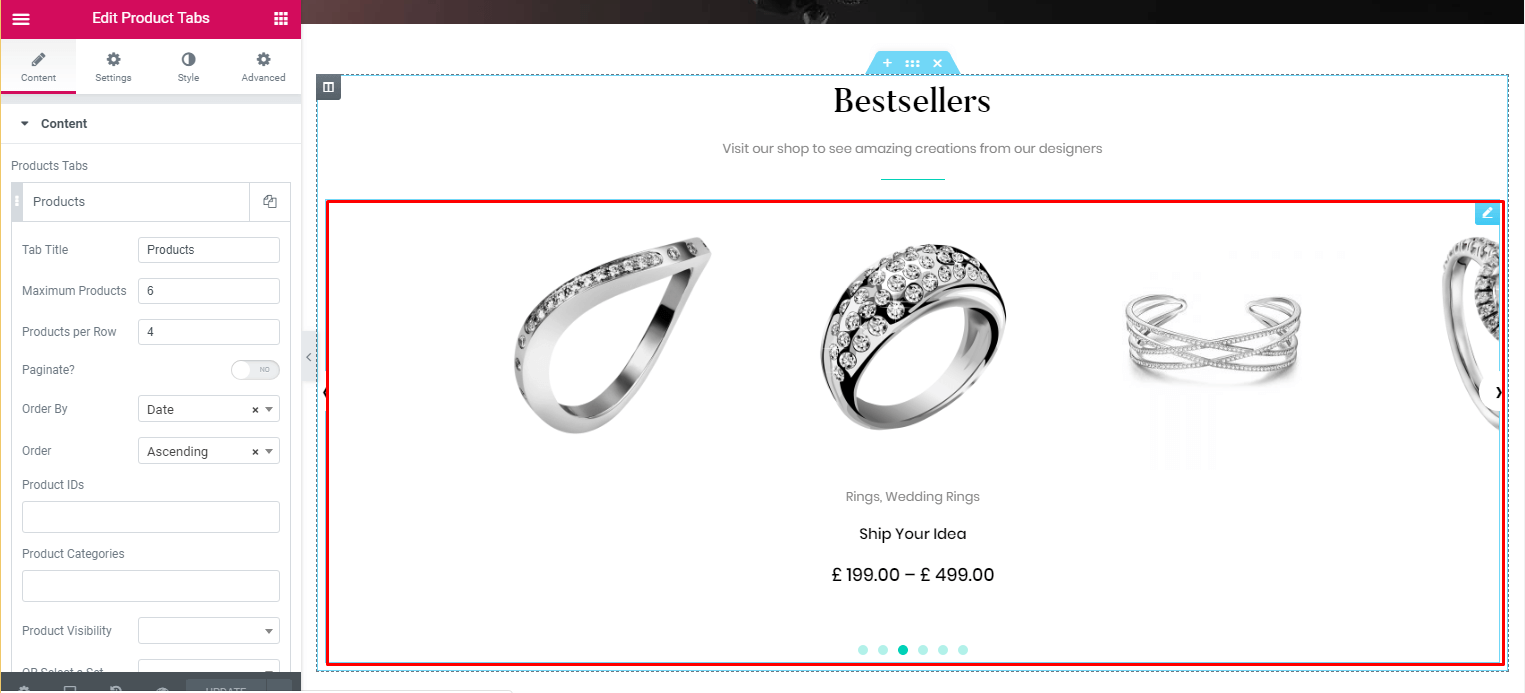
- Product Tabs - adds a carousel of products enriched with some visual effects
Translating Your Theme
There are several methods to create a translation of a WordPress theme. To translate DiCi to another language (Localization) you will need to create a custom translation. We recommend using PoEdit to create a custom translation for DiCi.
To create a custom translation you will need to take several steps:
- Download PoEdit and it install on your computer: https://poedit.net/download
- Locate the dici.pot file in the languages folder of your theme, open it with PoEdit and hit create new translation
- Translate necessary text strings. You will be able to come back and edit your translation later.
- Save the resulting file as themename-language_LOCALE.po, the .mo file will be compiled automatically. For example, for German language files should be named as dici-de_DE.po and dici-de_DE.mo
- Upload resulting files to wp-content/languages/ in your WordPress installation.
- Go to WordPress Settings and adjust Site Language in the dropdown.
- Save changes.
To create a website which has several languages and cureencies use WPML.
Site Speed
Your website site speed largely depends on your server and site optimization. These are the steps we recommend you to take in order to get a dramatic increase in site speed in case if you need one:
- Use Merge + Minify + Refresh plugin. You can donwload it here.
- Use WP Super Cache plugin. You can donwload it here.
- Use a CDN for your site. Learn more about CDN for WordPress.
- Your hosting must be a good one and support at least one of php caching solutions to reduce server response time.
-
Make sure your images are compressed with one of the many existing image compression tools, because heavy images slow down your site significantly. One of the simplest and free online tools for image compression is Tinypng.

Support
DiCi theme comes with a minimum of 6 months of included support which also can be extended. It means that whenever you have a question on theme functionality during the support period you can create a personal ticket at https://themeszone.freshdesk.com and receive qualified help from our support team.
At Themes.Zone we believe that nothing should stand between the Code and your Business. That’s why we do our best to meet the highest support standards and make your theme experience as smooth and pleasant as possible. We care about you and what you do, because we think that your success is our success too. That is why our support team is trained to treat your messages with proper respect and attention.
Although we do our best to satisfy all of our customers' needs, certain things naturally fall beyond the scope of our support. We are not able to provide support on code customization, third-party plugin integration, and server-related issues. Theme/demo data installation is also not included in support. We'll generally provide support on using theme's features or problems with the theme only.
You should understand that sophisticated tasks like changing theme's functionality, achieving 100% third-party plugin compatibility, adding new functionality to the theme, changing theme layouts beyond the existing options, and other may require advanced web development skill set.
We strongly recommend you to carefully read the Item Support Policy by Envato which we follow in order to acquire a full understanding of the terms and conditions for our support services: https://themeforest.net/page/item_support_policy
Theme Customization
Please note that theme support does not include services to modify or extend the item beyond the original features, style and functionality. For customization services that will help you tailor the item to your specific requirements, it is recommended that you contact our support team to see if we are going to be able to privately offer you paid customisation services. You can also hire a third-party developer to customize the theme for you.