Introduction Latest theme version released - 1.8
Please note that this document is being constantly updated and enriched with new paragraphs
Thank you for purchasing a Dash Store Premium Theme. This manual will show you how to work with your theme, how to edit it and make it a "live" website.
If you have any difficulties or stumbled upon a bug please contact us at Our Support Page we offer one on one personal support
Get Dash WordPress ThemeHosting Software Requirements:
- PHP version 5.6 or greater.
- MySQL version 5.6 or greater.
- The mod_rewrite Apache module (for permalinks).
More Information you can find here: Wordpress Requirements, Hosting Wordpress, Woocommerce Server Requirements.
Package Contents
The package of the Dash Theme contains everything that you need to customise the look and functionality of the theme
After unzipping the template package you will find 4 folders: "THEME", "PLUGINS", "DOCUMENTATION" and "SAMPLEDATA".
THEME folder contains the Dash Store theme, PLUGINS folder contains the plugins that you may use with the theme, DOCUMENTATION folder contains this particular document, SAMPLEDATA contains the data that was used for the live demo of the theme located at http://dash.themes.zone
Below is the package structure:
-
THEME – contains the Dash Store theme.
- dashstore.zip
-
PLUGINS - contains the plugins that you may use with the theme.
- ajax-thumbnail-rebuild.zip
- contact-form-7.zip
- contentbuilder.zip
- google-maps-easy.zip
- jck-woo-quickview.zip
- revslider.zip
- suppamenu.zip
- twiget.zip
- wc-vendors.zip
- widget-settings-importexport.zip
- woocommerce.zip
- wysija-newsletters.zip
- yith-woocommerce-compare.zip
- yith-woocommerce-wishlist.zip
-
SAMPLEDATA - contains the data that was used for the live demo of the theme.
- sample-data-installer.zip
THEME folder contains Dash theme, this folder have to be uploaded to wp-content/themes/ folder of your WordPress. The main CSS file of the theme is located in the Dash theme.
First Steps
Dash Theme is a WordPress theme, therefore it is important to get to know WordPress CMS before you continue. If you are not familiar with WordPress please visit WordPress getting started guide
You may find a detailed documentation of WordPress functionality at WordPress Codex
Installing the Theme
Once downloaded, unzip the compressed folder to see the structure of package.
Important! Please, make sure to use original WordPress copy from wordpress.org website. Do not use the pre-installed copy provided by your hosting company.
1. Go to THEME folder, there you will find a packaged dashstore.zip, upload the package to wp-content/themes/ folder of your WordPress and uncompress it. Once uncompressed the theme can be activated.
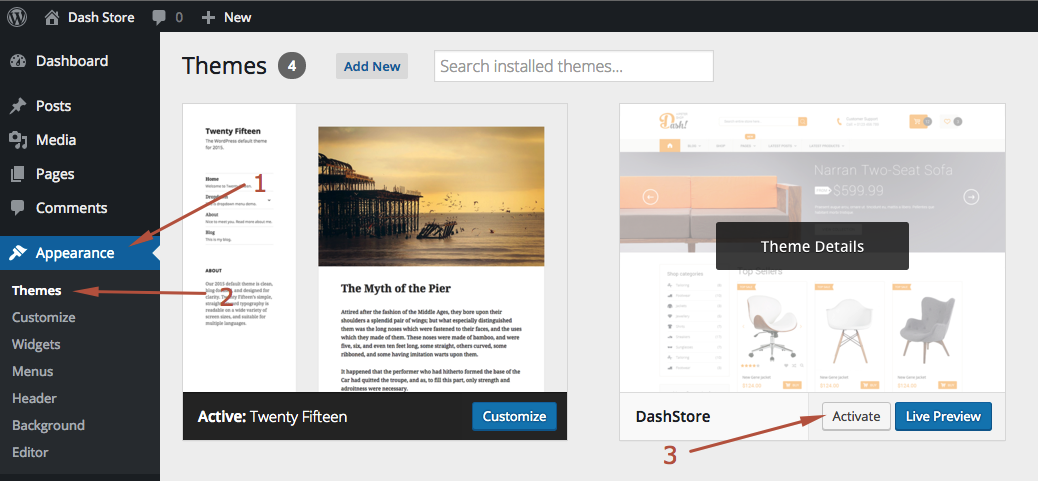
2. Go to backend section of your WordPress site (http://link_to_your_site/wp-admin/), then go to Appearance -> Themes and activate the Dashstore theme).
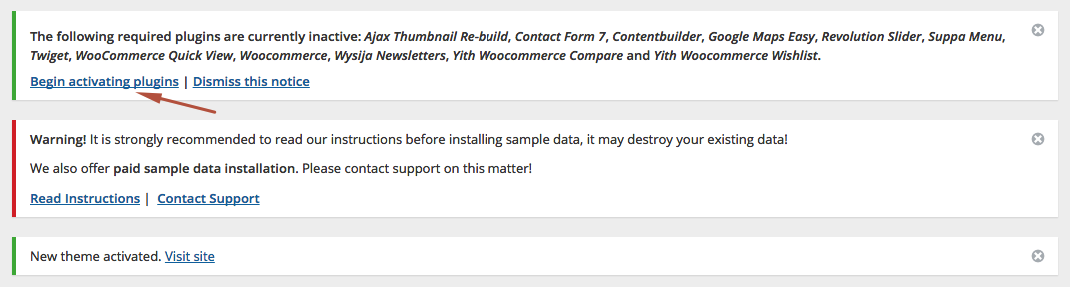
3.When you click on "Activate" button to activate Dash Theme, you will see the a notice offering you to install required and recommended plugins. Click "Begin installing plugins", on the screen that appears, next select the plugins you want to be installed, pick "Install" in Bulk Actions select box and click "Apply" button. For optimal user experience install and activate all recommended plugins.
Installing Sample Data
Warning! You should not install sample data on an existing website - it's database will be deleted and replaced with sample one. You also should not run sample data installer on a WordPress MultiSite - the database for all you overwritted as well. As long as you are using one database for several sites all of these sites may be lost.
Warning! Please note that images used on our live demo cannot be used on your live sites build with the help of our theme. You should only use properly licensed images on your live projects. Images you see on our live demo are not sold with the theme and therefore are not included in the theme package.
After you activate your theme and install required plugins you may want to install sample data to make your site look like Live Demo of our theme, which can be found here: http://dash.themes.zone/. You also need to donwload the "uploads" folder (click this link to download the uploads folder), unzip it and upload it to your wp-content folder. After that install and activate sample data installer plugin. It can be found in "Sample data" folder of you theme package.
Video tutorial on how to install Sample Data:
After you activate sample data installer you need to go to Appearance -> Dash Theme Options -> Site Options -> press "Restore Defaults" button at the bottom.
The widget-settings-importexport.zip (plugin) used in the video can be downloaded here.
.json file for the widget is located in the "required-plugins" folder of your theme -> "sample-data-installer.zip" -> sample-data-installer -> widgets -> widget_data_2016_04-20.json
To achieve the best site speed you need to choose good hosting. WP Engine servers are configured to run WordPress and WooCommerce sites as smoothly as possible, they are always up to date, simplest to configure and their support is just outstanding.
For all our clients here is a special offer from us, 20% discounts for:
- Personal Hosting Plan (Will be OK for small shops up to 20 products or 500 visitors per day)
- Business Hosting Plan (Will be good for medium shops up to 100 products or 10000 visitors per day)
- Professional Hosting Plan (Will be good for large shops up to 10000 products or 100000 visitors per day)
Creating a child theme
We strongly recommend you to create a child theme and use it for customizing Dash Theme. This way you can update Dash Theme and it's plugins without fear of loosing implemented changes.
Video tutorial on how to create a child theme for Dash theme:
Example of functions.php of child theme:
<?php
/* Dash child theme functions */
add_action('wp_enqueue_scripts', 'child_theme_enqueue_styles');
function child_theme_enqueue_styles() {
  wp_enqueue_style('parent-style', get_template_directory_uri().'/style.css');
  wp_enqueue_style('child-style', get_stylesheet_directory_uri().'/style.css', array('parent-style','dash-woo-styles'));
}
Theme Structure
Dash theme supports default WordPress functionality, such as post types and page templates. This allows you build any kind of page, plus theme contains a lot of useful shortcodes and pre-built elements.
Theme Options
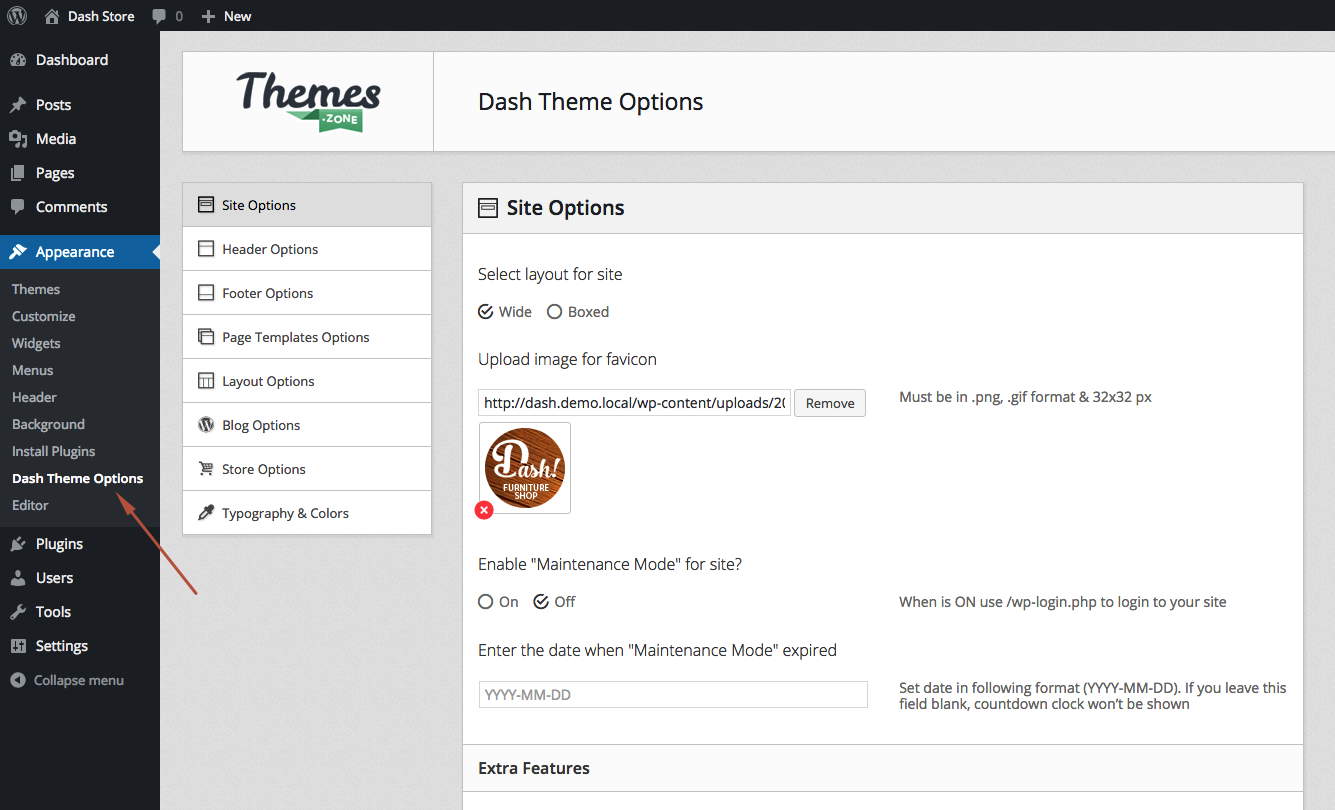
1. Site options:
- Select layout for site – switches the sites between Wide and Boxed regimes;
- Upload image for favicon – add favicon to your site;
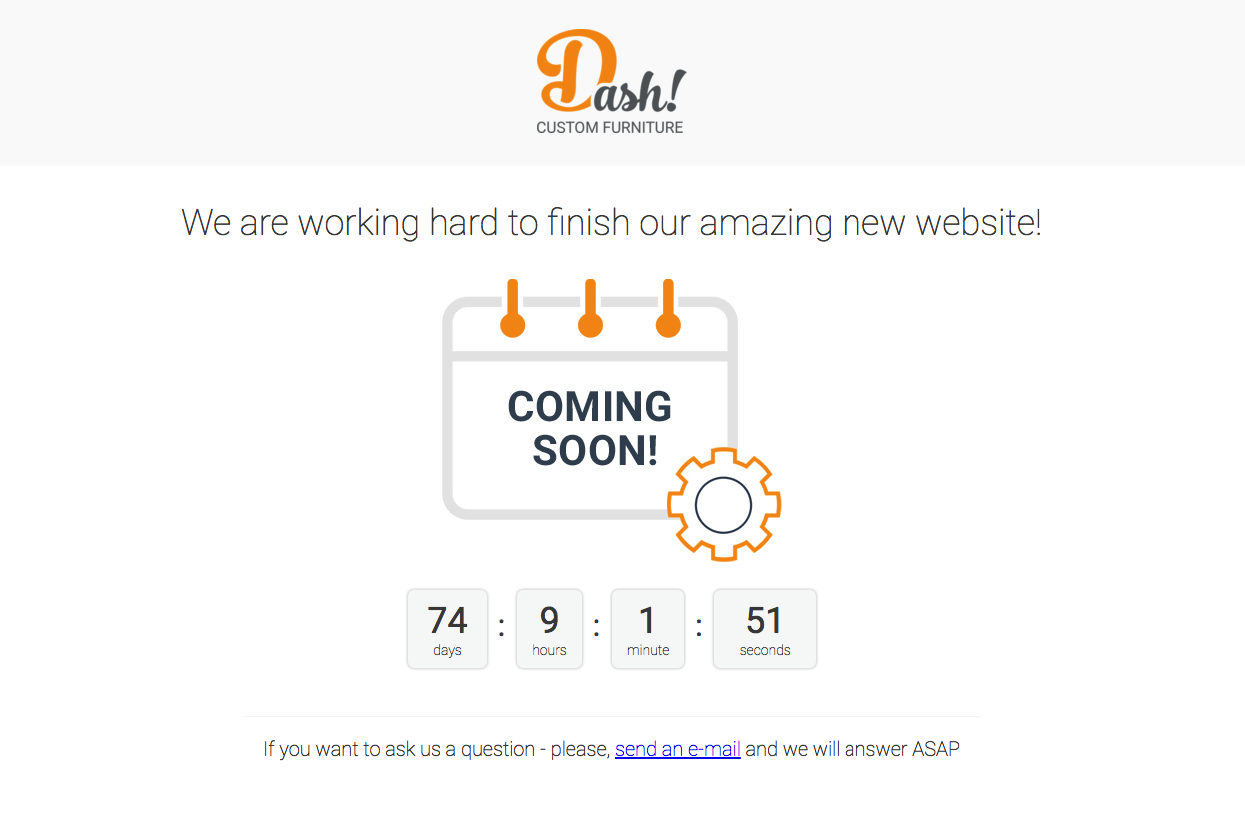
- Enable "Maintenance Mode" for site – just turn on this option if your site temporary not available or under construction;
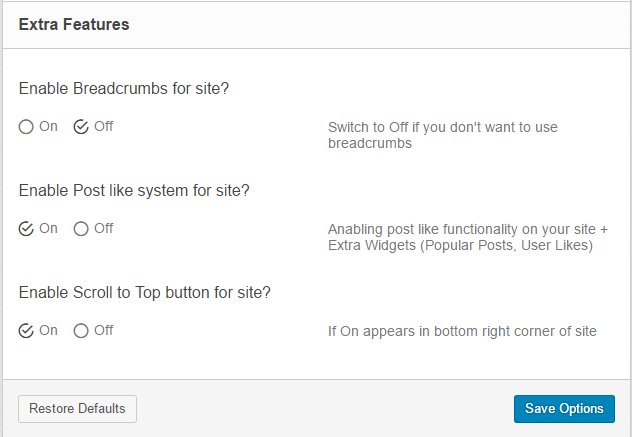
- Enable "Breadcrumbs" for site – turns your breadcrumbs on or off;
- Enable "Post like system" for site – turns on or off likes for you blogposts and products;
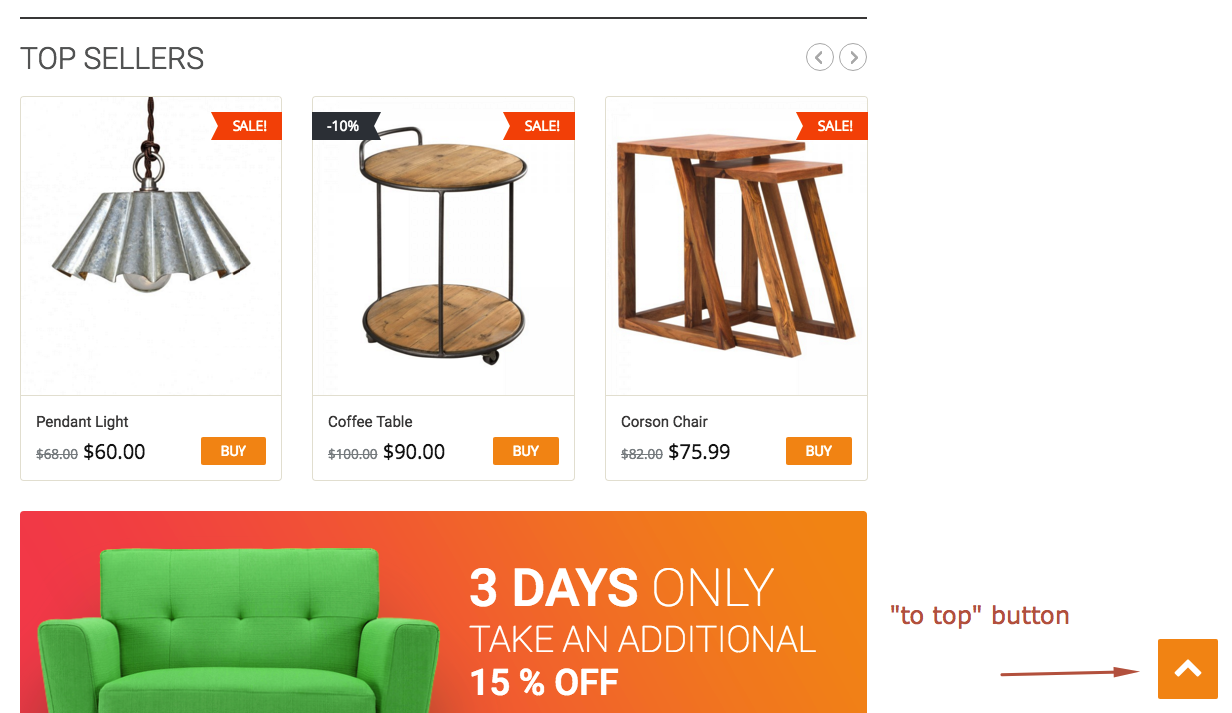
- Enable "Scroll to Top button" for site – adding to top button.
Click thumbnails to observe changes:
2. Header options: see here
3. Footer options: see here
4. Page Templates Options: see here
5. Layout Options:
Dash Theme offers you a dynamic way of sidebar positioning. You can set both global and per page sidebar positions.
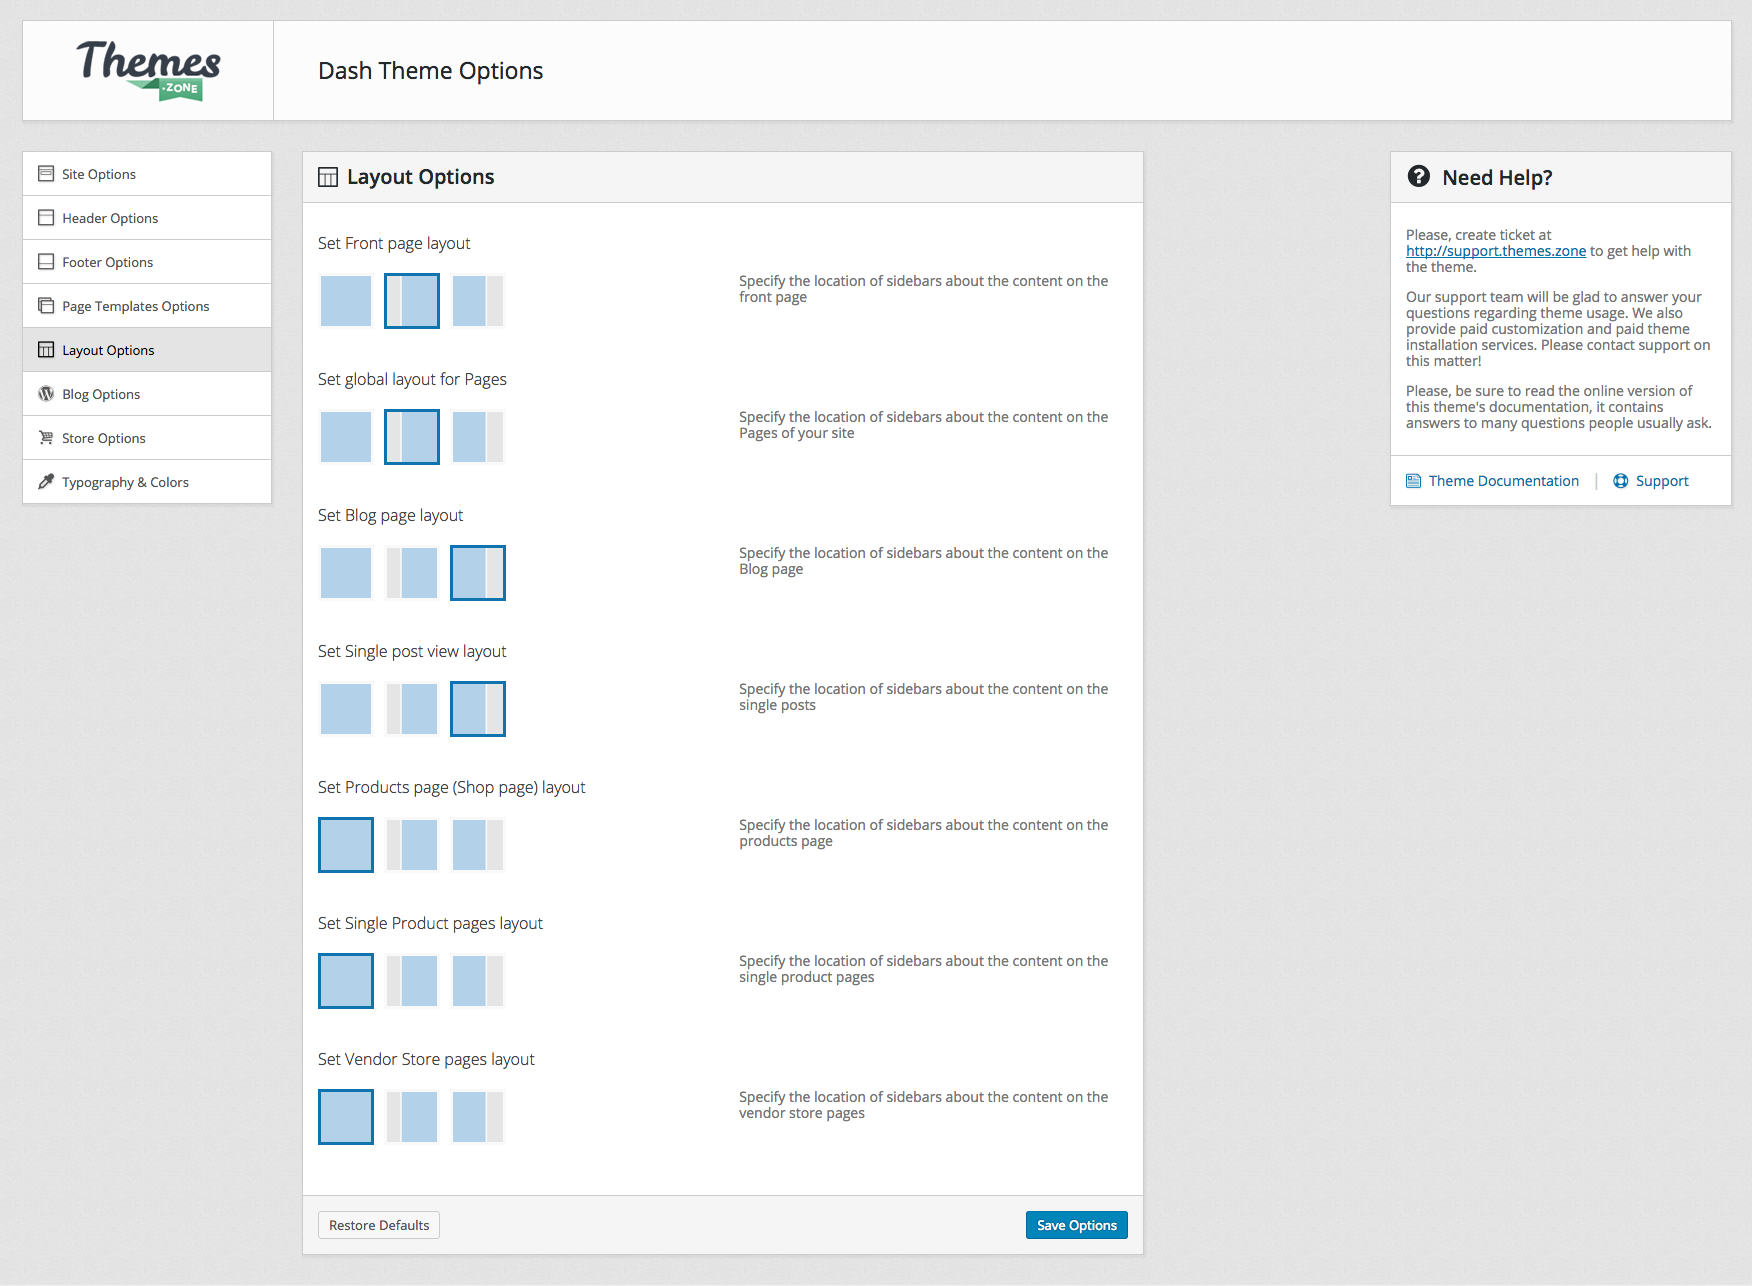
The "Layout Options" panel lets you set global layout settings for each type of page. You can set sidebar position to left, right or with out the sidebar. Front Page Layout lets you set the sidebar position for the Home Page, "Global layout for Pages" setting will set global value for all static pages present on the site. The "Blog Page Layout" settings will set sidebar position for "Blog" pages (Page that has blog posts listed). "Single Post View" controls the position of a sidebar on single post page (the Single Post page). Store Layout options lets you set sidebar position on Store Pages (Product Listing Page, Single Product Page).
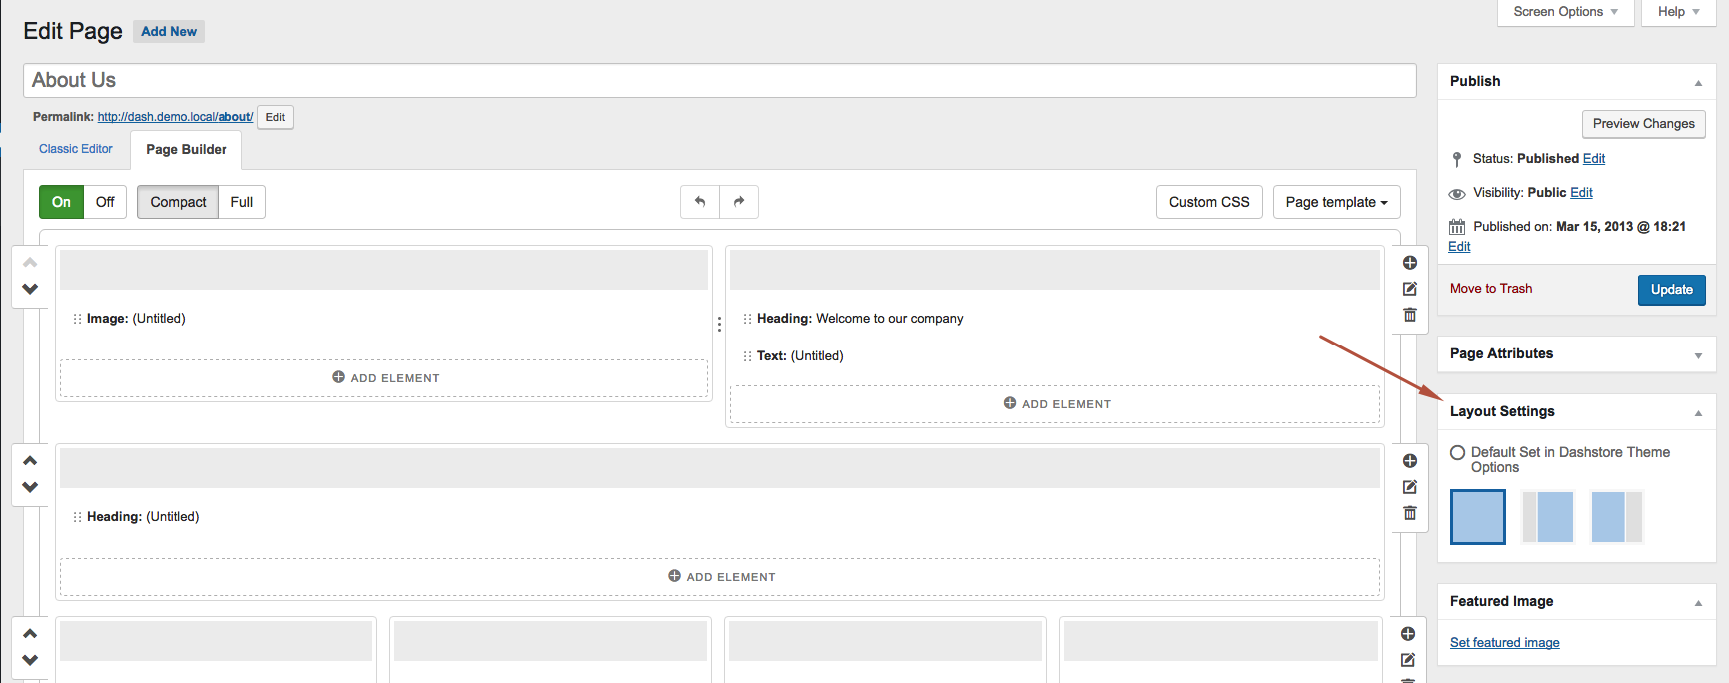
You also can set Sidebar Position for each created Page. Open a static page for editing in the backend of your site, there you will find a "Layout Settings Widget", set the sidebar position in that widget and the global value for the sidebar position will be overridden.
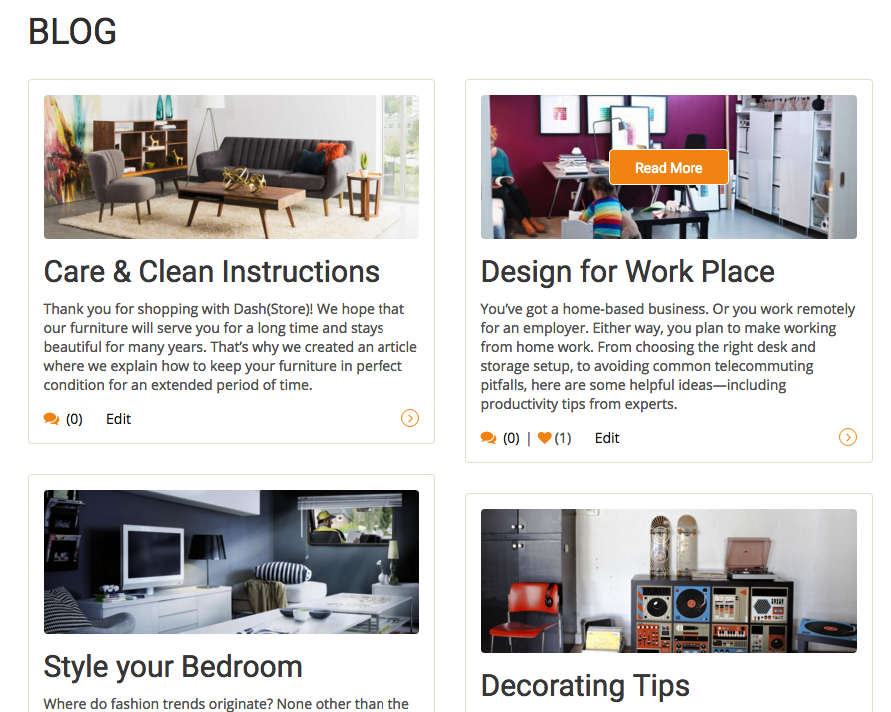
6. Blog options:
- Enter text for "Read More" button – specify custom "read more" text;
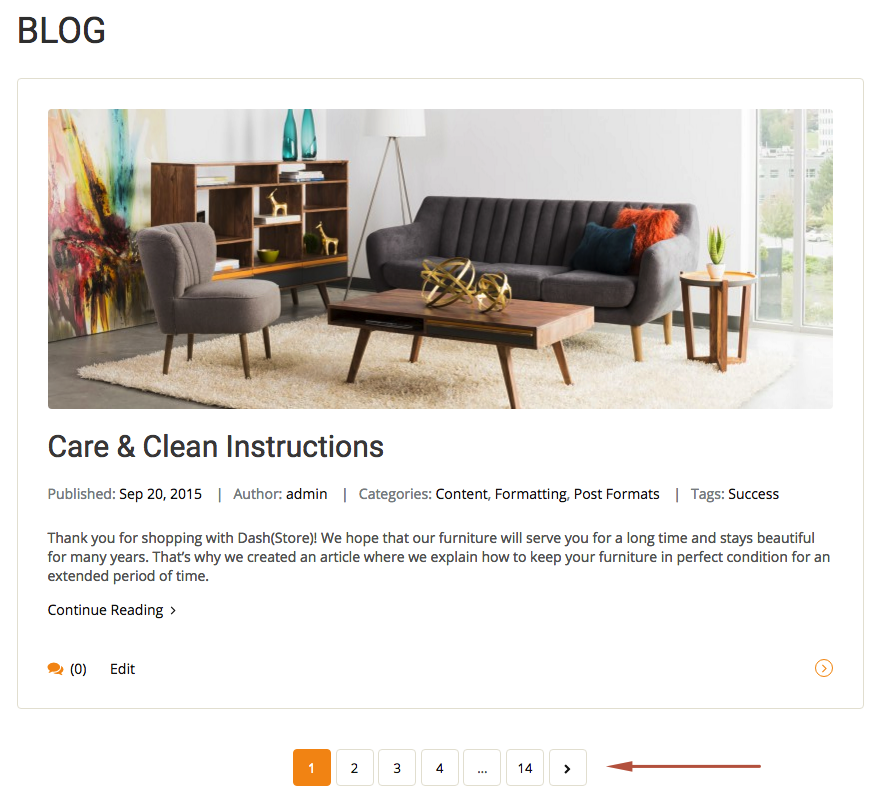
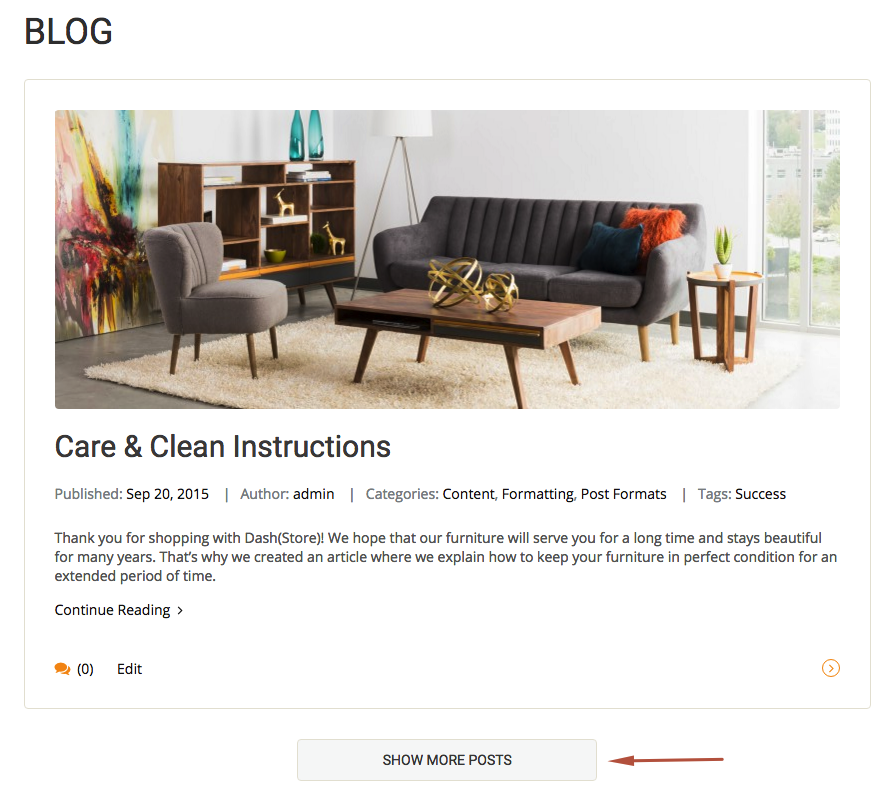
- Select pagination view – use Ajax blog posts downloading or classic pagination ;
- Enable lazyload effects – add lazyload effects for posts appearance while scrolling;
- Select layout for blog – select layout for Blog page ;
- Select number of columns(optional) – select number of columns for grid layout;
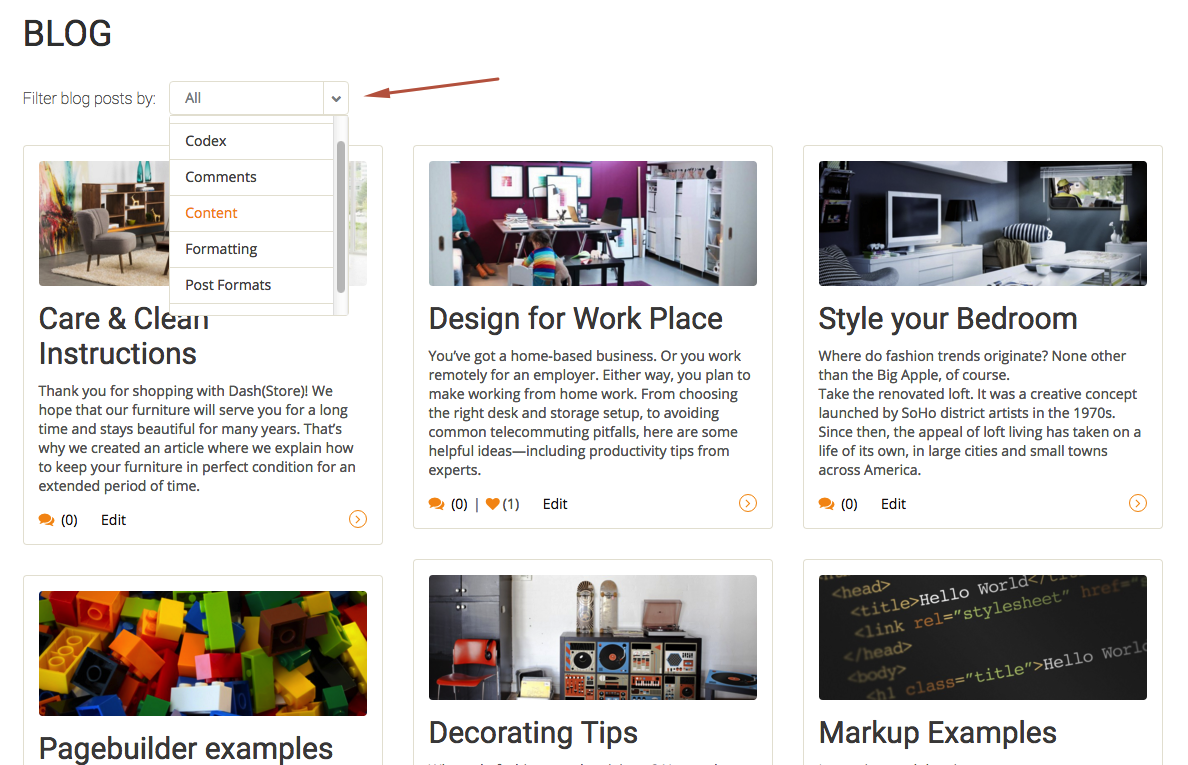
- Select what taxonomy will be used for blog filters(optional) – select filters for Blog posts;
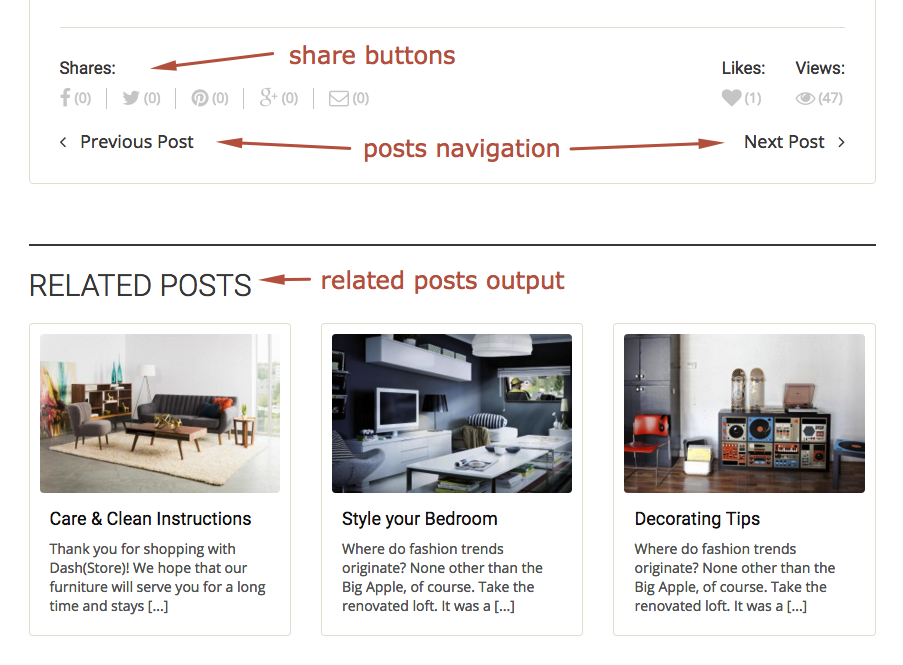
- Enable single post Prev/Next navigation – add prev/next post links;
- Enable single post breadcrumbs – add breadcrumbs to single post;
- Enable single post share buttons – add social network links;
- Enable single post Related Posts – enable single post Related Posts;
- Select pagination type for comments – select pagination type for comments;
- Enable lazyload effects on single post – add lazyload effects for Related Posts and Comments appearance.
Click thumbnails to observe changes:

7. Store Options:
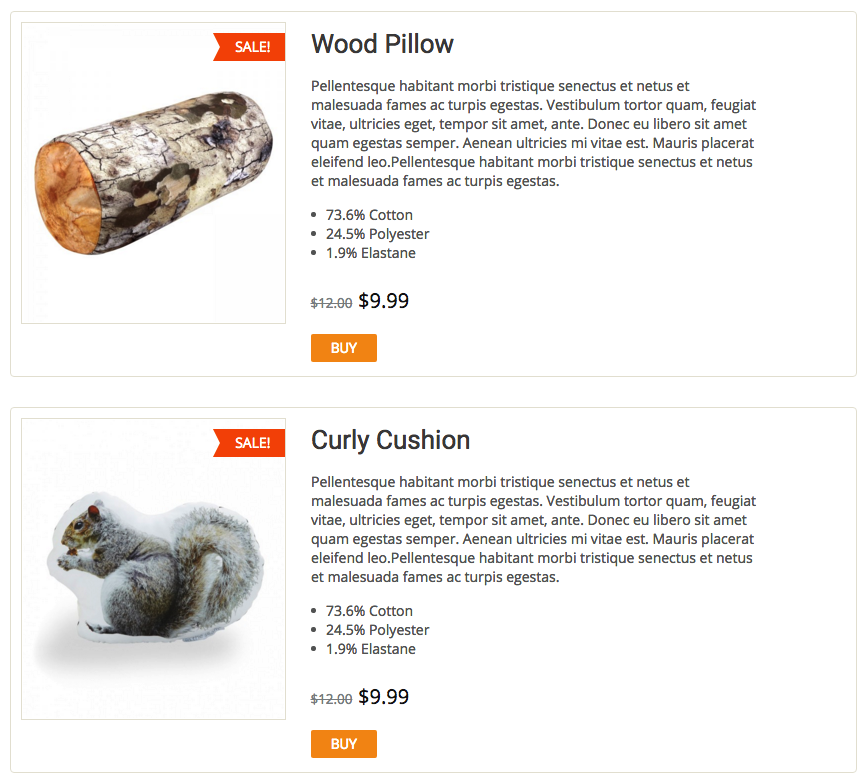
- Enable Catalog Mode – special mode of products display (without prices and add to cart possibility);
- Show number of products in the cart widget – addin digital counter of products that were successfully added to the cart;
- Show store Breadcrumbs – add breadcrumbs to store pages;
- Add special sidebar for filters – add widget area above the mainproducts listing (for filters);
- Store as Front page – special mode to display products on front page;
- Add "Lazyload" to products – add lazyload product appearance effects while page scrolling;
- Enter number of products to show – enter number of products to display on shop page;
- Select product quantity per row – select product quantity per row ;
- Show List/Grid products switcher – show List/Grid products switcher;
- Set default view for products – set default view for products;
Click thumbnails to observe changes:


- Show Single Product pagination – add prev/next product links;
- Show single product share buttons – add social network links;
- Use custom images output – enable custom way of product output;
- Choose slider type for images(optional) – choose slider type for optional images output;
- Select transition effect(optional) – select animation for product images;
- Show single product up-sells – show single product up-sells after single product tabs;
- Select how many Up-Sell Products to show – select the quantity of Up-Sell Products to show;
- Show single product related products – show single product related products;
- Select how many Related Products to show – select the quantity of Raleted products to show;
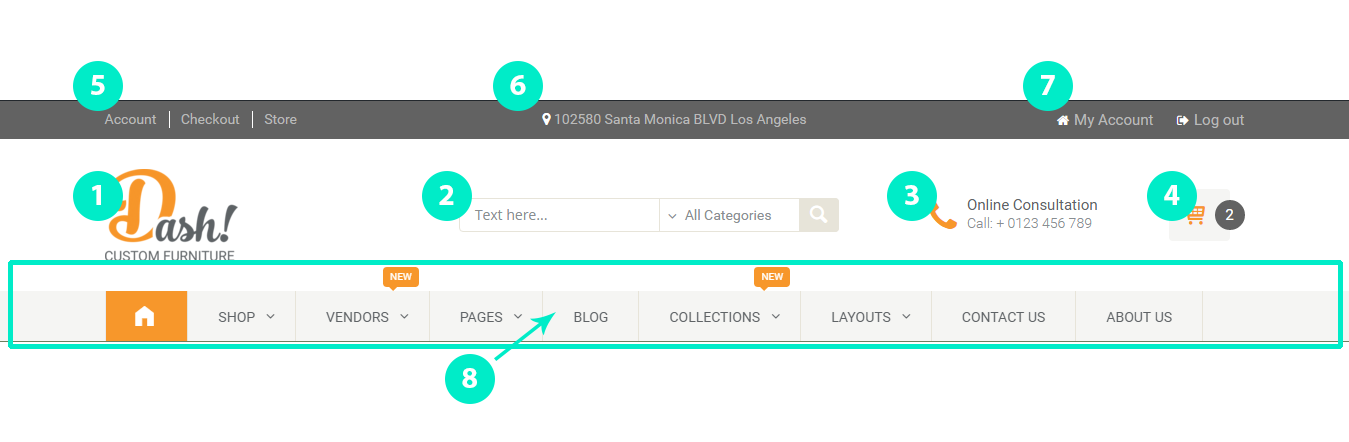
Header
Header of Dash Store theme consists of menu, logo, and two sidebars filled with widgets - Header Top Panel Sidebar and Header (Logo group) sidebar. Let's take a closer look at the demo elements.
-
The Logo
Site logo can be set in Appearance -> Dash Theme Options -> Header Options (Logo Options) menu of your WordPress Dashboard:
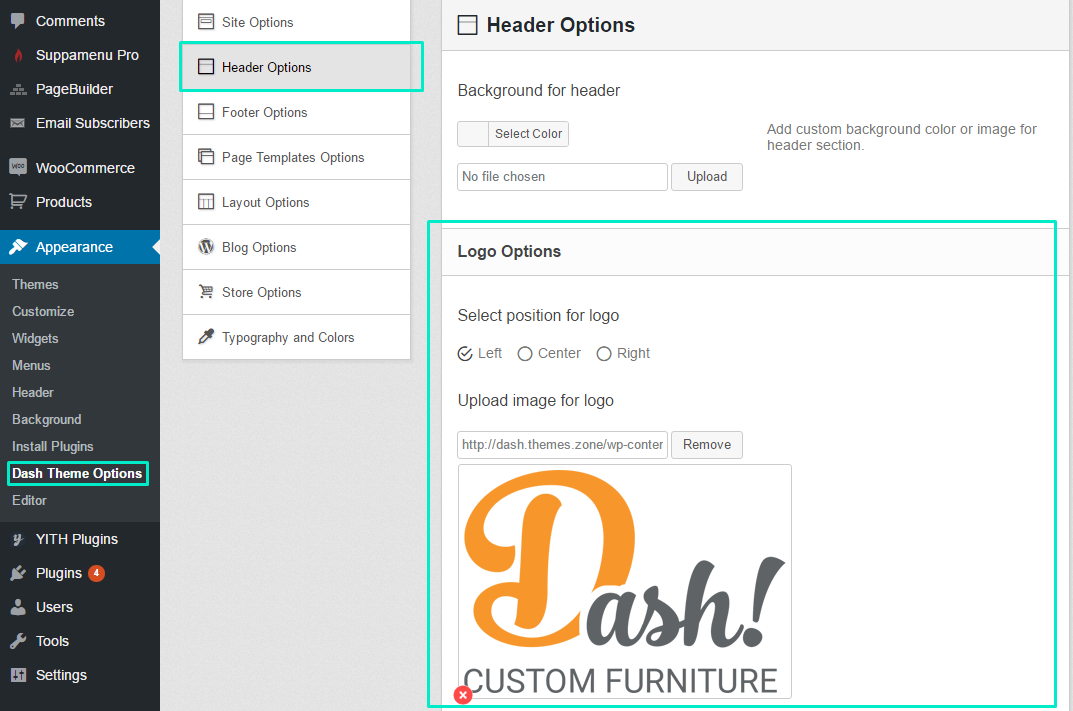
Here you can also select logo position - Left, Center or Right.
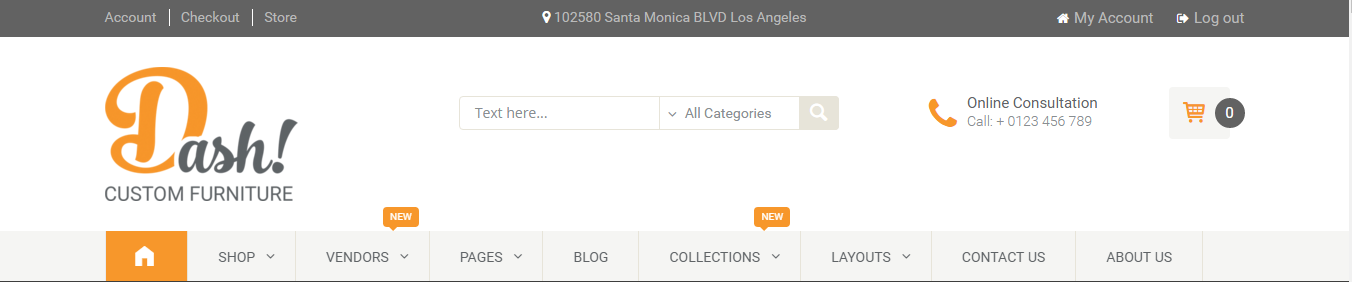
Other logo parameters - like width and height - can be set/changes using css overrides. For example, we can increase logo size by adding the following override at the end of our theme's (or child theme's) style.css file:
 .site-logo img {
    max-width: 193px;
}
This it what we'll get:
-
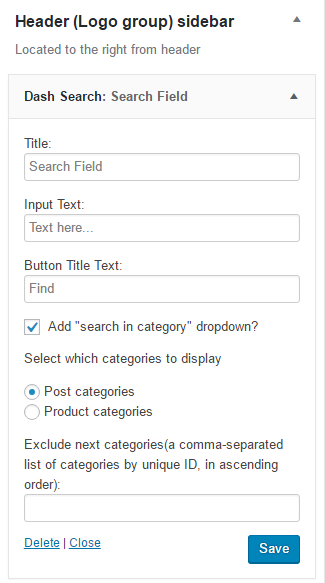
Search Widget - is a Dash Search widget placed in the Header (Logo Group) Sidebar:
-
Online Consultation - it is a text widget placed in the Header (Logo Group) Sidebar. This widget contains the following html code:
<div class="icon-with-description" style="padding-top: 1px;"> <i class="fa fa-phone"></i> <span style="color: #606366; font-weight: 400; padding-bottom: 5px;">Online Consultation</span><br> <span style="color: #898e91; font-weight: 300; font-size: 14px;">Call: + 0123 456 789</span> </div> -
Cart widget - is the WooCommerce Cart (Dash Store Themed) widget placed in the Header (Logo Group) Sidebar.
-
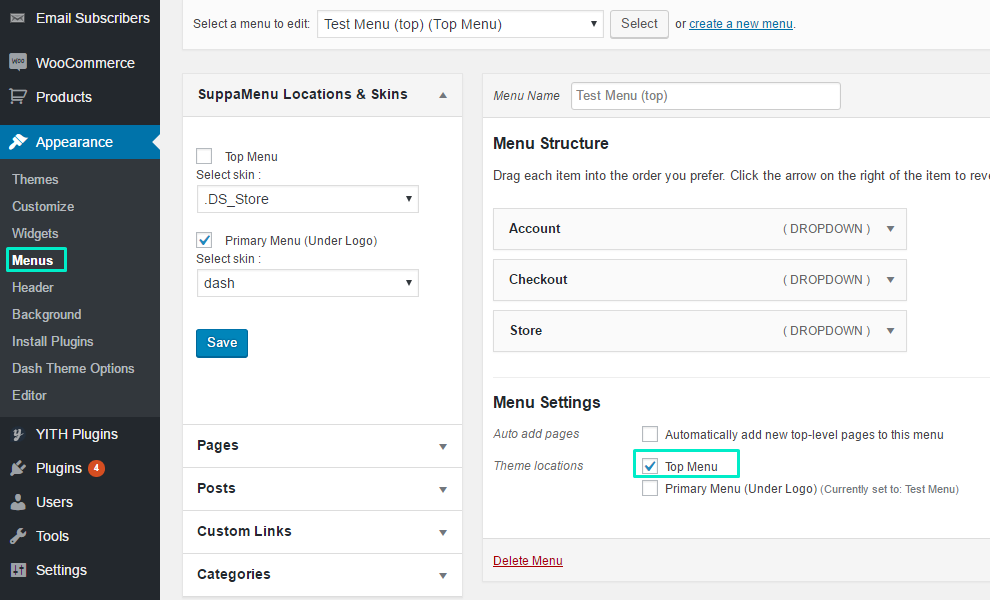
Top menu - the Account, Checkout, and Store links. This is a WordPress menu with Top Menu location:
-
Address - this info can be changed in Appearance -> Dash Theme Options -> Header Options -> Top Panel Options
-
Login widget - this is Dash Login/Register widget placed in the Hedaer Top Panel Sidebar with Show in line option checked.
Editing Content
-
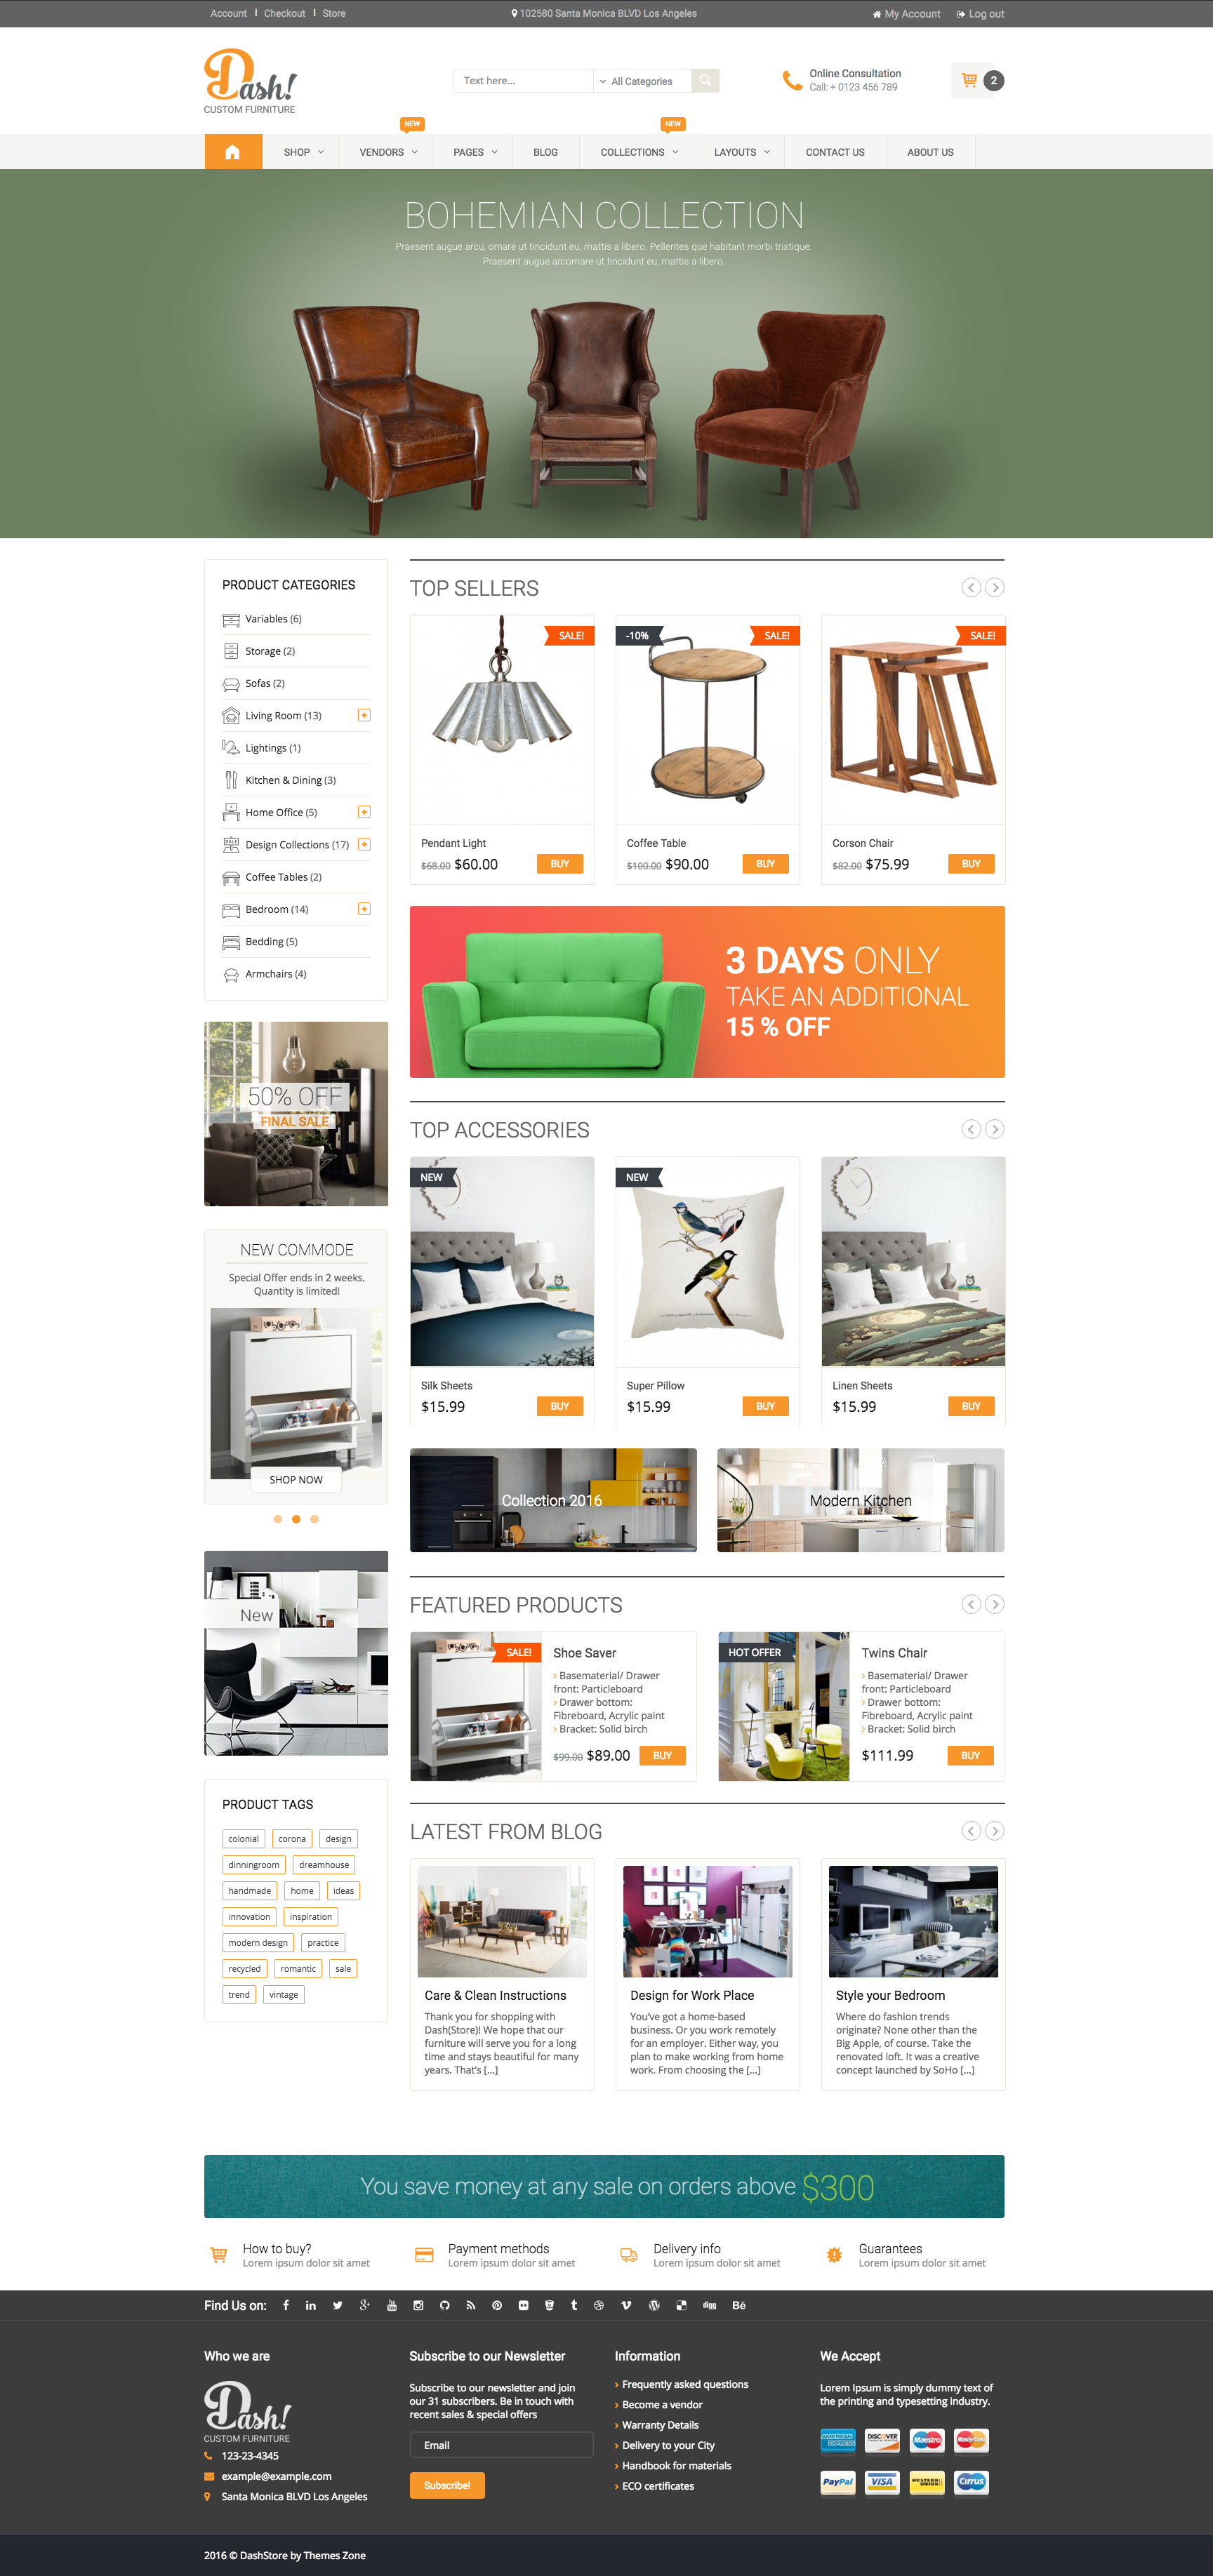
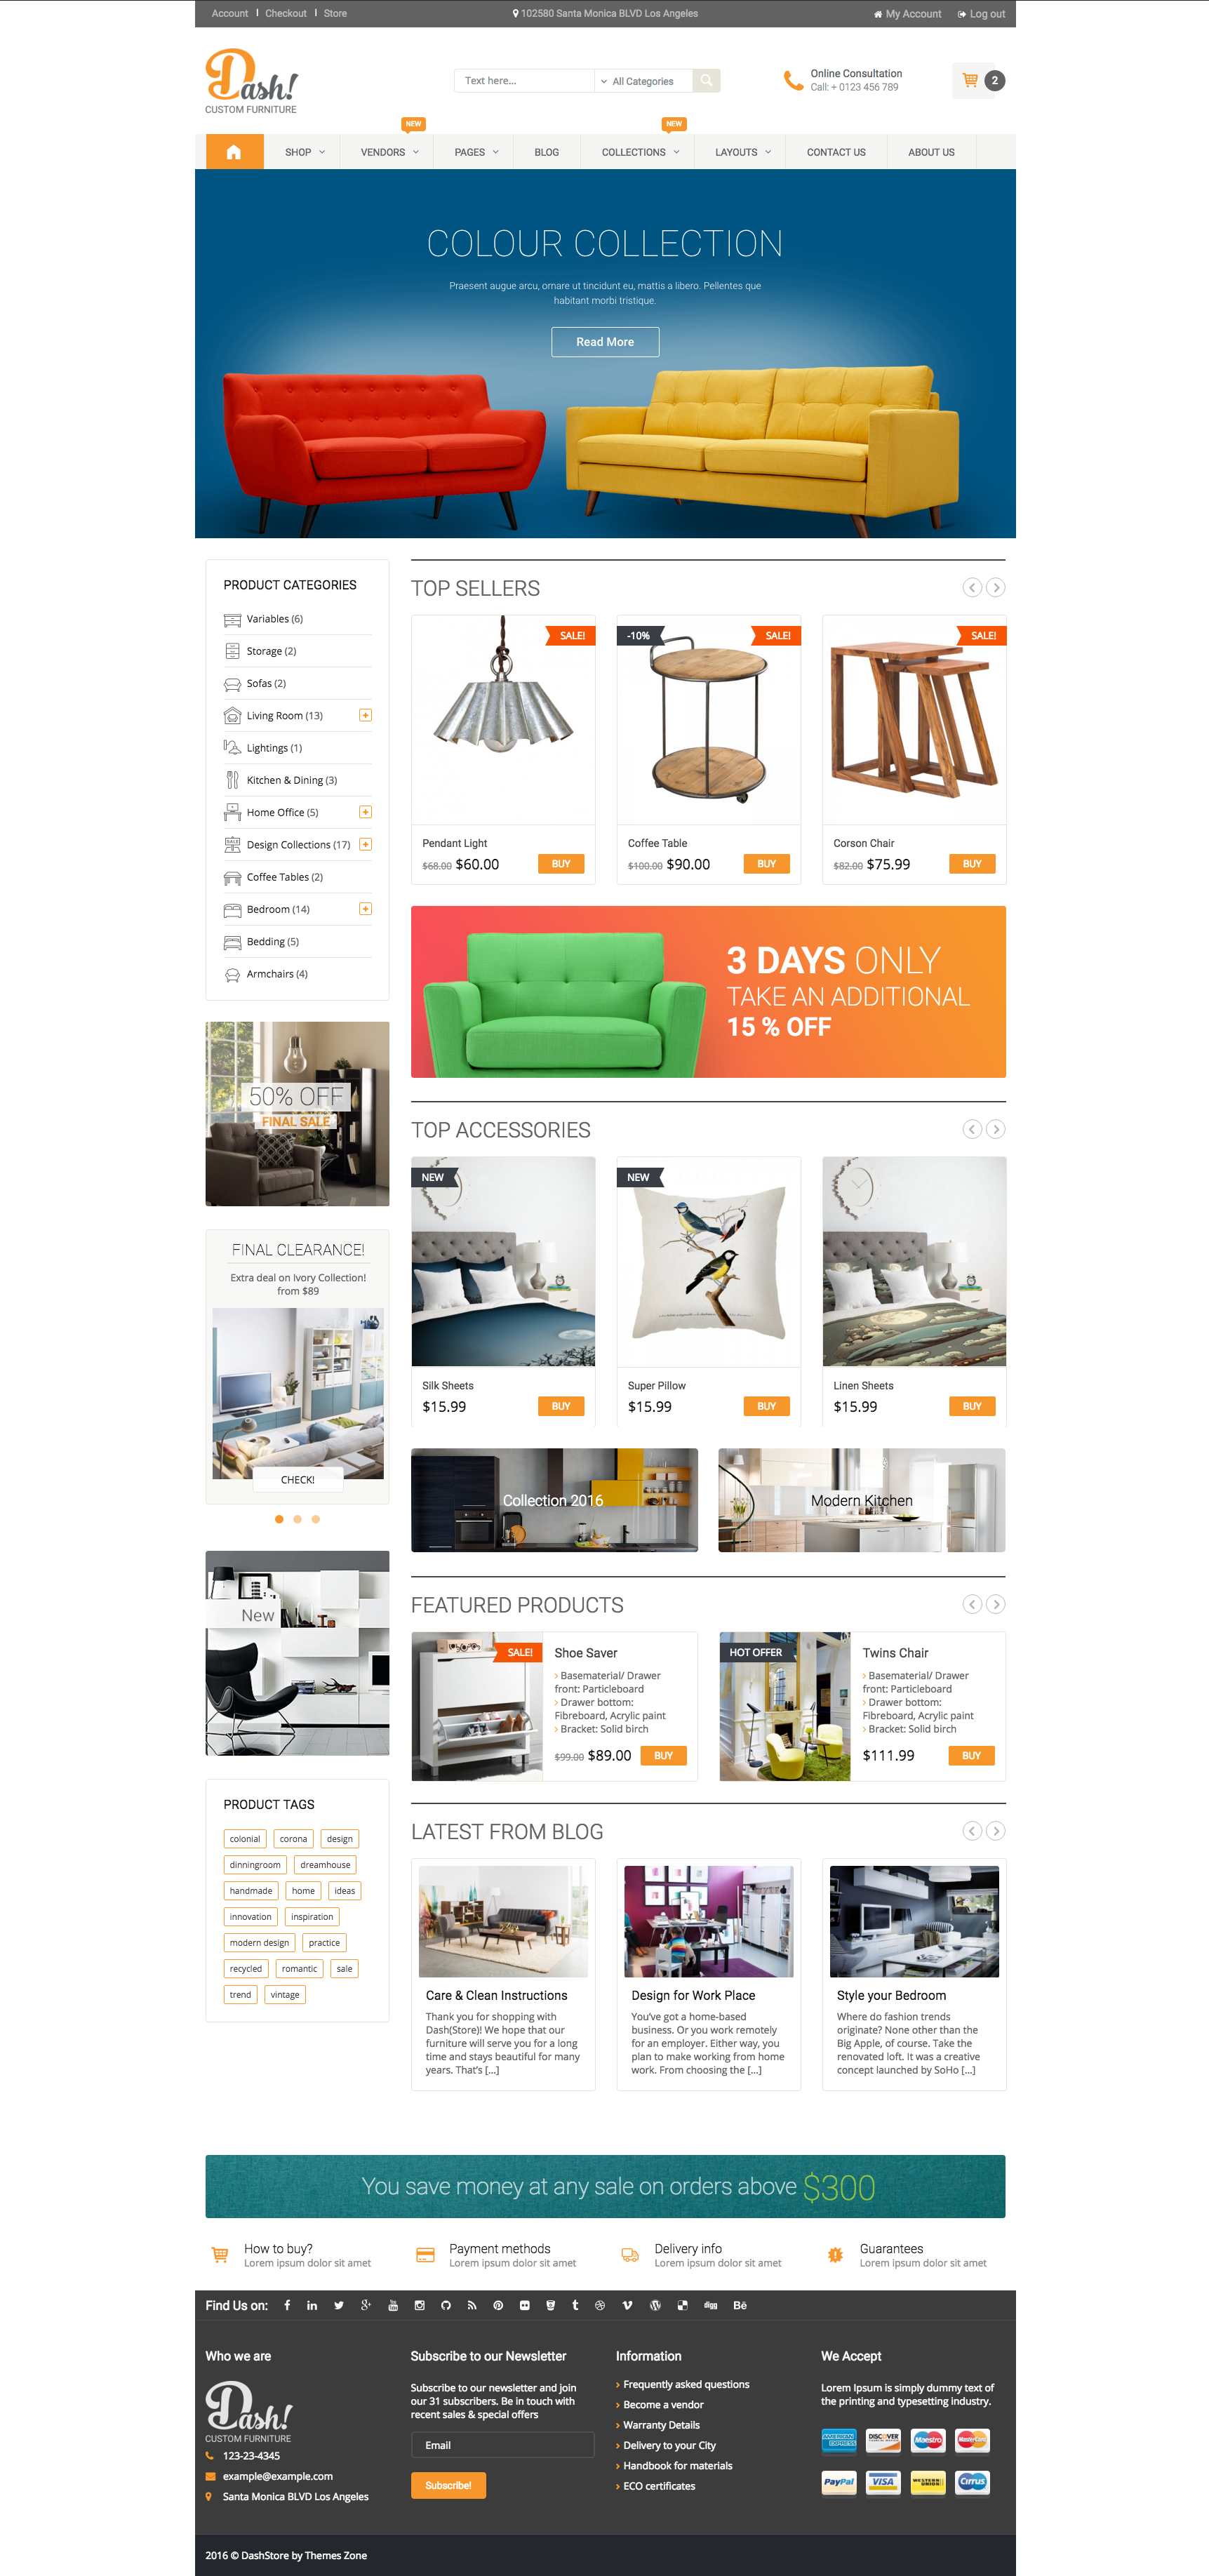
Home Page
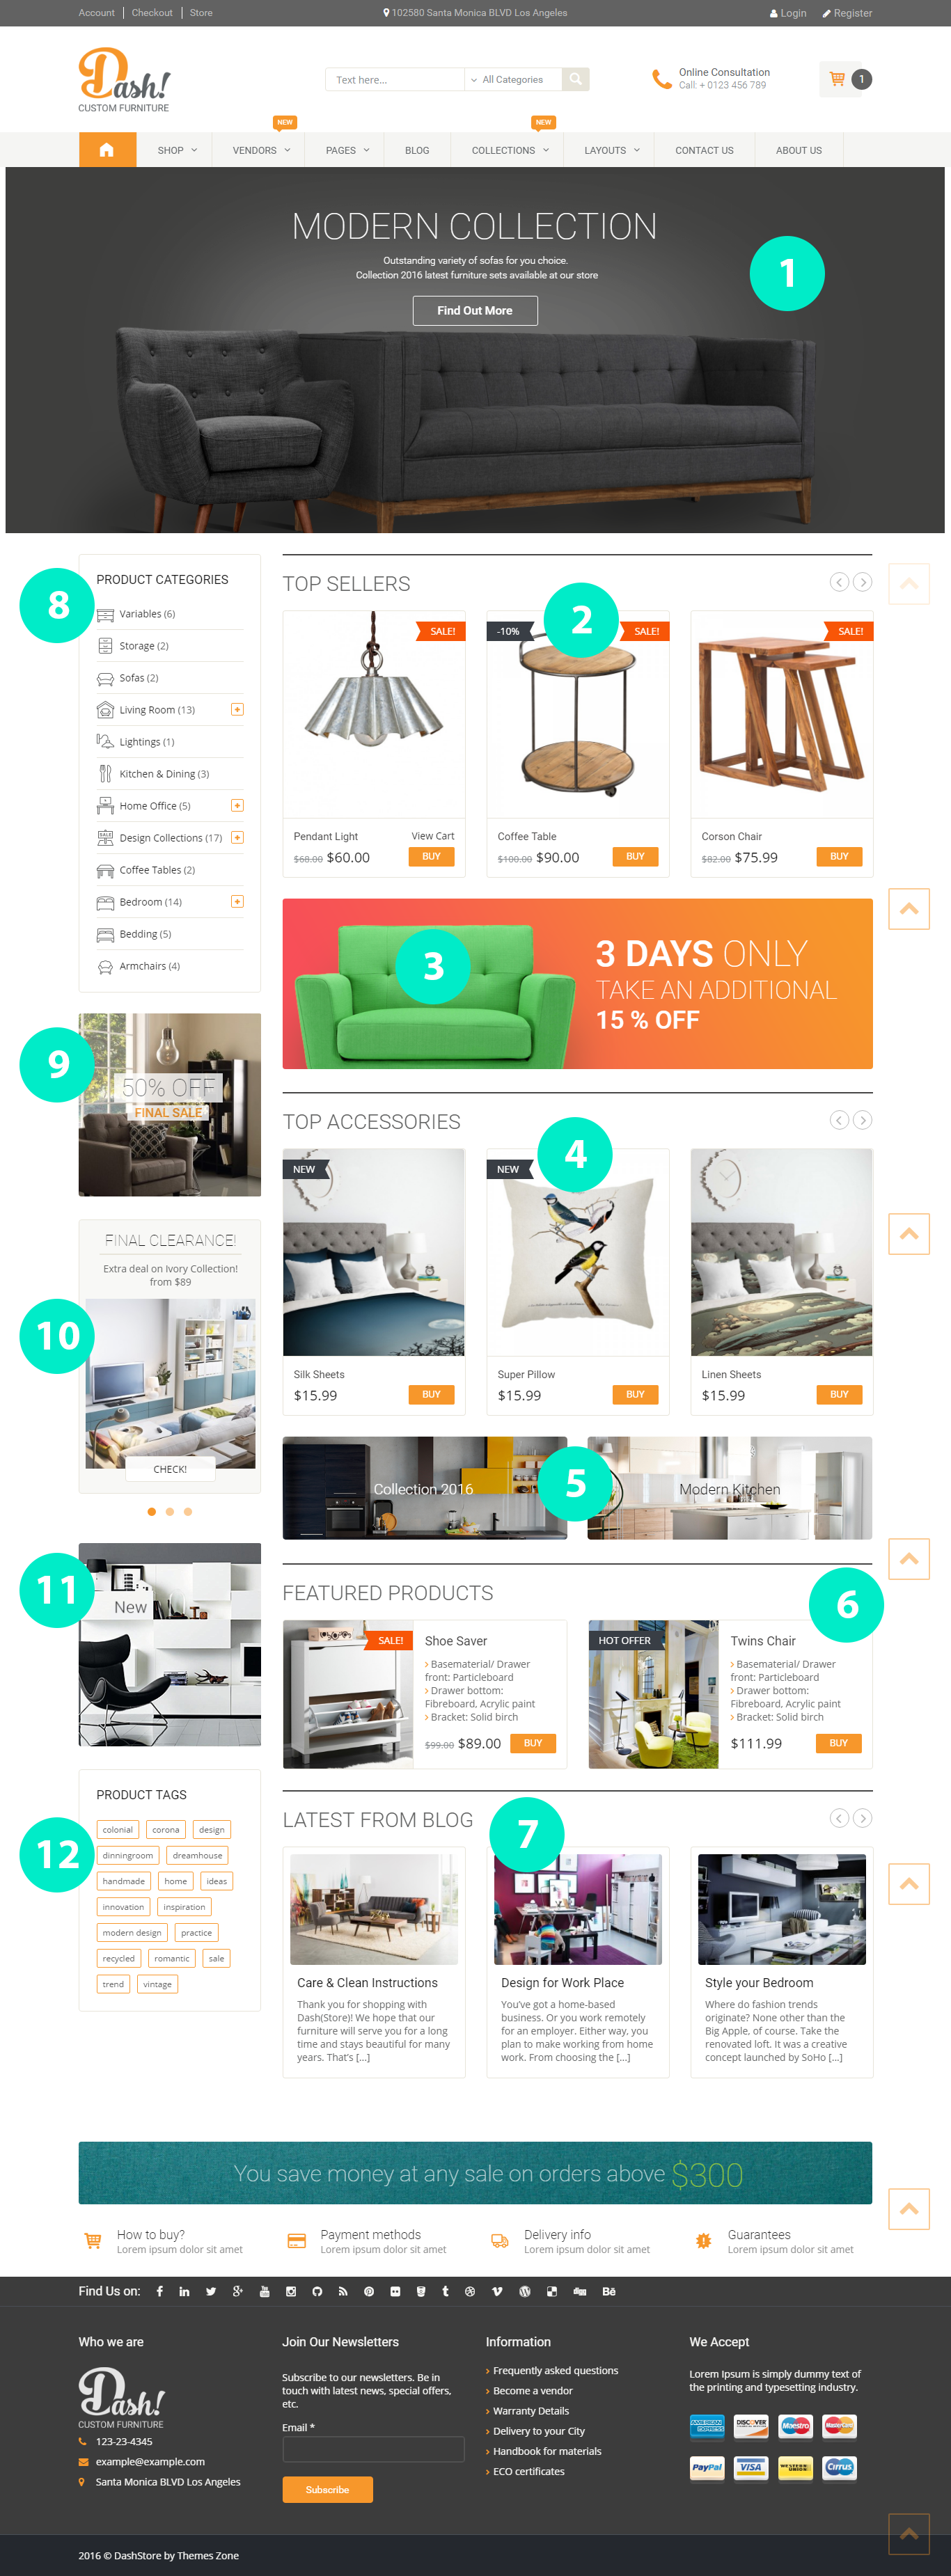
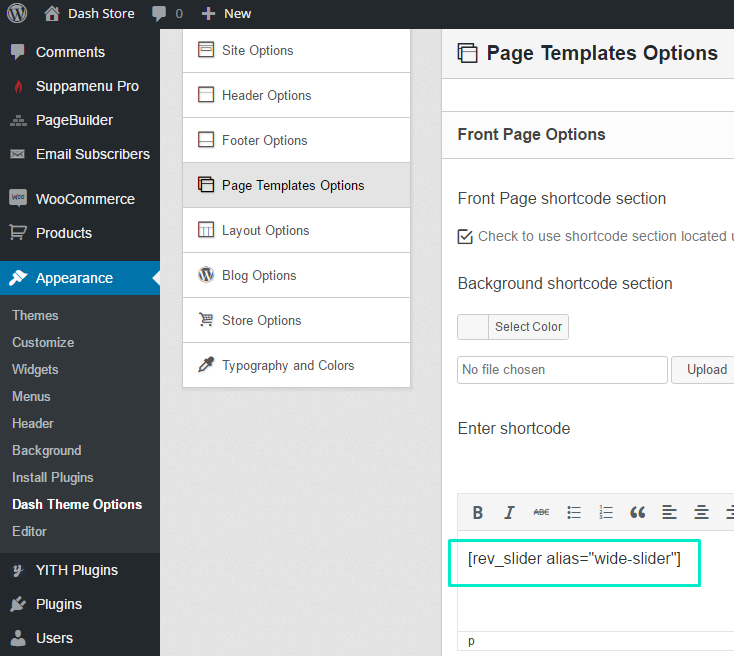
The Demo Home Page consists of the following elements:
-
The Slider
The slider on the Home Page is powered by Revolution Slider plugin and is inserted into home page with the help of a shortcode. The shortcode, in it's turn, is inserted in the Front Page Options area of the Dash Theme Options menu:
-
Top Sellers
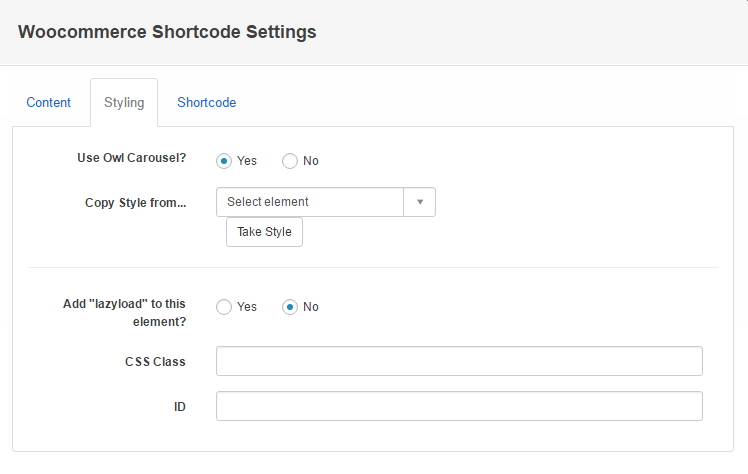
Top Sellers is a WooCommerce Shortcode element of Page Builder with the following settings:

-
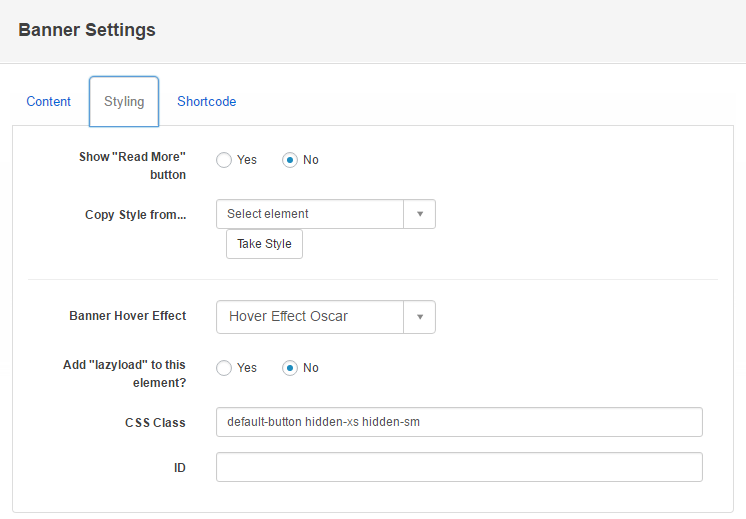
3 Days Only Banner With a Couch
This is a Banner element of Page Builder with an image an html code:
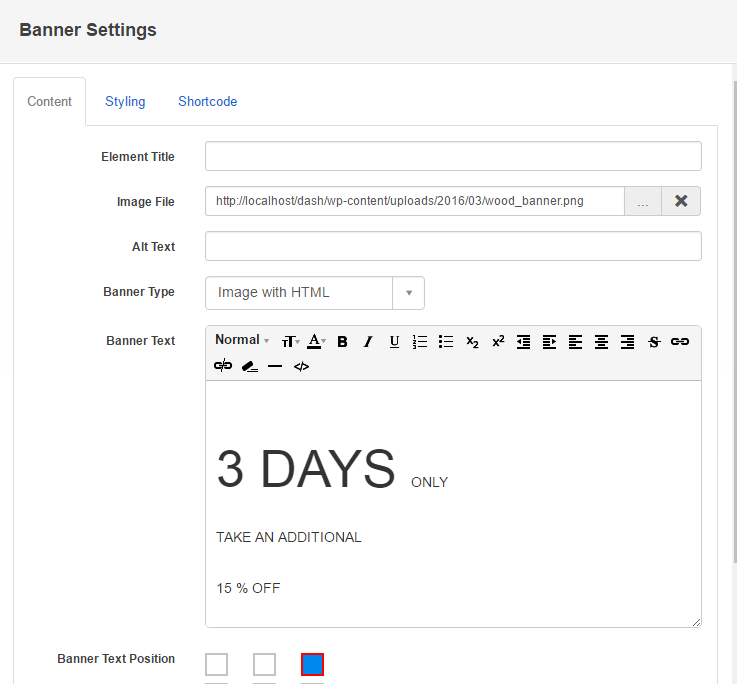
To see the actual html code you need to switch the Banner Text editor to the Source mode by pressing the button:
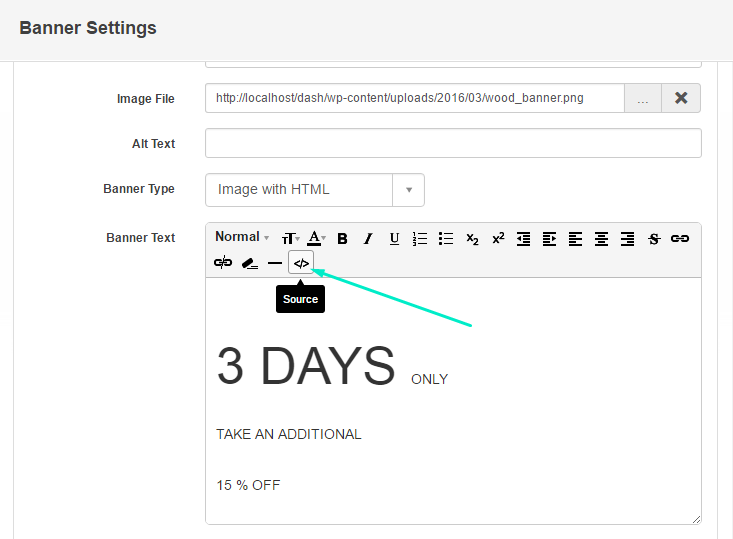
The following demo code is used in this banner:
<p style="font-weight: 200; text-align: left; display: inline-block; font-family: 'Roboto',sans-serif; color: #ffffff; width: 370px; padding: 40px 20px 0px 0px;"><span style="font-size: 3.714em; font-weight: 500;"> 3 DAYS <span style="font-weight: 200;">ONLY</span></span><span style="font-size: 2.571em; line-height: 1.2em; font-weight: 200;"><span style="display: inline-block; width: 100%;">TAKE AN ADDITIONAL</span><span style=" font-weight: 500;"> 15 % OFF</span></span></p> -
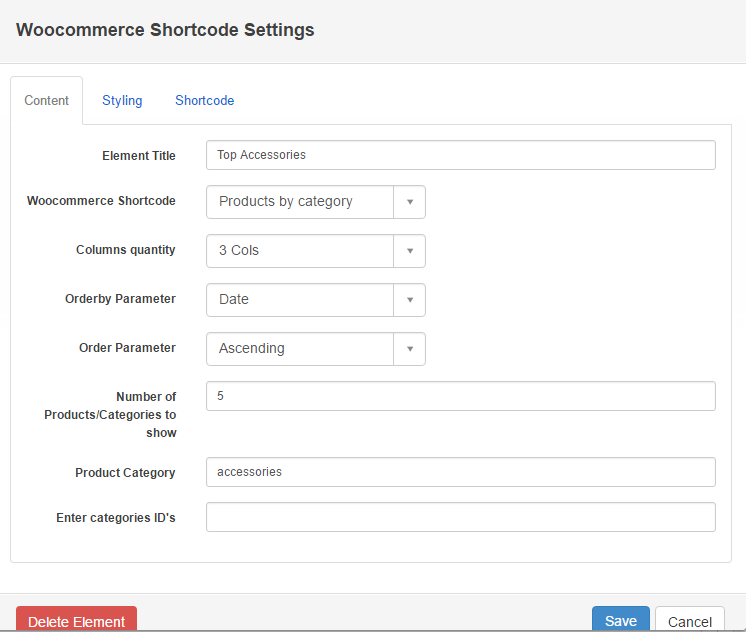
Top Accessories
Top Accessories is a WooCommerce Shortcode element of Page Builder with the following settings:

-
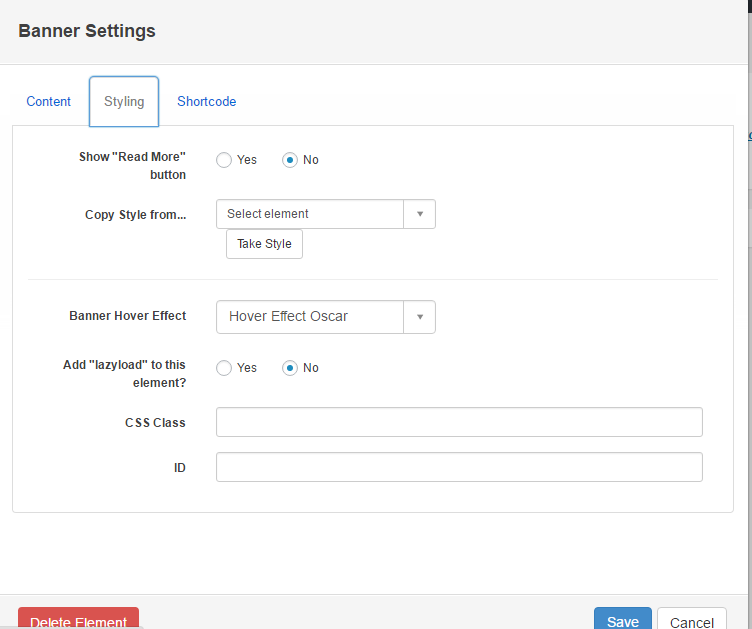
Collection 2016 and Modern Kitchen Banners
These elements are Banner Page Builder elements.
Collection 2016 banner is a typical "image with html" banner:
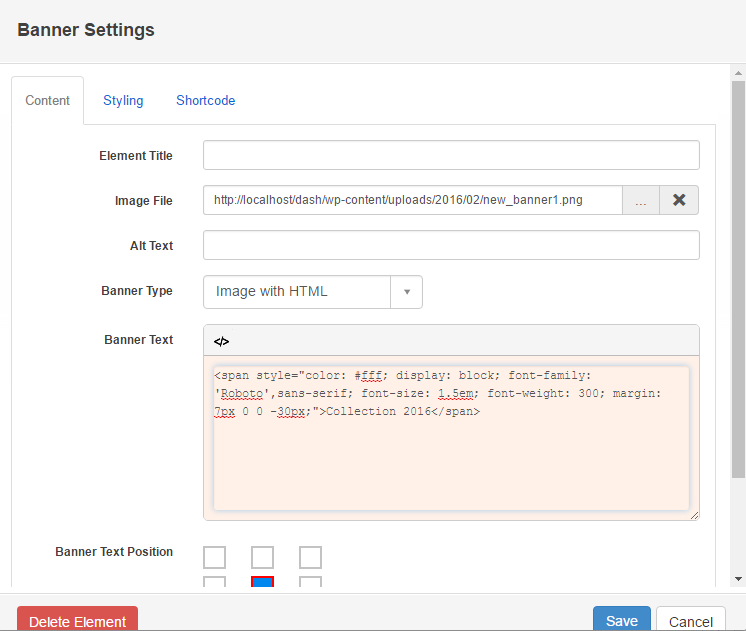

The following html code is being used for this demo banner:
<span style="color: #fff; display: block; font-family: 'Roboto',sans-serif;
 font-size: 1.5em; font-weight: 300; margin: 7px 0 0 -30px;">Collection 2016</span>
Modern Kitchen banner is also a typical "image with html" banner:
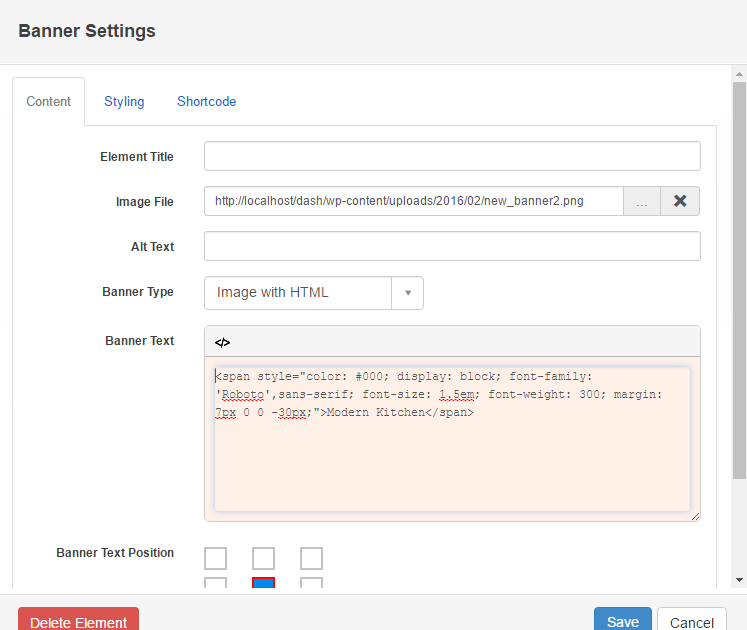
The following html code is being used for this demo banner:
<span style="color: #000; display: block; font-family: 'Roboto',sans-serif; font-size: 1.5em; font-weight: 300; margin: 7px 0 0 -30px;">Modern Kitchen</span> -
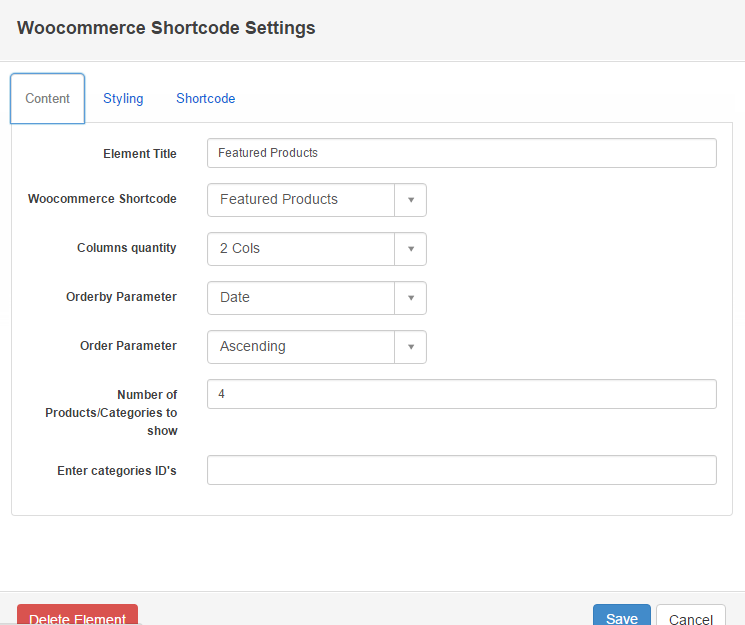
Featured Products
Featured products is the WooCommerce Shortcode element of Page Builder with the following settings:

-
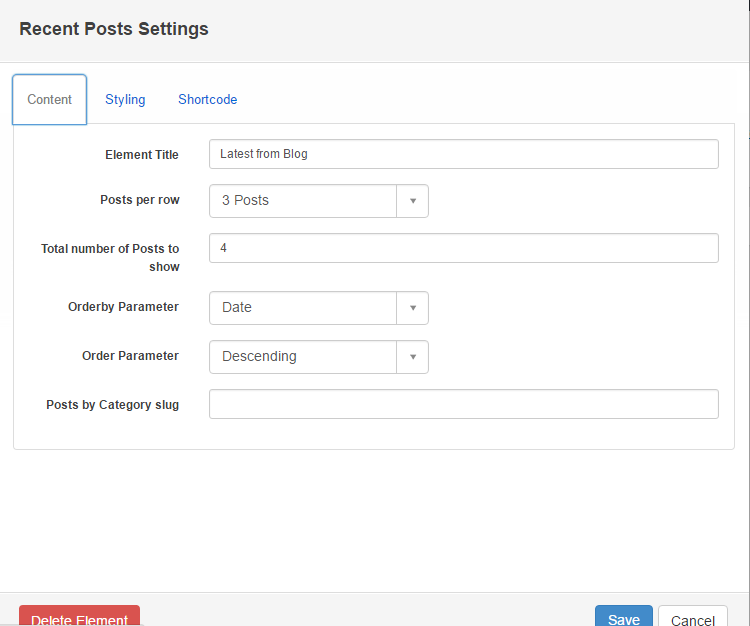
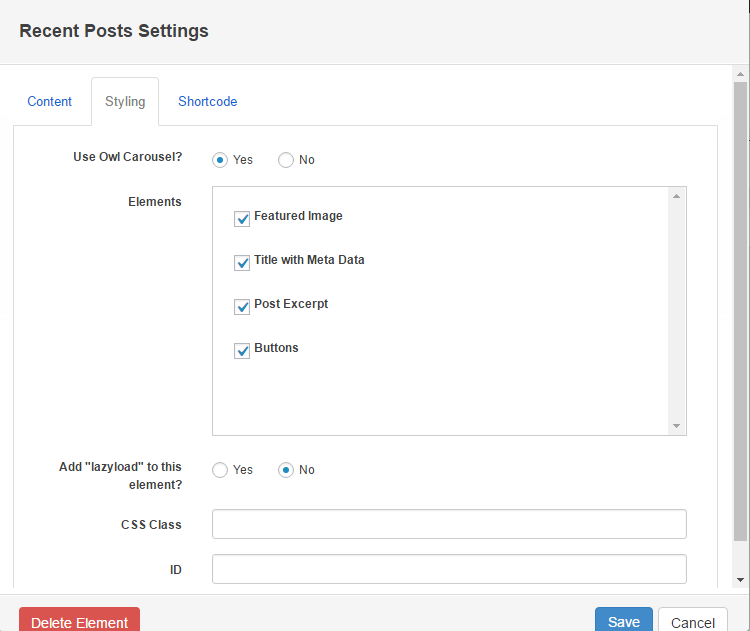
Latest from Blog
Latest from blog is the Recent Posts element of Page Builder with the following settings:
-
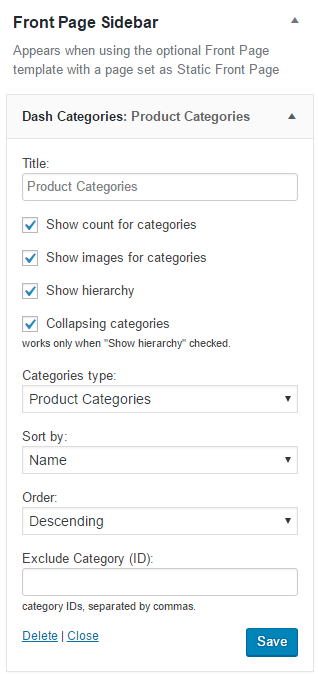
Product Categories widget
Product Categories is a Dash Categories widget placed in the Front Page sidebar
-
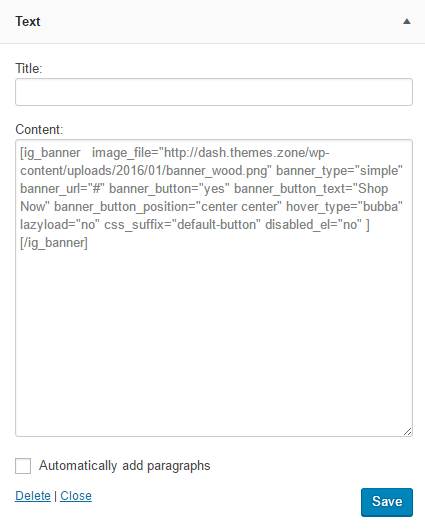
50% OFF Banner
50% OFF banner is a shortcode with html code placed in a text widget which, in it's turn, is placed in the Front Page sidebar
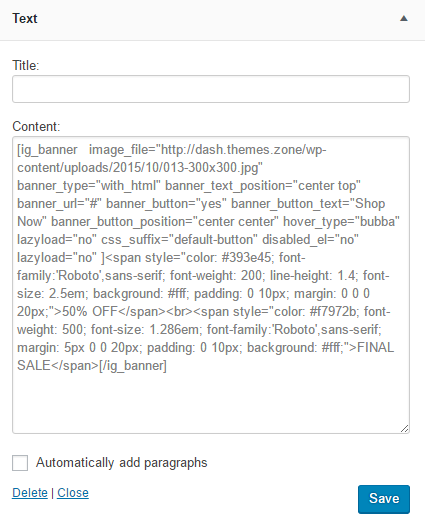
Follow the link to access the demo code for the widget:
https://gist.github.com/anonymous/0ab486c98f4bfc82b786090fafbb6276 -
Final Clearance Carousel
Final Clearance Carousel is also a shortcode with html code placed in a text widget which, in it's turn, is placed in the Front Page sidebar
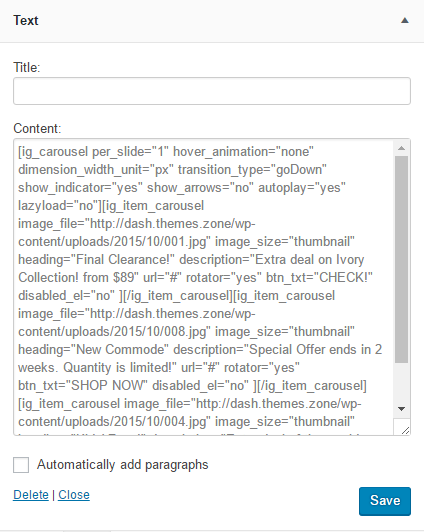
Follow the link to access the demo code for the widget:
https://gist.github.com/anonymous/f742c1f2a7634eaf635f9e869044a01f -
New Banner
New banner is also a shortcode with html code placed in a text widget which, in it's turn, is placed in the Front Page sidebar
Follow the link to access the demo code for the widget:
https://gist.github.com/anonymous/6db87219edcacf1d65fa0b7ec31ddb57 -
Product tags
Product tags is a Tag Cloud widget placed in the Front Page sidebar

-
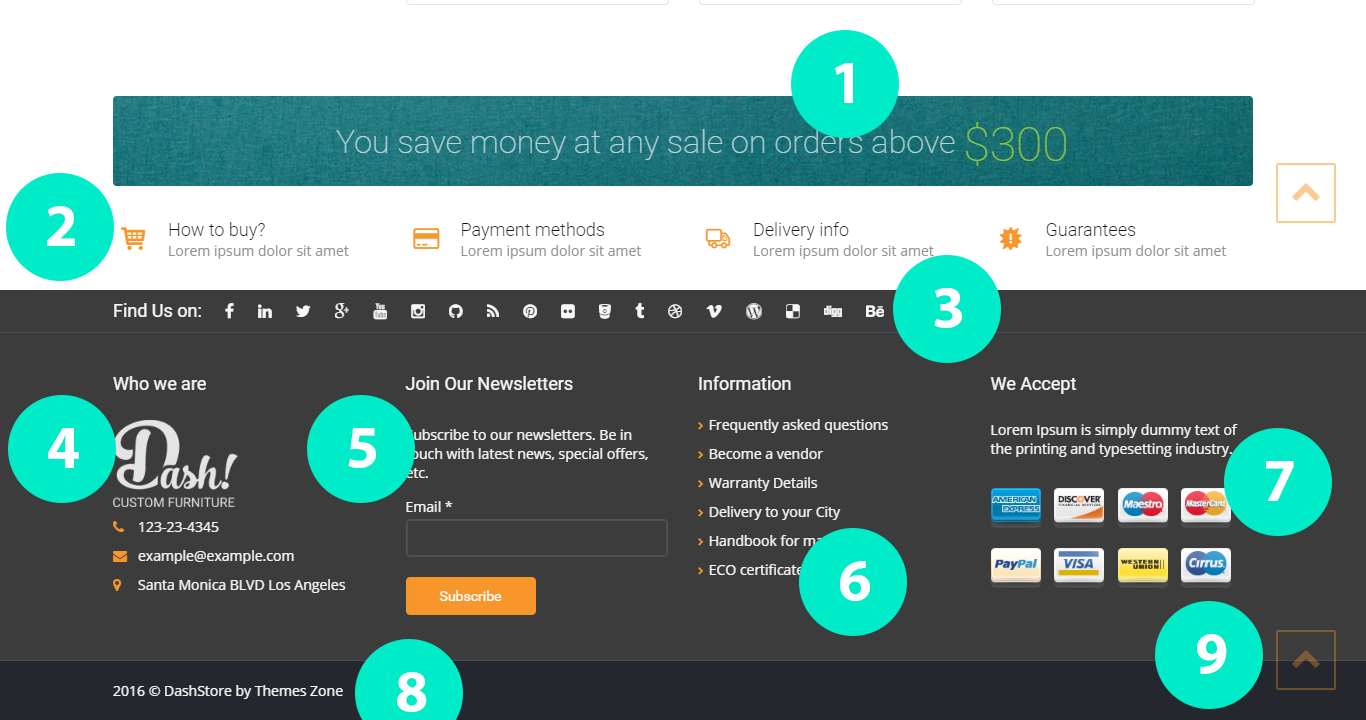
Editing Footer
Demo Footer of Dash Store Theme consists of various elements which are shown and listed below.
-
You Save Money Banner
You Save Money banner is code which is placed in Appearance -> Dash Theme Options -> Footer Options -> Footer shortcode section Options:
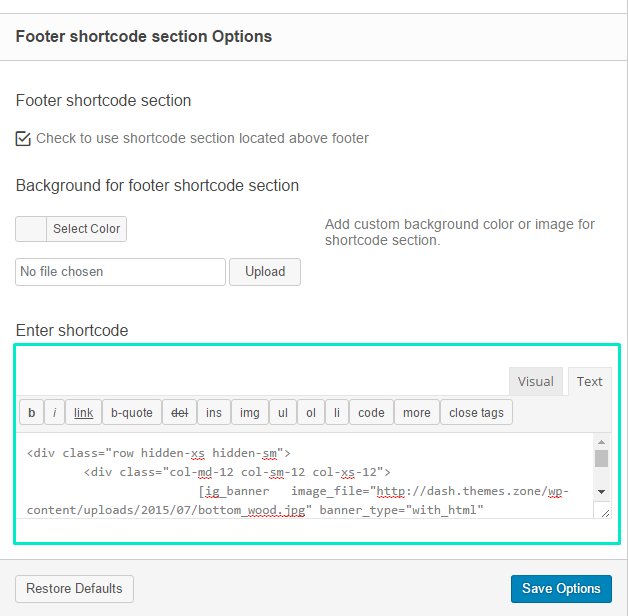
Follow the link to access the demo code for the banner:
https://gist.github.com/anonymous/bfa87170c31cef7c6ffb64c0a3d6b8a5 -
How to Buy? and other elements in the row
These elements is another piece of code which is placed in Appearance -> Dash Theme Options -> Footer Options -> Footer shortcode section Options:
Follow the link to access the demo code for these elements:
https://gist.github.com/anonymous/56bb8e2113ad00f0180cc2c936299920 -
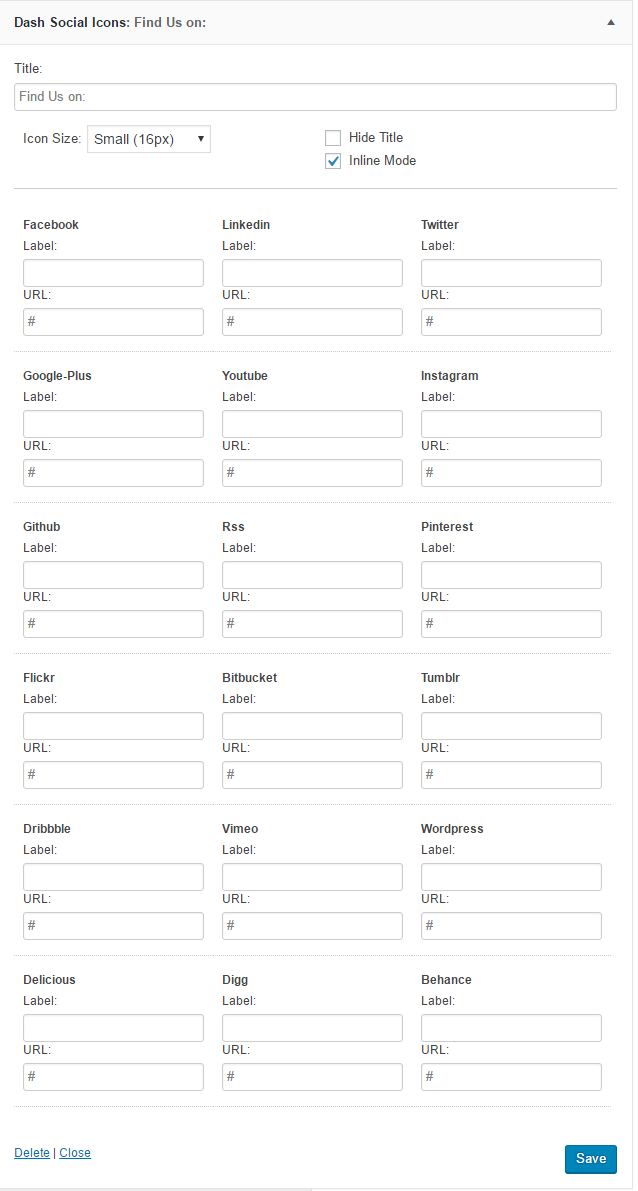
Find Us On
Find Us On is the Dash Social Icons widget placed in the Top Footer sidebar:
-
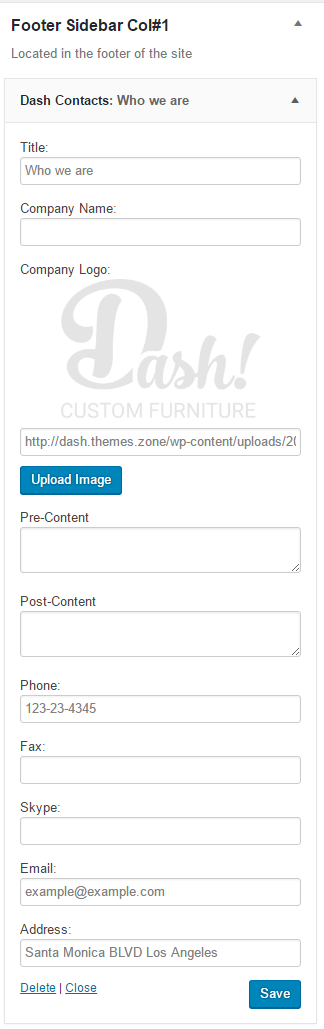
Who We Are
Who We Are is Dash Contacts widget placed in the Footer Sidebar Col #1 sidebar:
-
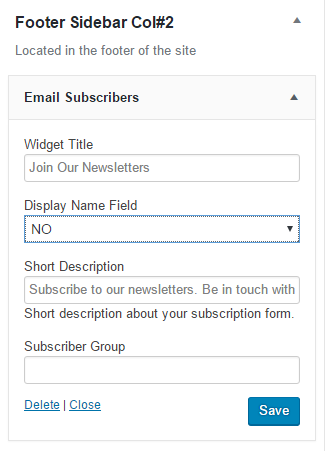
Join Our Newsletters
Join Our Newsletters is Email Subscribers widget placed in the Footer Sidebar Col #2 sidebar:
-
Information
Information is a text widget placed in the Footer Sidebar Col #3 sidebar:
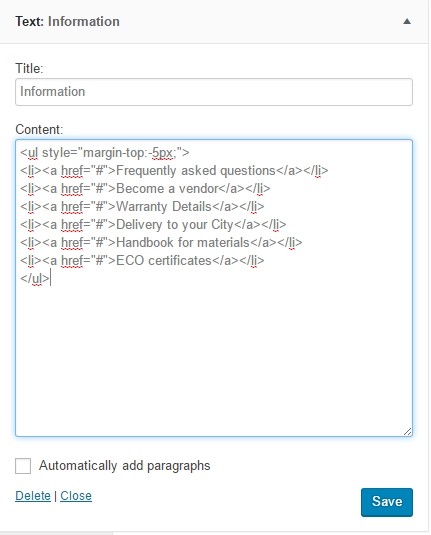
Follow the link to access the demo code for this element:
https://gist.github.com/ThemesZoneHelp/96bfbde164aeb22b35df300601bbc295 -
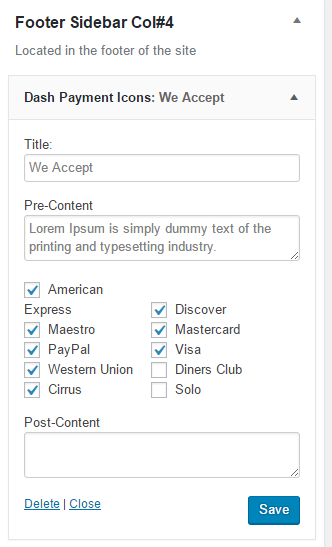
We Accept
We Accept is Dash Payment Icons widget placed in the Footer Sidebar Col#4:
-
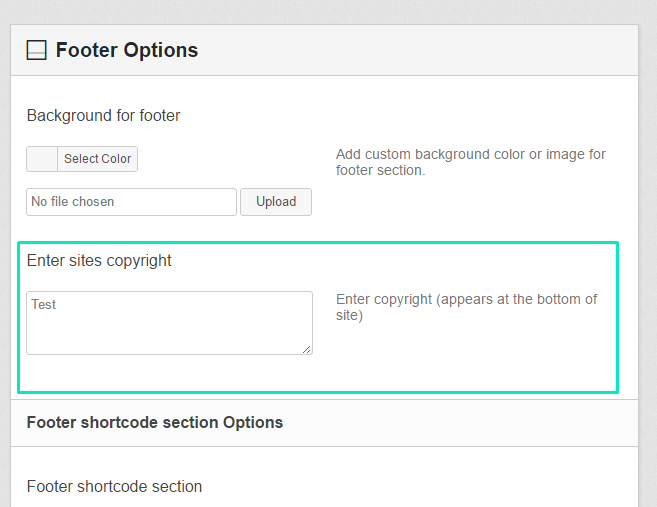
Site copyright
Site copyright info can be edited at Appearance -> Dash Theme Options -> Footer Options -> Enter sites copyright field. The year will be inserted/changed automatically by the theme.
-
Scroll to Top Button
Scroll to Top Button can be turned on/off in Appearance -> Dash Theme Options -> Site Options -> Extra Features -> Enable Scroll to Top button for site: